> ## Documentation Index
> Fetch the complete documentation index at: https://help.experro.com/llms.txt
> Use this file to discover all available pages before exploring further.
# Channels
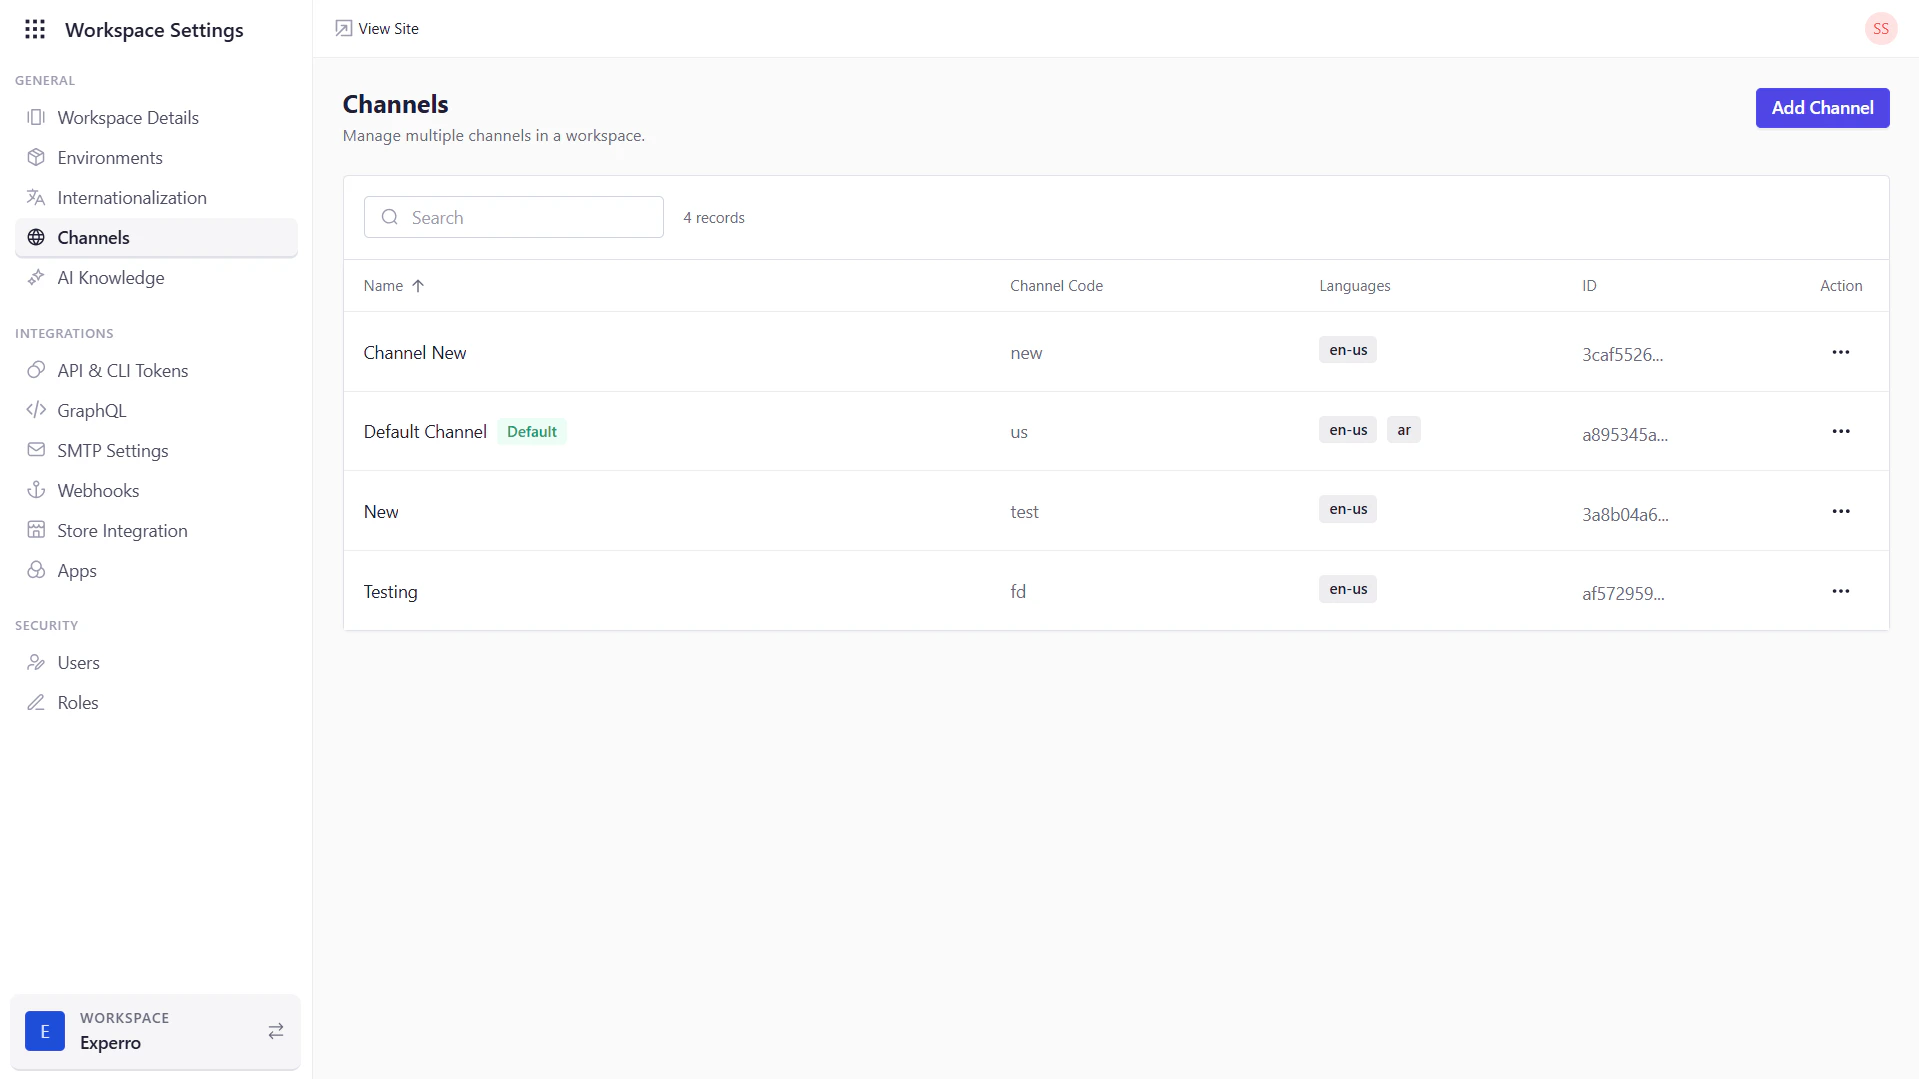
The **Channels** page is where you manage the distinct storefront channels for your workspace—each channel represents a language- or region-specific entry point to your site. From here, you can review existing channels, create new ones, and perform channel-specific actions like editing settings, deleting channels, or configuring redirects and themes.
 ## What You Can Do on This Page
1. **Browse Existing Channels**
– See every channel you’ve configured, including its code, supported languages, and unique ID.
2. **Create New Channels**
– Click **Add Channel** to define a fresh channel, mapping it to one or more languages and setting URL prefixes.
3. **Edit Channel Settings**
– Use the **Edit** action to adjust core details, publish themes to different environments, or view theme history.
4. **Manage Redirects**
– From **Channel Settings**, add 301 redirects to handle URL changes or route legacy links.
5. **Delete Channels**
– Remove channels you no longer need via the **Delete** action in the list (this cannot be undone).
## Field-by-Field Breakdown
| Field | Description |
| ---------------- | ------------------------------------------------------------------------------------------------------------------------------------------------------------------------------------------- |
| **Name** | The human-friendly label for the channel (e.g., “US Storefront”, “French Site”). Visible in the navigation panel and channel selector. |
| **Channel Code** | A short identifier (e.g., `us`, `fr`, `ca-en`). Used internally and in URL generation. Must be unique across channels. |
| **Languages** | Lists the locale(s) mapped to this channel (e.g., “English – United States”, “Français – France”). These are the languages you added under Internationalization. |
| **ID** | The system-generated unique identifier for the channel. This is needed when referring to the channel in API calls or CLI commands. |
| **Actions** | - **Edit**: Modify channel name, code, or mapped languages; publish themes; view theme history; configure redirects.
## What You Can Do on This Page
1. **Browse Existing Channels**
– See every channel you’ve configured, including its code, supported languages, and unique ID.
2. **Create New Channels**
– Click **Add Channel** to define a fresh channel, mapping it to one or more languages and setting URL prefixes.
3. **Edit Channel Settings**
– Use the **Edit** action to adjust core details, publish themes to different environments, or view theme history.
4. **Manage Redirects**
– From **Channel Settings**, add 301 redirects to handle URL changes or route legacy links.
5. **Delete Channels**
– Remove channels you no longer need via the **Delete** action in the list (this cannot be undone).
## Field-by-Field Breakdown
| Field | Description |
| ---------------- | ------------------------------------------------------------------------------------------------------------------------------------------------------------------------------------------- |
| **Name** | The human-friendly label for the channel (e.g., “US Storefront”, “French Site”). Visible in the navigation panel and channel selector. |
| **Channel Code** | A short identifier (e.g., `us`, `fr`, `ca-en`). Used internally and in URL generation. Must be unique across channels. |
| **Languages** | Lists the locale(s) mapped to this channel (e.g., “English – United States”, “Français – France”). These are the languages you added under Internationalization. |
| **ID** | The system-generated unique identifier for the channel. This is needed when referring to the channel in API calls or CLI commands. |
| **Actions** | - **Edit**: Modify channel name, code, or mapped languages; publish themes; view theme history; configure redirects.
- **Delete**: Permanently remove the channel and its settings. |
## Adding a New Channel
1. Click **Add Channel**.
2. **Enter Basic Details**
* **Name**: e.g., “EU Storefront”.
* **Channel Code**: e.g., `eu`, `de`, `es`.
3. **Map Languages**
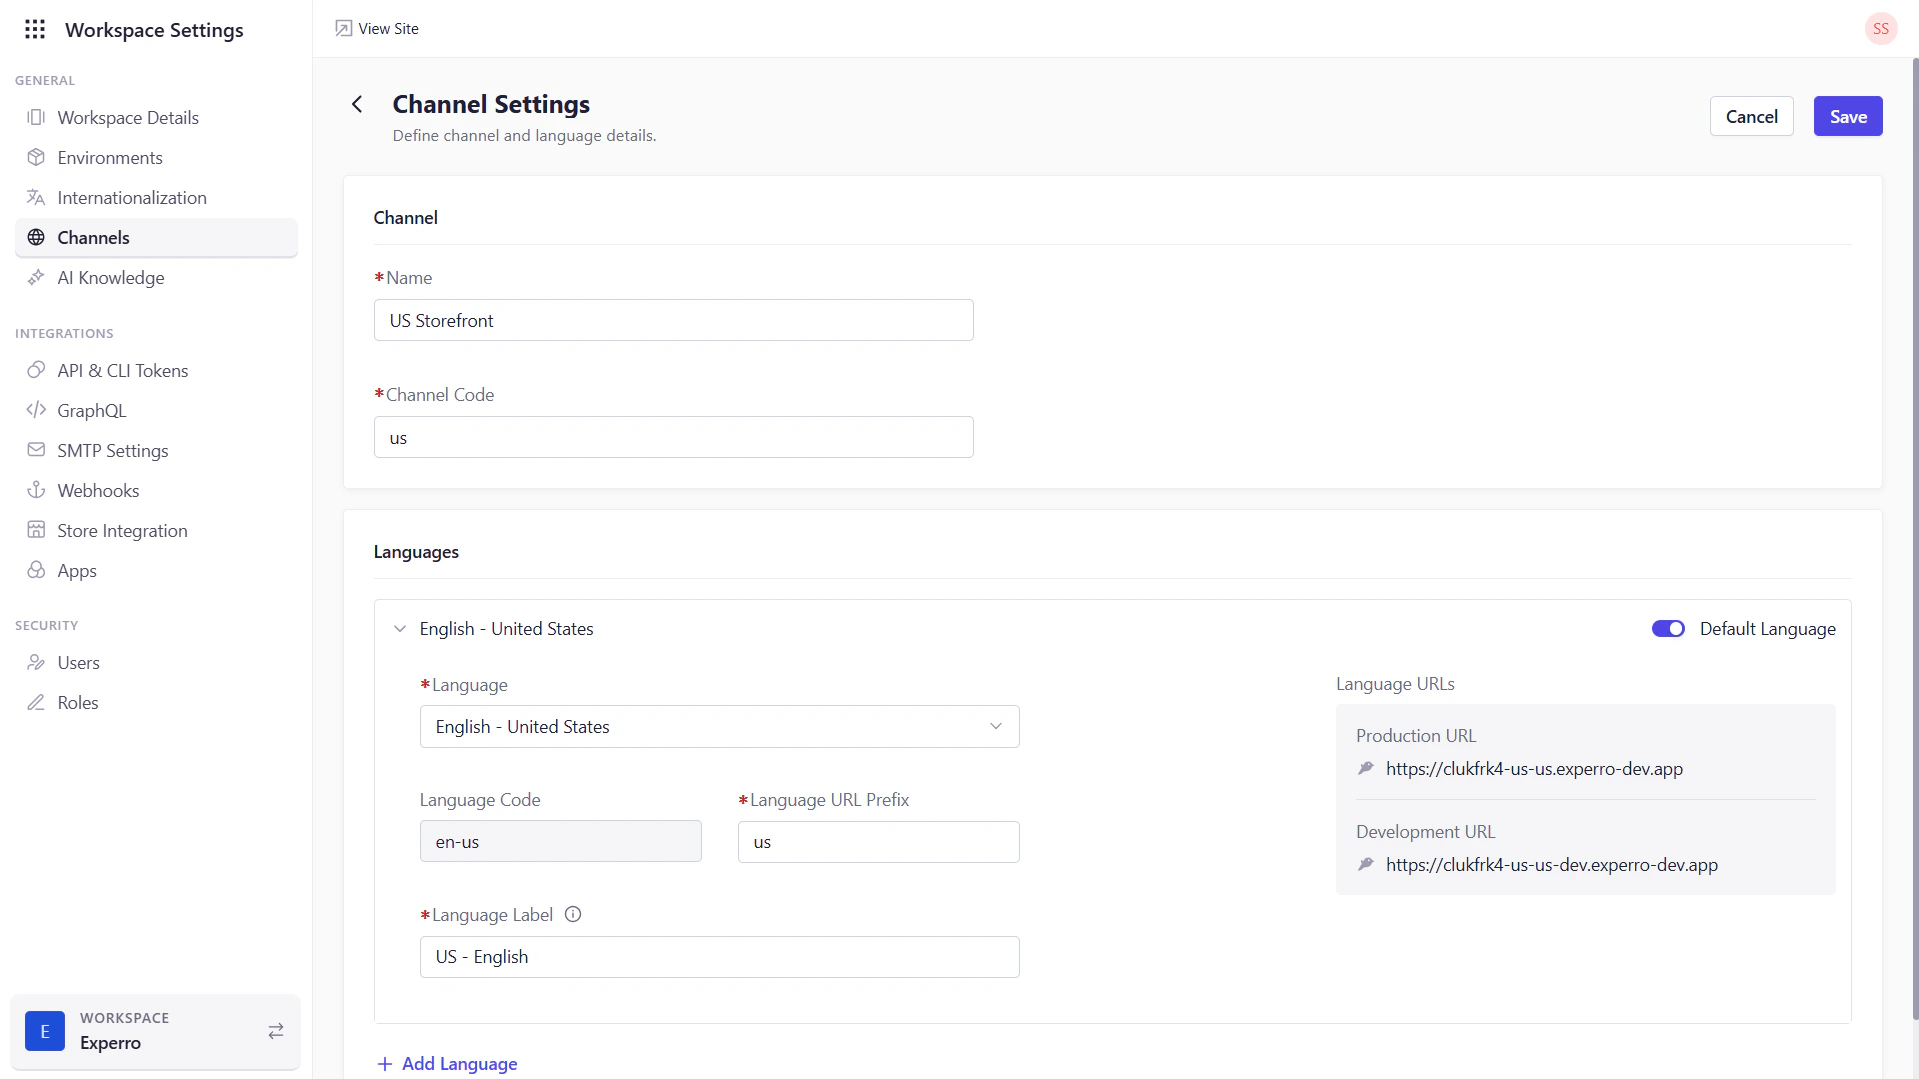 * Select a **Language** from the dropdown (populated from your Internationalization settings).
* The **Language Code** auto-fills based on your choice.
* Enter a **Language URL Prefix** (e.g., `de`, `es`)—this becomes part of the channel’s URLs.
* Provide a **Language Label** (e.g., “Deutsch”, “Español”) which visitors will see when switching locales.
* Click **Add Language** to map additional locales to the same channel.
4. **Save** the channel via the button at the top of the screen.
After saving, your new channel appears in the list, ready to serve content in the mapped languages.
* Select a **Language** from the dropdown (populated from your Internationalization settings).
* The **Language Code** auto-fills based on your choice.
* Enter a **Language URL Prefix** (e.g., `de`, `es`)—this becomes part of the channel’s URLs.
* Provide a **Language Label** (e.g., “Deutsch”, “Español”) which visitors will see when switching locales.
* Click **Add Language** to map additional locales to the same channel.
4. **Save** the channel via the button at the top of the screen.
After saving, your new channel appears in the list, ready to serve content in the mapped languages.