> ## Documentation Index
> Fetch the complete documentation index at: https://help.experro.com/llms.txt
> Use this file to discover all available pages before exploring further.
# Internationalization
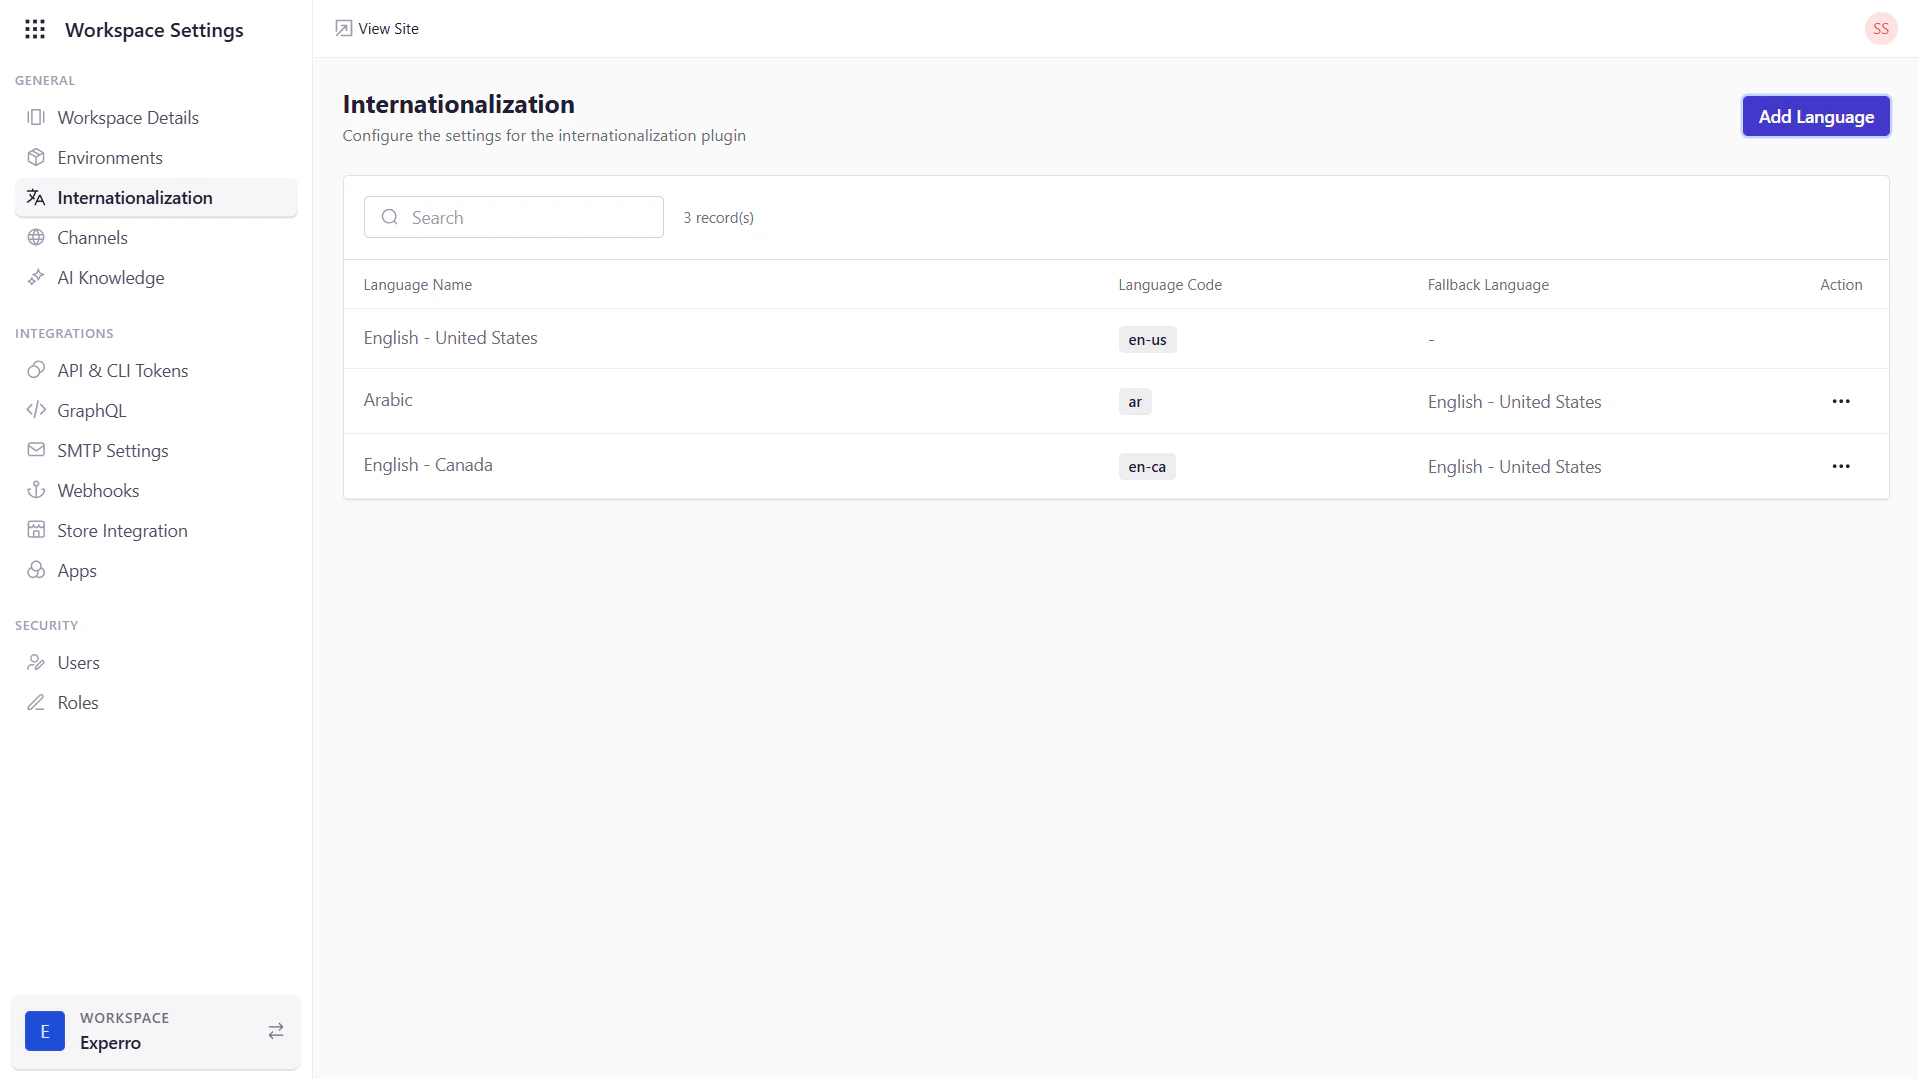
The **Internationalization** page allows you to manage the languages supported by your storefront. By configuring multiple locales here, you can then create language-specific channels to tailor content and experiences for different regions.
 ## What You Can Do on This Page
1. **View Supported Languages**
– See every language you’ve added, along with its code and any fallback settings.
2. **Add New Languages**
– Click **Add Language**, fill out the form to register another locale, and begin using it in your storefront channels.
3. **Configure Fallbacks**
– Assign a fallback language so that if content isn’t available in a given locale, the system will gracefully revert to another.
4. **Remove Unneeded Languages**
– Delete any non-default entries to keep your language list clean (note that **English – United States** cannot be removed).
## Internationalization Settings
| Field | Description |
| --------------------- | ----------------------------------------------------------------------------------------------------------------------------------------------------------------------------- |
| **Language Name** | The display name for the locale (e.g., “French – France”). This appears in dropdowns throughout the UI when selecting a language. |
| **Language Code** | The standard two- or five-character code (e.g., `fr`, `fr-FR`) that uniquely identifies the locale. Auto-populated when you choose a language in the add panel. |
| **Fallback Language** | If content is missing in this locale, the system will fall back to the chosen language (e.g., fallback from `fr-CA` to `en-US`). Helps ensure a consistent user experience. |
| **Actions** | - **Delete**: Remove this language entry (except for the default **English – United States**). Use with caution, as removing a language will disable any channels tied to it. |
## Adding a New Language
1. Click **Add Language**.
2. In the popup form:
* **Language**: Choose from the dropdown (e.g., “Spanish – Spain”).
* **Language Code**: Automatically fills in based on your selection.
* **Fallback Language**: (Optional) Select which existing locale to use as a fallback.
## What You Can Do on This Page
1. **View Supported Languages**
– See every language you’ve added, along with its code and any fallback settings.
2. **Add New Languages**
– Click **Add Language**, fill out the form to register another locale, and begin using it in your storefront channels.
3. **Configure Fallbacks**
– Assign a fallback language so that if content isn’t available in a given locale, the system will gracefully revert to another.
4. **Remove Unneeded Languages**
– Delete any non-default entries to keep your language list clean (note that **English – United States** cannot be removed).
## Internationalization Settings
| Field | Description |
| --------------------- | ----------------------------------------------------------------------------------------------------------------------------------------------------------------------------- |
| **Language Name** | The display name for the locale (e.g., “French – France”). This appears in dropdowns throughout the UI when selecting a language. |
| **Language Code** | The standard two- or five-character code (e.g., `fr`, `fr-FR`) that uniquely identifies the locale. Auto-populated when you choose a language in the add panel. |
| **Fallback Language** | If content is missing in this locale, the system will fall back to the chosen language (e.g., fallback from `fr-CA` to `en-US`). Helps ensure a consistent user experience. |
| **Actions** | - **Delete**: Remove this language entry (except for the default **English – United States**). Use with caution, as removing a language will disable any channels tied to it. |
## Adding a New Language
1. Click **Add Language**.
2. In the popup form:
* **Language**: Choose from the dropdown (e.g., “Spanish – Spain”).
* **Language Code**: Automatically fills in based on your selection.
* **Fallback Language**: (Optional) Select which existing locale to use as a fallback.
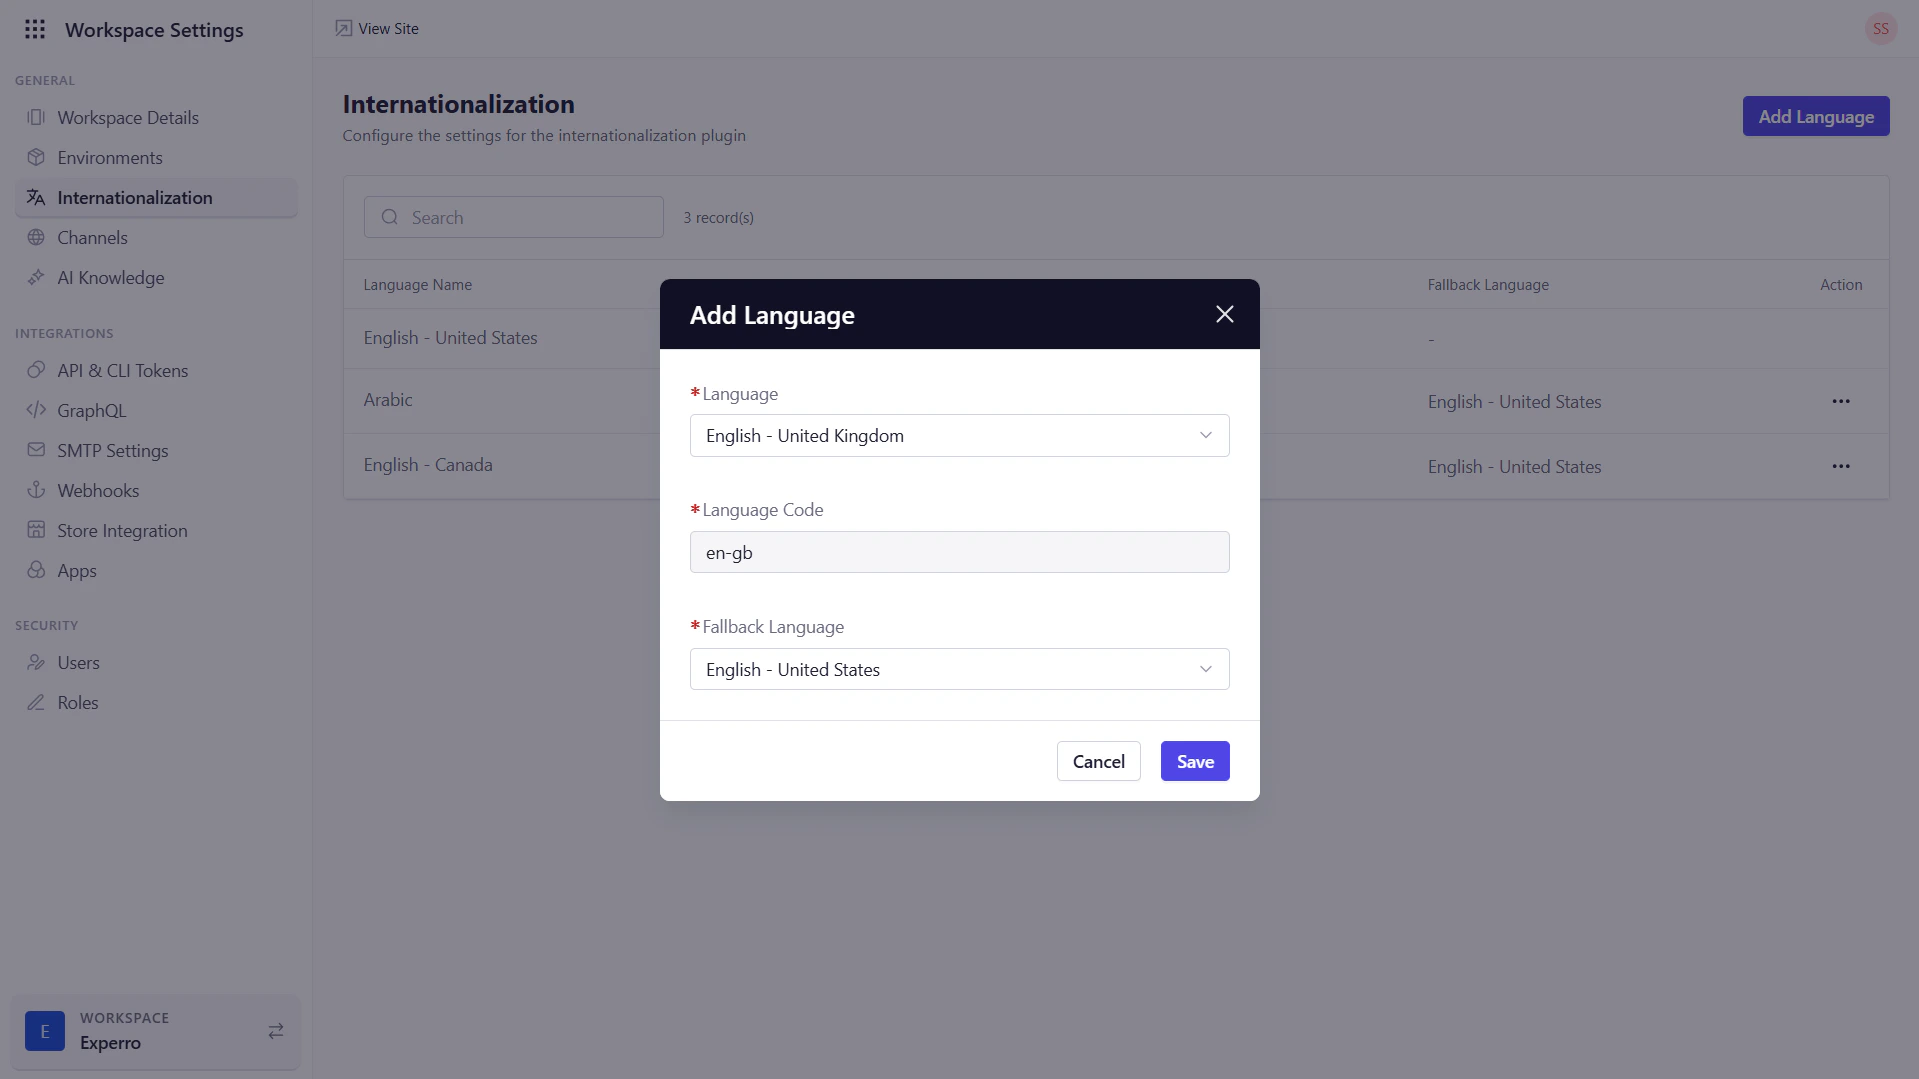 3. Click **Save** to register the new locale.
Once saved, your new language appears in the list, ready for use when creating storefront channels.
3. Click **Save** to register the new locale.
Once saved, your new language appears in the list, ready for use when creating storefront channels.