> ## Documentation Index
> Fetch the complete documentation index at: https://help.experro.com/llms.txt
> Use this file to discover all available pages before exploring further.
# Forms
Experro’s Forms feature lets you capture user input—contact requests, surveys, sign-ups—either via a visual **Form Builder** or a programmatic **Free Style Form**. Built-in integrations for notifications and webhooks ensure you can act on submissions in real time.
## Form Types
1. **Form Builder**
A drag-and-drop interface for assembling common form fields (text, dropdowns, numbers, media uploads, etc.) without code. Ideal for quickly adding simple to moderately complex forms to your pages.
2. **Free Style Form**
A headless, API-first form you define entirely via JSON schema. Use this when you need custom validation, dynamic field logic, or integration with external form libraries.
## Creating a New Form
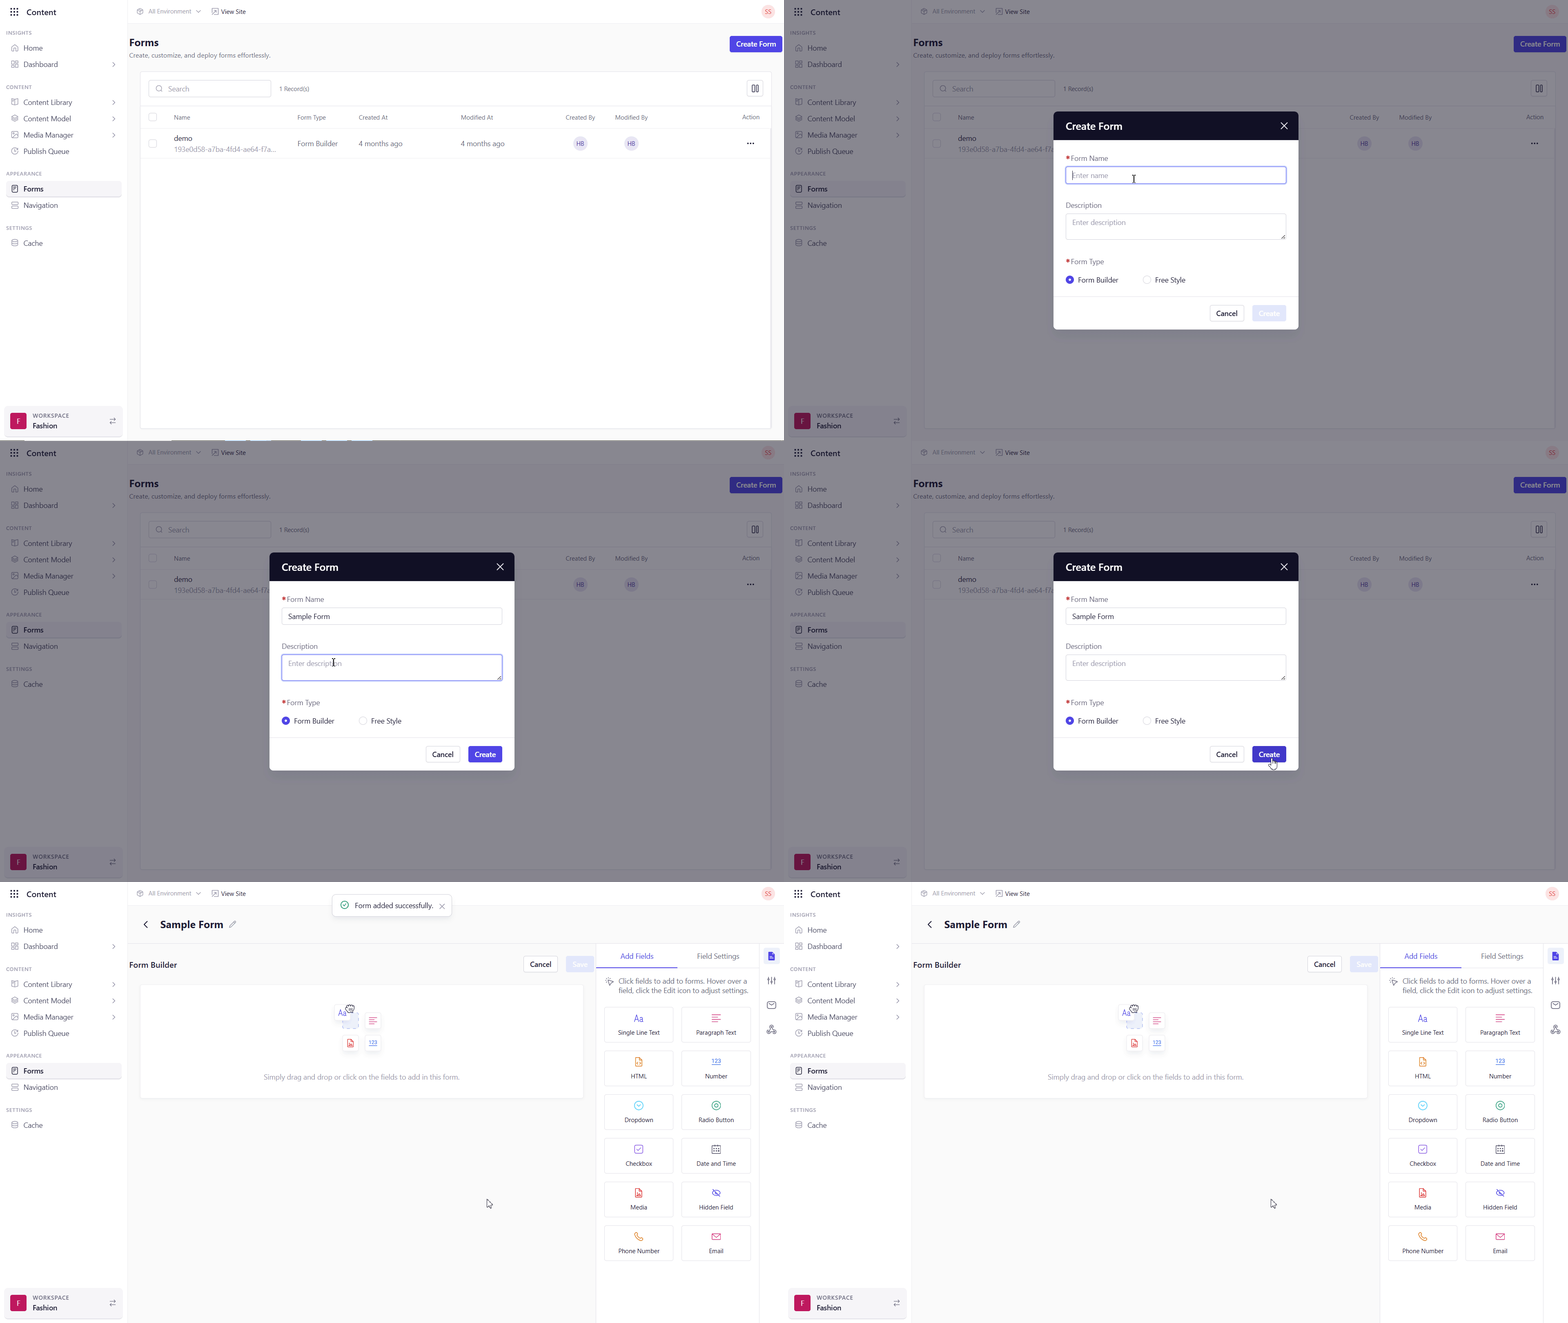
1. **Navigate to** **Content → Forms** in the left sidebar.
2. Click **Create Form** (top-right).
3. In the modal, enter:
* **Form Name** (e.g., “Contact Us”)
* **Description** (optional guidance)
* **Form Type**: **Form Builder** or **Free Style**
4. Click **Create** to proceed to the form editor.
 ## Free Style Forms
After creation, the Free Style Form screen displays:
* **Form ID**: A unique identifier you’ll include in API requests.
* **Google reCAPTCHA** toggle: Enable to protect against spam.
Use the **REST API** from [here](/api-reference/forms) to fetch your form schema and submit responses
## Form Builder Forms
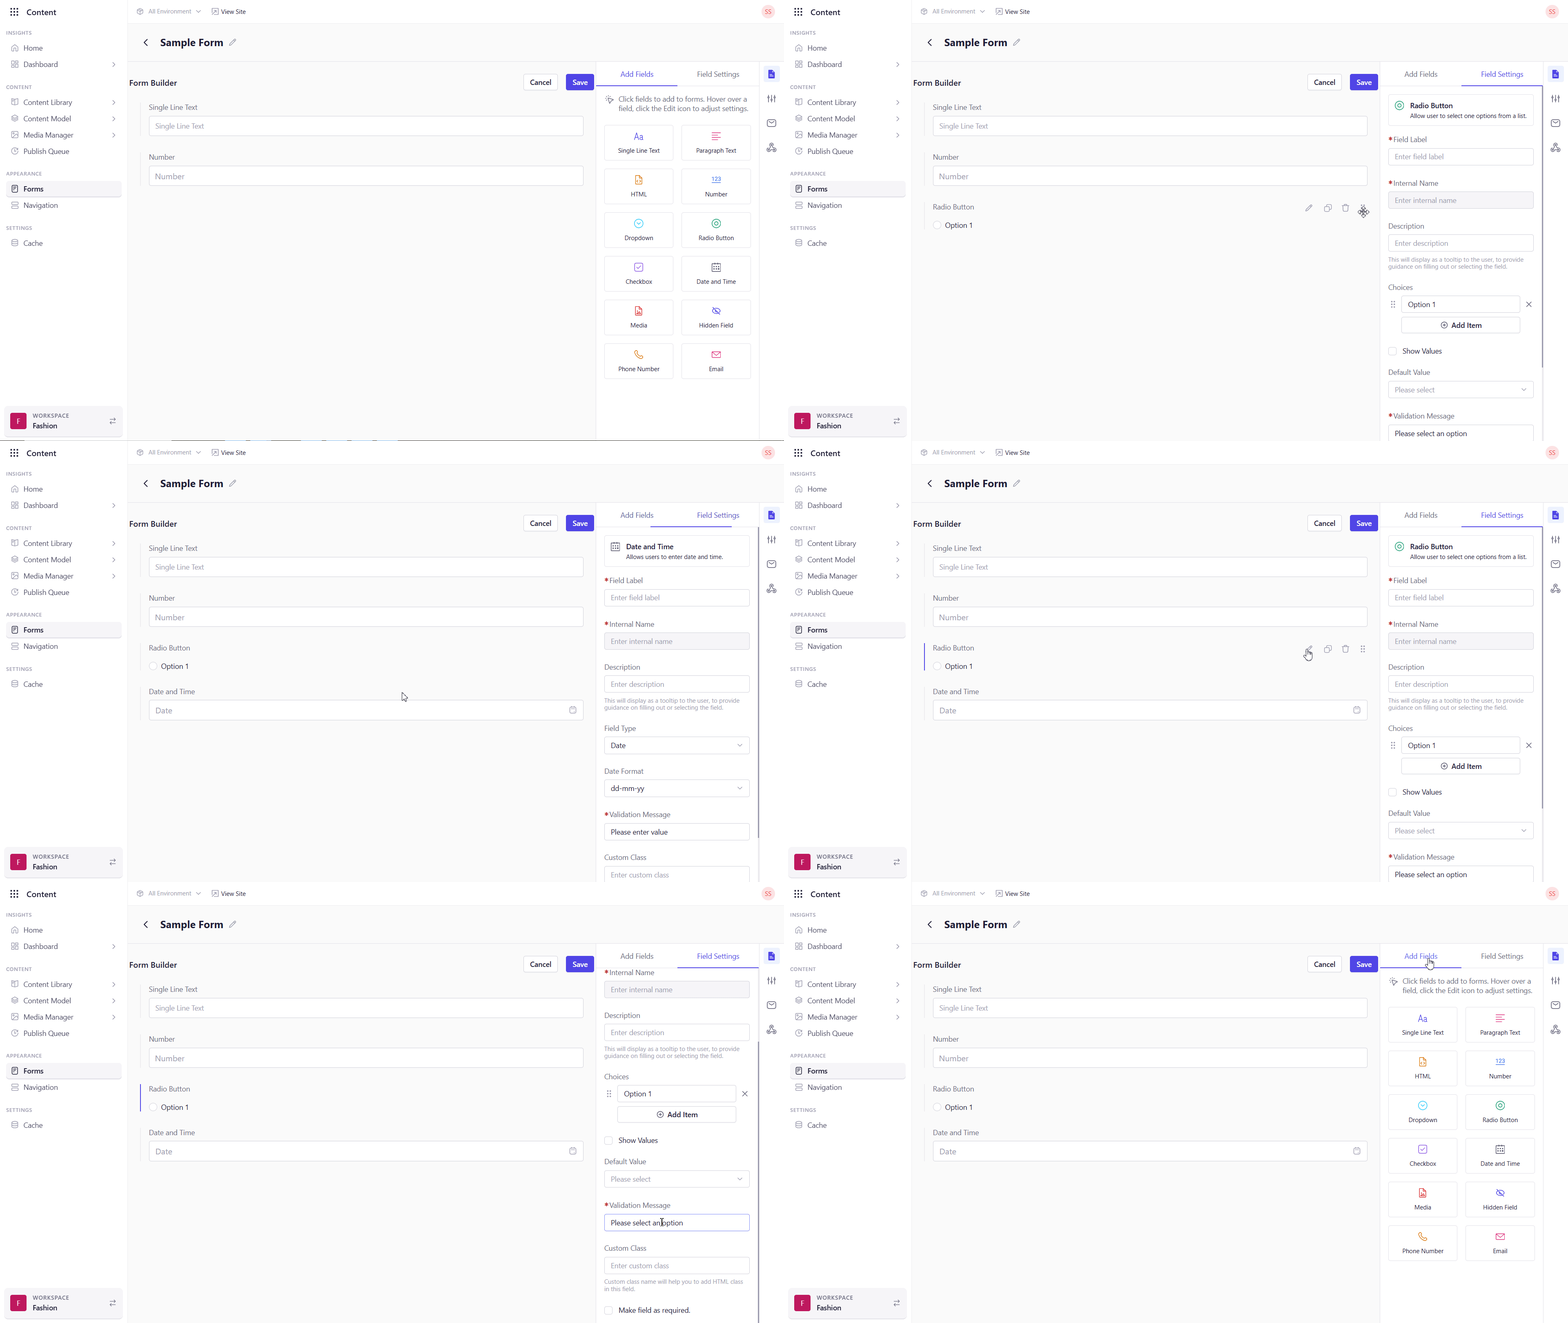
In the Form Builder interface, you’ll see a palette of field types such as Single-Line Text, Paragraph Text, Number, and many more.
### Adding & Configuring Fields
1. **Drag** a field from the palette into your form canvas.
2. **Hover** the field and click the **Edit** icon to adjust:
3. **Configure** the field’s label, placeholder, help text, required status, default value, and validation message and any other properties based on the field that you have selected.
4. **Save** to apply your changes.
## Free Style Forms
After creation, the Free Style Form screen displays:
* **Form ID**: A unique identifier you’ll include in API requests.
* **Google reCAPTCHA** toggle: Enable to protect against spam.
Use the **REST API** from [here](/api-reference/forms) to fetch your form schema and submit responses
## Form Builder Forms
In the Form Builder interface, you’ll see a palette of field types such as Single-Line Text, Paragraph Text, Number, and many more.
### Adding & Configuring Fields
1. **Drag** a field from the palette into your form canvas.
2. **Hover** the field and click the **Edit** icon to adjust:
3. **Configure** the field’s label, placeholder, help text, required status, default value, and validation message and any other properties based on the field that you have selected.
4. **Save** to apply your changes.
 ### Embedding Your Form
* **Form Builder Forms**
1. Open a page in the **Visual Builder** from the **Content Library**.
2. Drag the **Form** element onto your layout.
3. From the dropdown, select your newly created Form Builder form.
* **Free Style Forms**
Integrate via the **Forms API** using the Form ID
### Notifications & Webhooks
After your form is created, configure automated actions on submission:
* **Notifications**
Set email alerts for admins or team members.
* **Webhooks**
Specify a **Payload URL** whereExperro will send a JSON payload on each submission, enabling integrations with CRMs, marketing tools, or serverless functions.
**Next Steps**
* Test each form in **Preview** mode before going live.
* Use real-time analytics in **Insights → Dashboard** to track submission volume and performance.
* If you need custom styling or advanced client-side logic, combine Free Style Forms with your preferred front-end framework.
### Embedding Your Form
* **Form Builder Forms**
1. Open a page in the **Visual Builder** from the **Content Library**.
2. Drag the **Form** element onto your layout.
3. From the dropdown, select your newly created Form Builder form.
* **Free Style Forms**
Integrate via the **Forms API** using the Form ID
### Notifications & Webhooks
After your form is created, configure automated actions on submission:
* **Notifications**
Set email alerts for admins or team members.
* **Webhooks**
Specify a **Payload URL** whereExperro will send a JSON payload on each submission, enabling integrations with CRMs, marketing tools, or serverless functions.
**Next Steps**
* Test each form in **Preview** mode before going live.
* Use real-time analytics in **Insights → Dashboard** to track submission volume and performance.
* If you need custom styling or advanced client-side logic, combine Free Style Forms with your preferred front-end framework.