> ## Documentation Index
> Fetch the complete documentation index at: https://help.experro.com/llms.txt
> Use this file to discover all available pages before exploring further.
# Uploading Assets
The Media Manager offers two intuitive methods for adding files from single images to multiple images directly into your asset library.
## Click‑to‑Upload
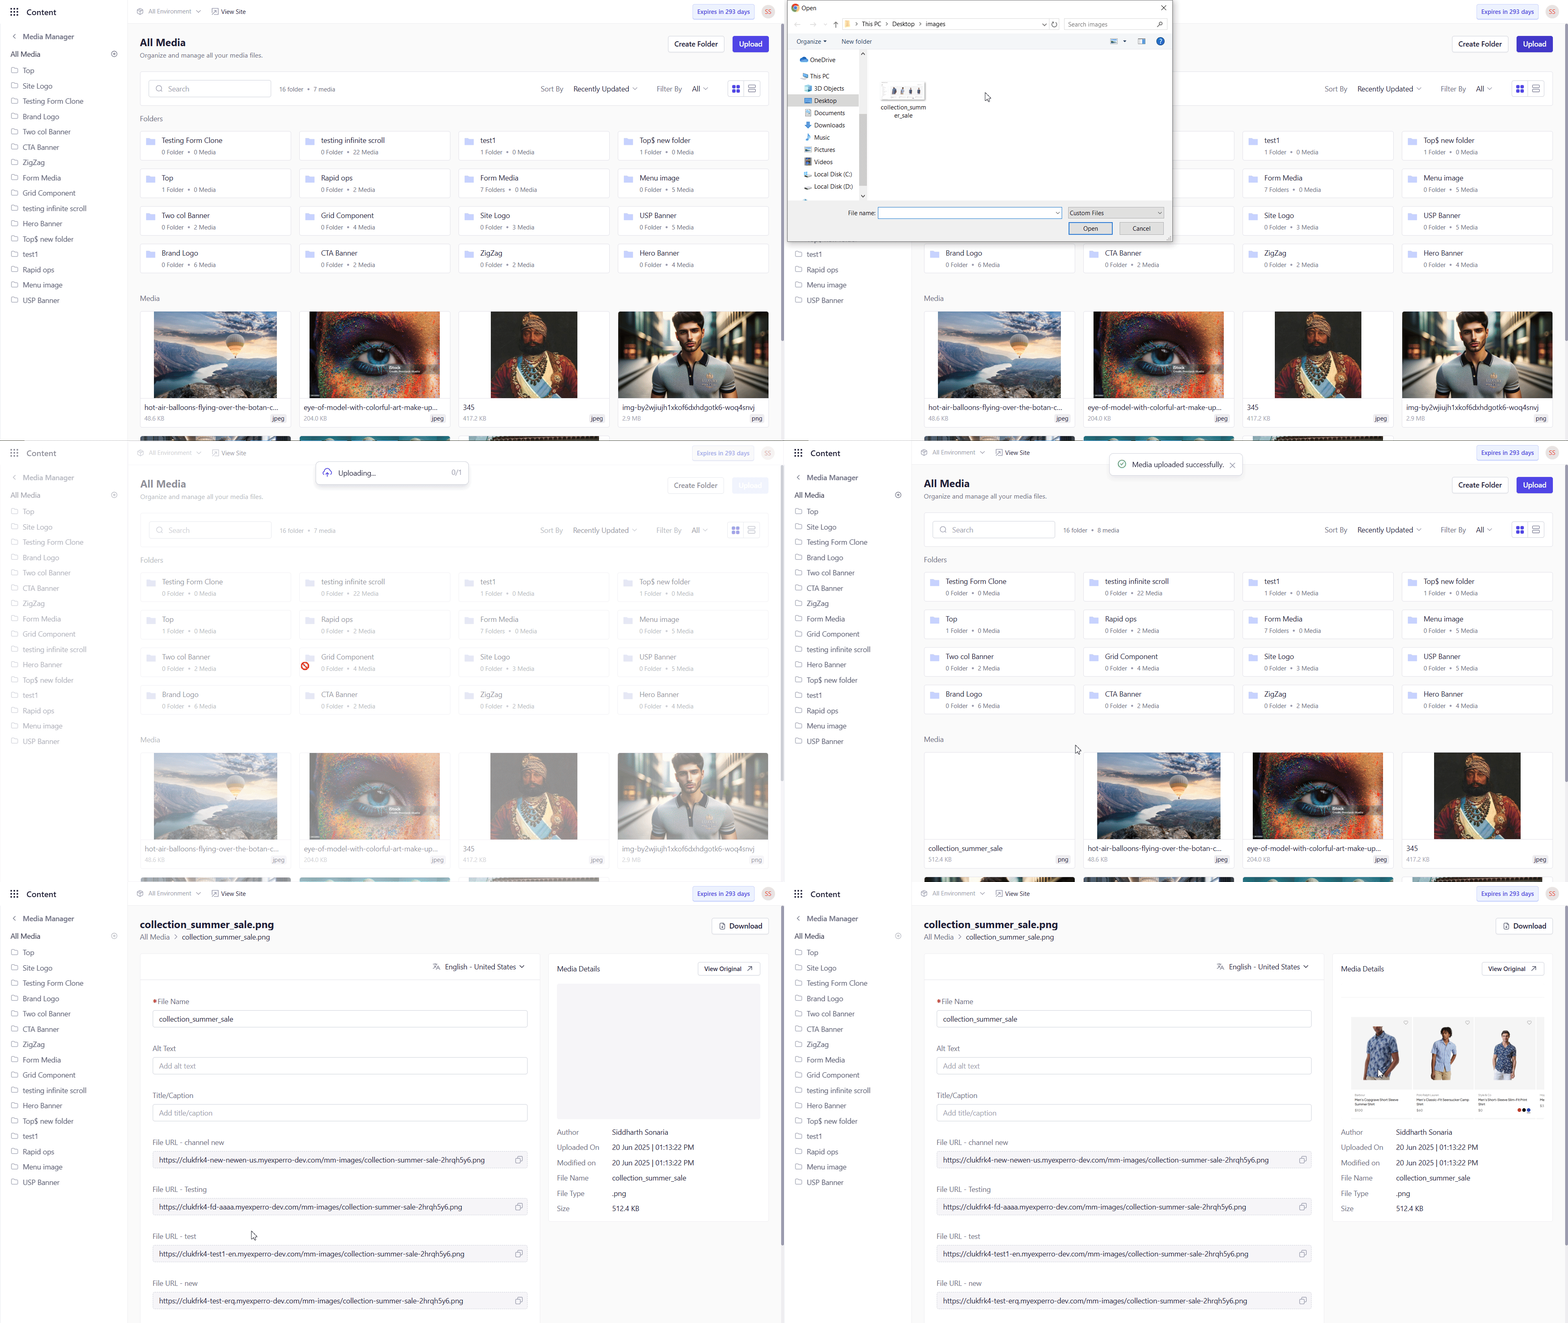
From the left sidebar, select **Media Manager**.
Navigate to the desired folder (by default you land in **All Media**).
Click the **Upload** button in the top‑right corner of the folder view.
In the system file picker, select one or more files and click **Open**.
Each file displays an upload progress bar; wait until you receive the message for sucessfull upload.
 ## Drag‑and‑Drop
Open **Media Manager** and browse to the target folder.
From your desktop or file explorer, drag one or more files onto the designated drop zone.
Drop the files to start the upload. Monitor the progress bars as each file uploads.
## Post‑Upload Validation & Error Handling
* **Unlimited Size & Quantity** : Upload as many files of any size as you need as there are no hard limits on file count or total data volume.
* **Retry on Failure** : If an upload fails, you’ll see an “Upload failed. Retry” message. Simply click **Retry** to attempt that file again.
* **Unsupported Formats** : When you try to add a file with an unsupported extension, the system displays “File not supported.” Check the file type and try again with a compatible format.
With your assets successfully uploaded, you can now edit metadata, organize files into subfolders, or insert them directly into content entries using the Content Library.
## Drag‑and‑Drop
Open **Media Manager** and browse to the target folder.
From your desktop or file explorer, drag one or more files onto the designated drop zone.
Drop the files to start the upload. Monitor the progress bars as each file uploads.
## Post‑Upload Validation & Error Handling
* **Unlimited Size & Quantity** : Upload as many files of any size as you need as there are no hard limits on file count or total data volume.
* **Retry on Failure** : If an upload fails, you’ll see an “Upload failed. Retry” message. Simply click **Retry** to attempt that file again.
* **Unsupported Formats** : When you try to add a file with an unsupported extension, the system displays “File not supported.” Check the file type and try again with a compatible format.
With your assets successfully uploaded, you can now edit metadata, organize files into subfolders, or insert them directly into content entries using the Content Library.