> ## Documentation Index
> Fetch the complete documentation index at: https://help.experro.com/llms.txt
> Use this file to discover all available pages before exploring further.
# Banner Rule
## Add Banners to Merchandising Rules
After creating and activating a banner, attach it to a Merchandising Rule to control where it appears, on which pages, and for how long.
### Rule Types
| **Rule Type** | **Where the Banner Appears** |
| -------------------- | ----------------------------------------------------- |
| **Global Rules** | Across all applicable discovery pages site-wide |
| **Category Rules** | On specific category or collection browse pages |
| **Search Rules** | On search result pages, triggered by specific queries |
| **Collection Rules** | On custom collection pages created within Experro |
### Attach a Banner to a Rule
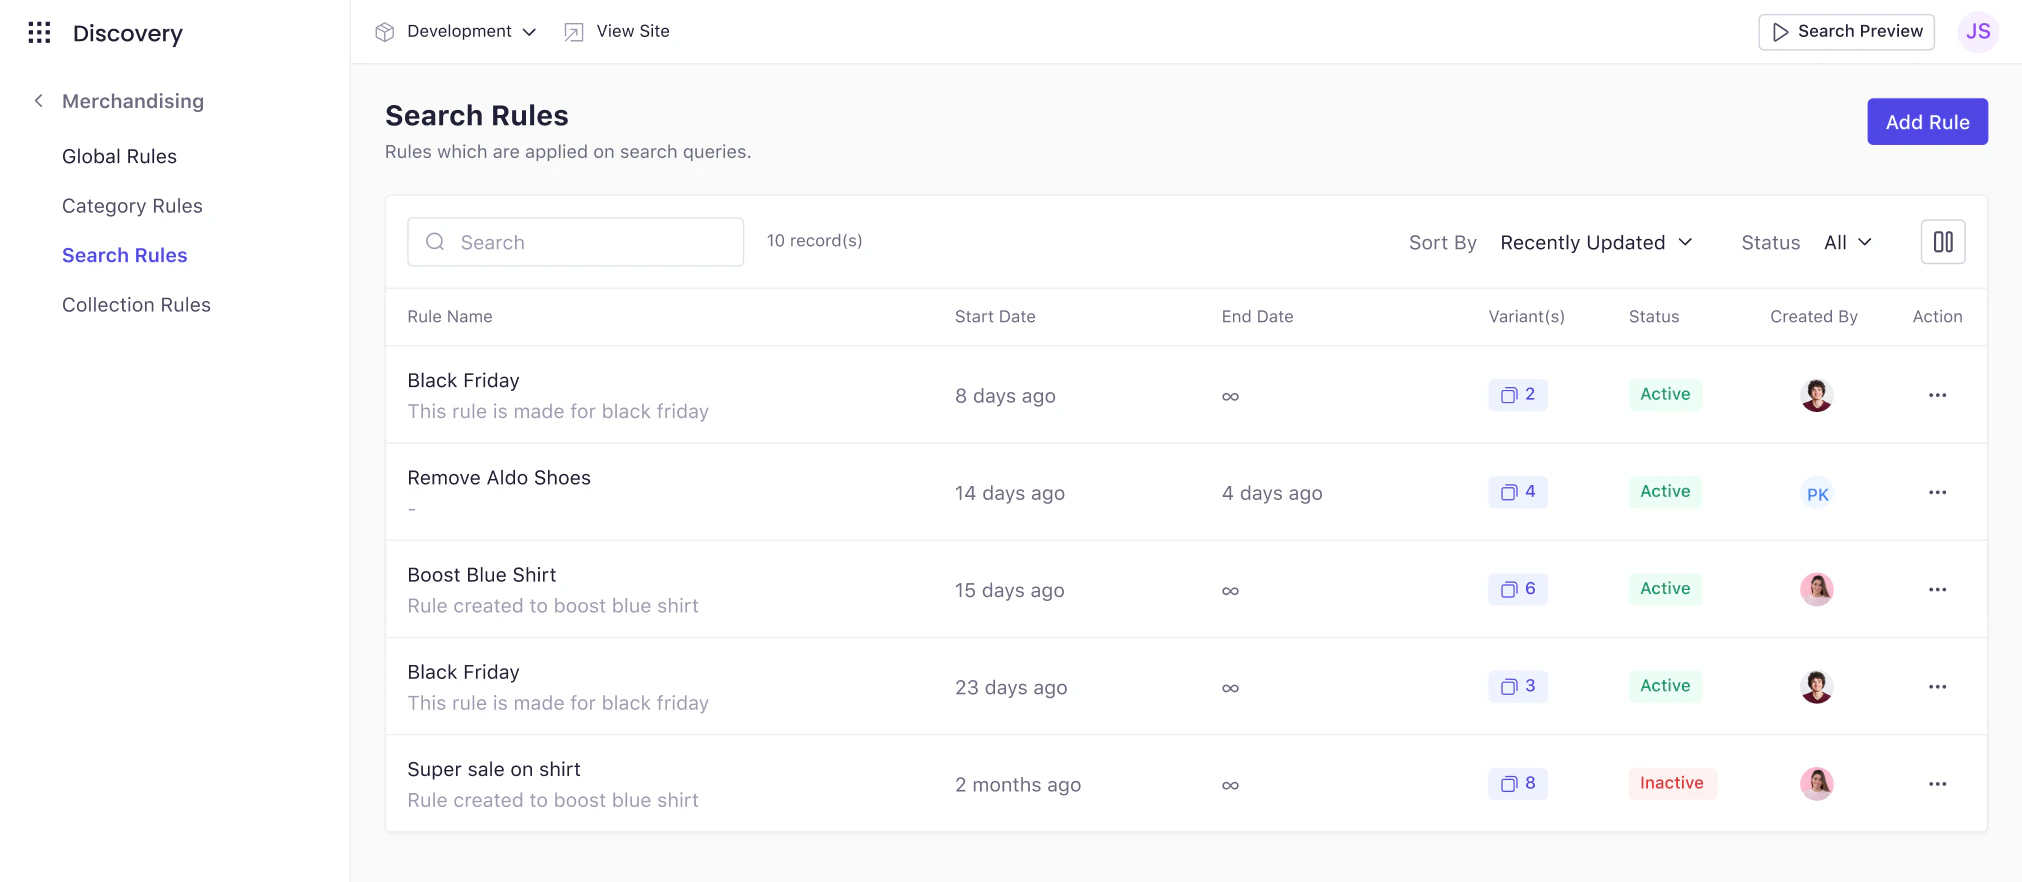
1. Navigate to **Discovery → Merchandising**.
2. Select the rule type: **Global**, **Category**, **Search**, or **Collection**.
3. Click **Add Rule** to create a new rule, or open an existing one.
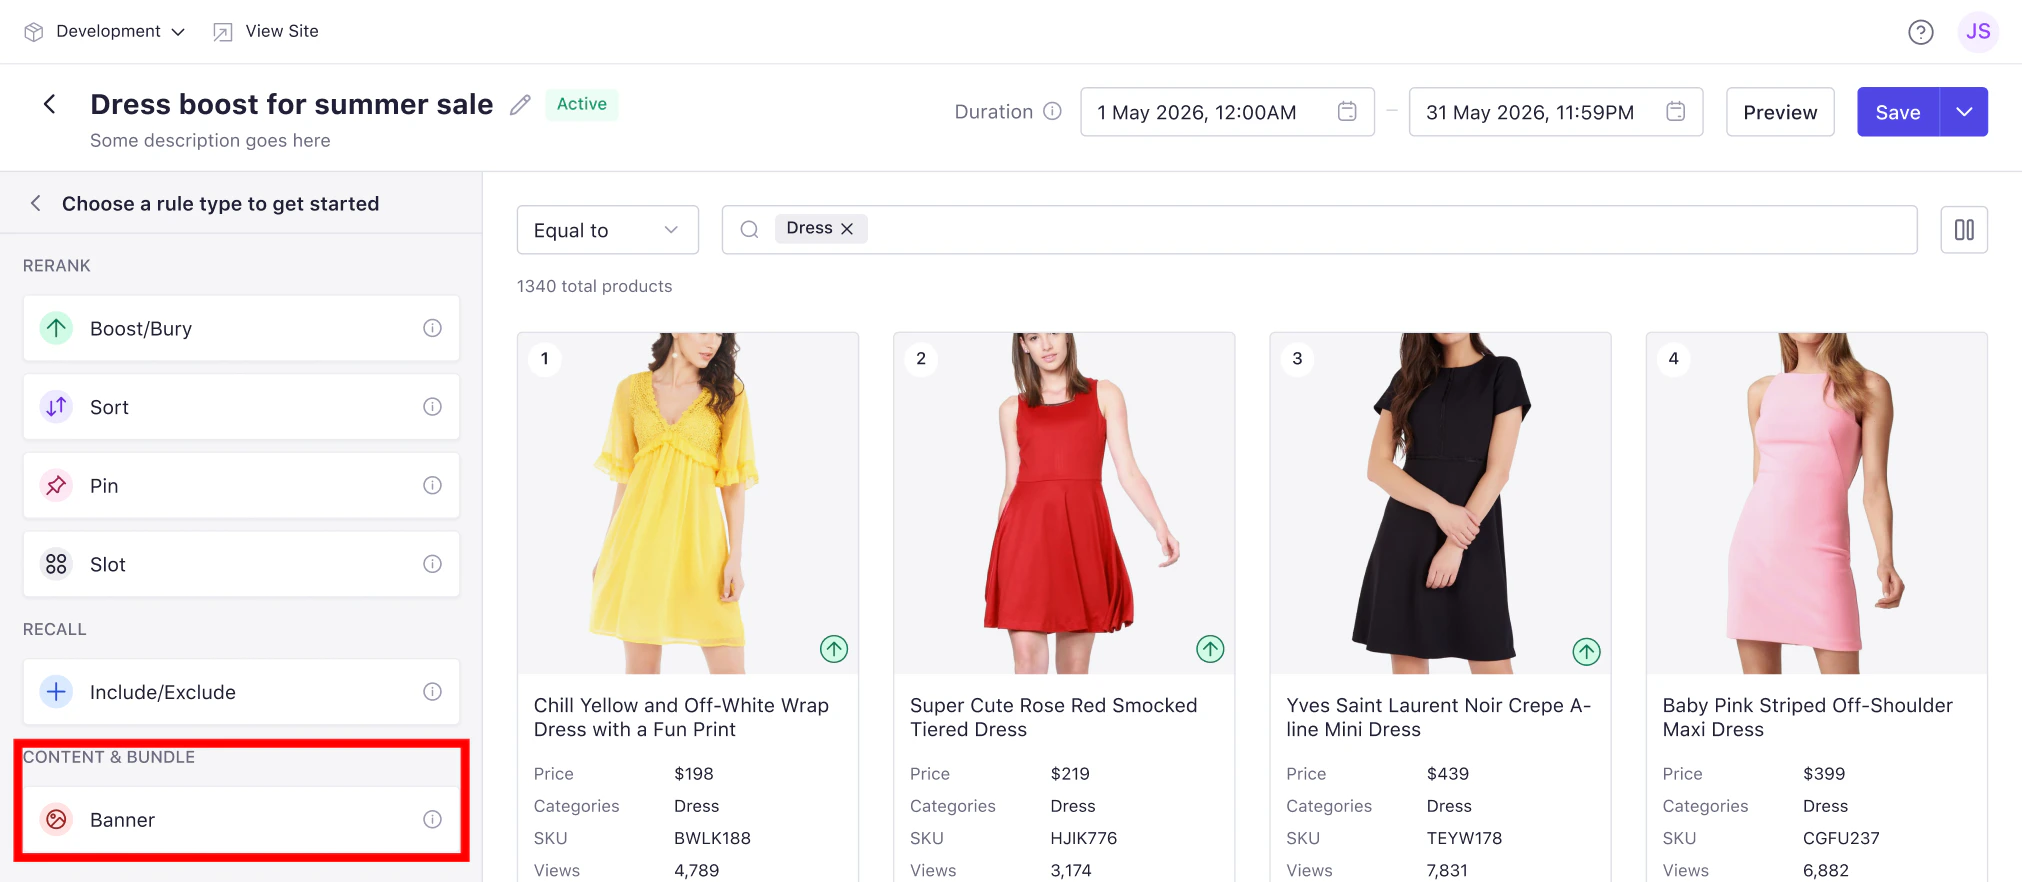
 4. In the rule configuration screen, locate the **Content & Bundle** section and click **Banner**.
 5. Complete the banner rule settings:
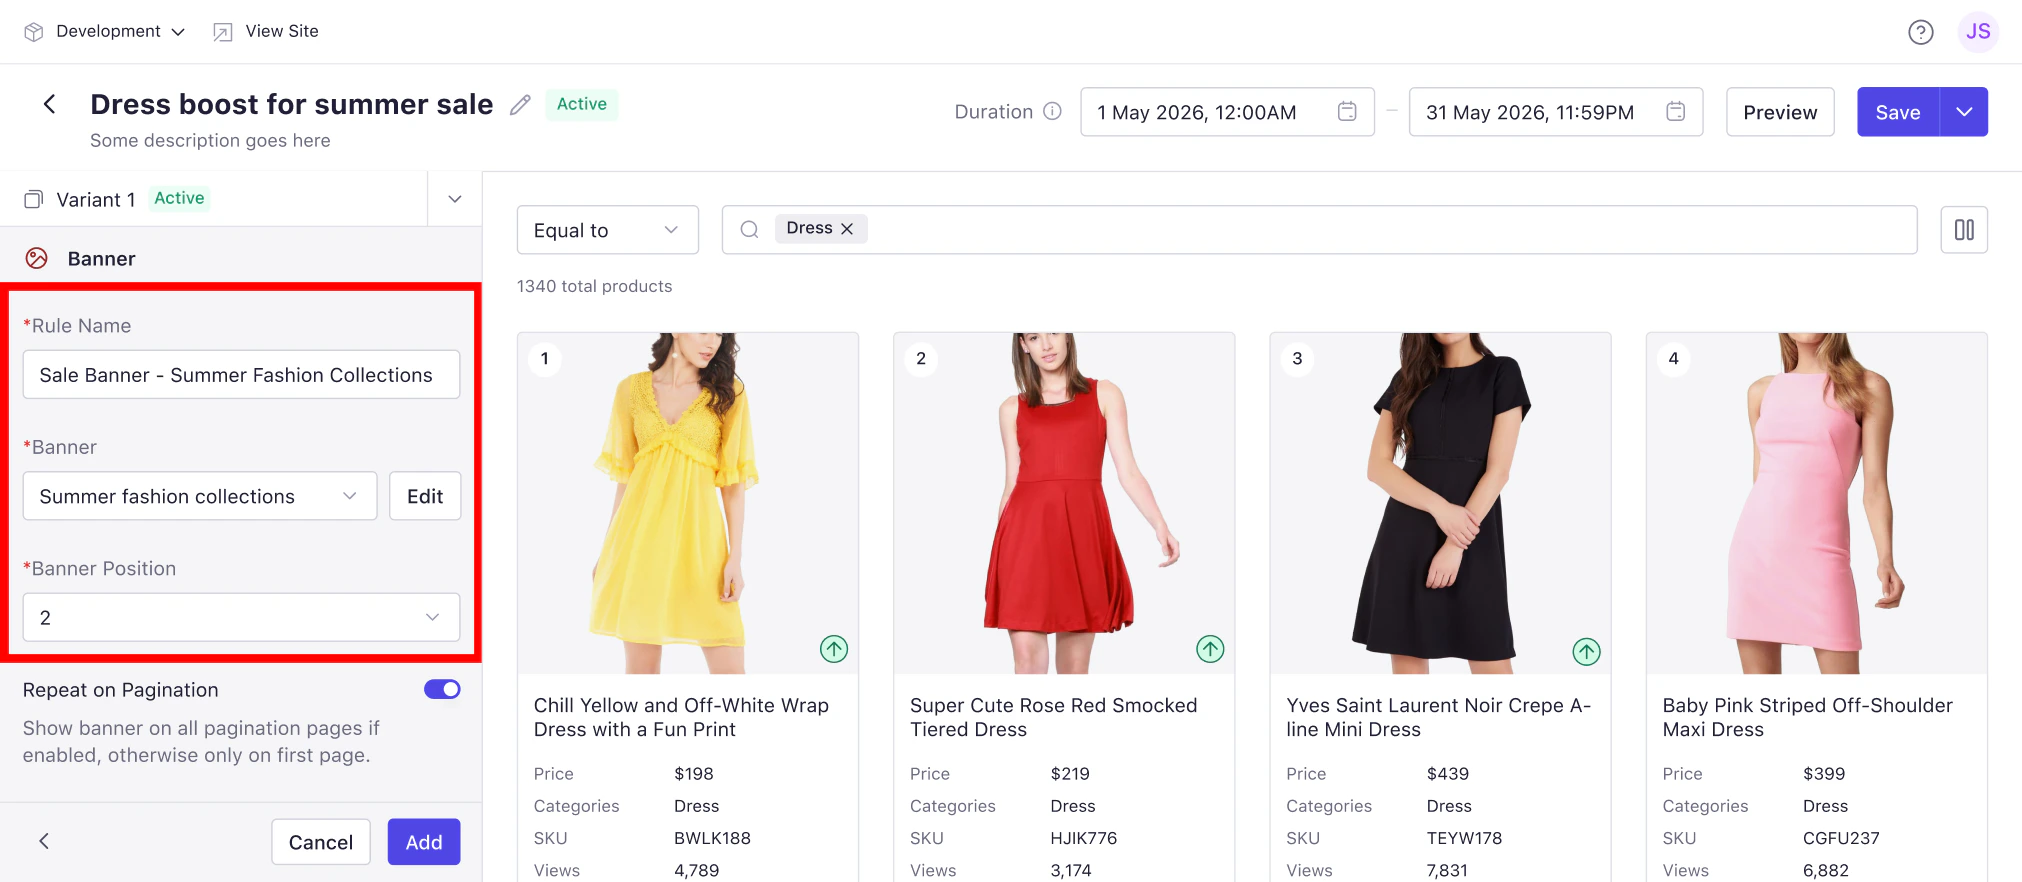 ### Configure Banner Rule Settings
| Field | Description |
| ------------------------ | ------------------------------------------------------------------------------------------------------------------------ |
| **Rule Name** | Enter a name to identify the merchandising rule, for example: "Summer Sale — Jewelry Search — June 2025." |
| **Banner** | Select the banner from the dropdown. Only banners created in **Discovery → Banners** are available. |
| **Banner Position** | Choose the position where the banner should appear on the page (based on the selected layout and page type). |
| **Repeat on Pagination** | Enable this option to display the banner on all paginated pages. If disabled, the banner appears only on the first page. |
### Page and Category Selection
Use the **Search Category** field to select the category, collection, or search context where the banner should be applied. Once selected, products related to that page are displayed in the **preview area**.
### Schedule the Banner
Start and end dates are set at the rule level.
1. Click the **Duration** field in the rule configuration screen.
2. Set a **Start Date** and time. Start date defaults to the current date.
3. Set an **End Date** and time, or leave open for evergreen placements.
4. Click **Apply**.
### Save and Preview
### Configure Banner Rule Settings
| Field | Description |
| ------------------------ | ------------------------------------------------------------------------------------------------------------------------ |
| **Rule Name** | Enter a name to identify the merchandising rule, for example: "Summer Sale — Jewelry Search — June 2025." |
| **Banner** | Select the banner from the dropdown. Only banners created in **Discovery → Banners** are available. |
| **Banner Position** | Choose the position where the banner should appear on the page (based on the selected layout and page type). |
| **Repeat on Pagination** | Enable this option to display the banner on all paginated pages. If disabled, the banner appears only on the first page. |
### Page and Category Selection
Use the **Search Category** field to select the category, collection, or search context where the banner should be applied. Once selected, products related to that page are displayed in the **preview area**.
### Schedule the Banner
Start and end dates are set at the rule level.
1. Click the **Duration** field in the rule configuration screen.
2. Set a **Start Date** and time. Start date defaults to the current date.
3. Set an **End Date** and time, or leave open for evergreen placements.
4. Click **Apply**.
### Save and Preview
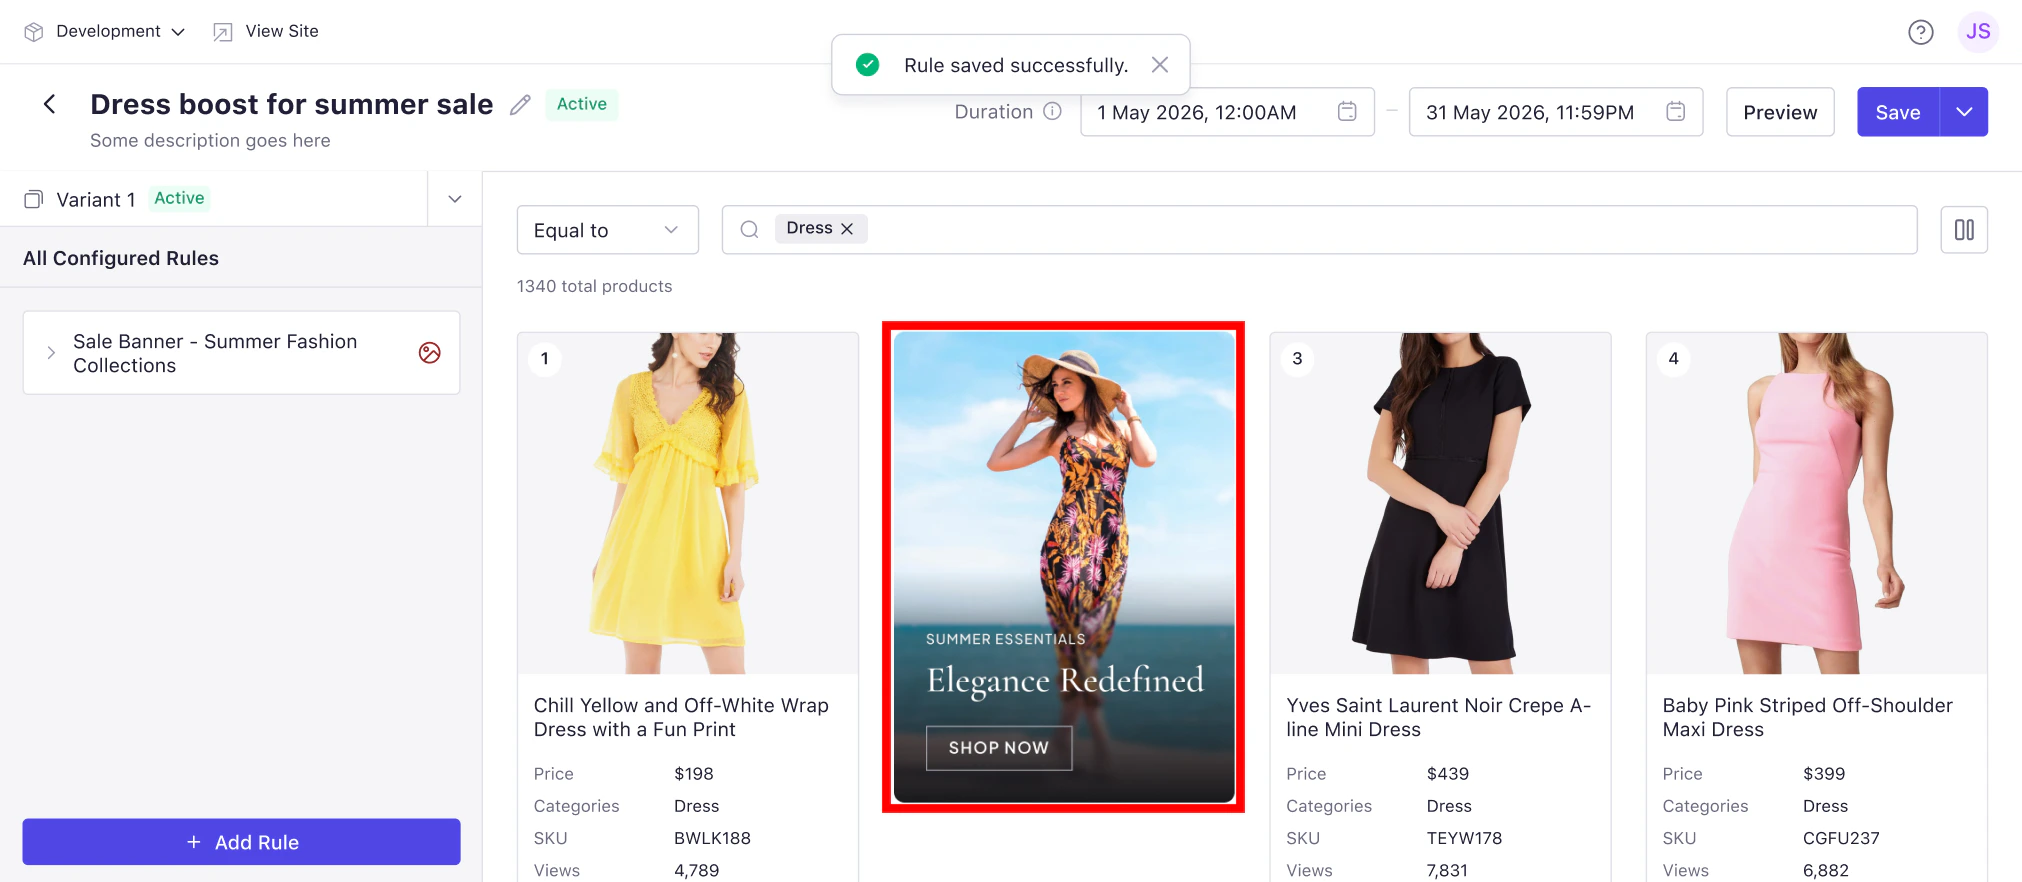 * **Save** — applies the rule. Once saved and active, the banner displays on the storefront according to the configuration and schedule.
* **Preview** — validates banner placement within the product grid before publishing.
* **Save** — applies the rule. Once saved and active, the banner displays on the storefront according to the configuration and schedule.
* **Preview** — validates banner placement within the product grid before publishing.