

Step-by-Step Configuration Guide
1
Navigate to Facets
- Use the left-hand navigation panel to go to Discovery.
- Select Facets
 to view the list of existing facets.
2
Add a New Facet
- Click the Add Facet button to open the configuration form.
- Define the facet attributes by selecting the product category from the dropdown menu.
- Click Save to create the new facet.
3
Configure Facet Options
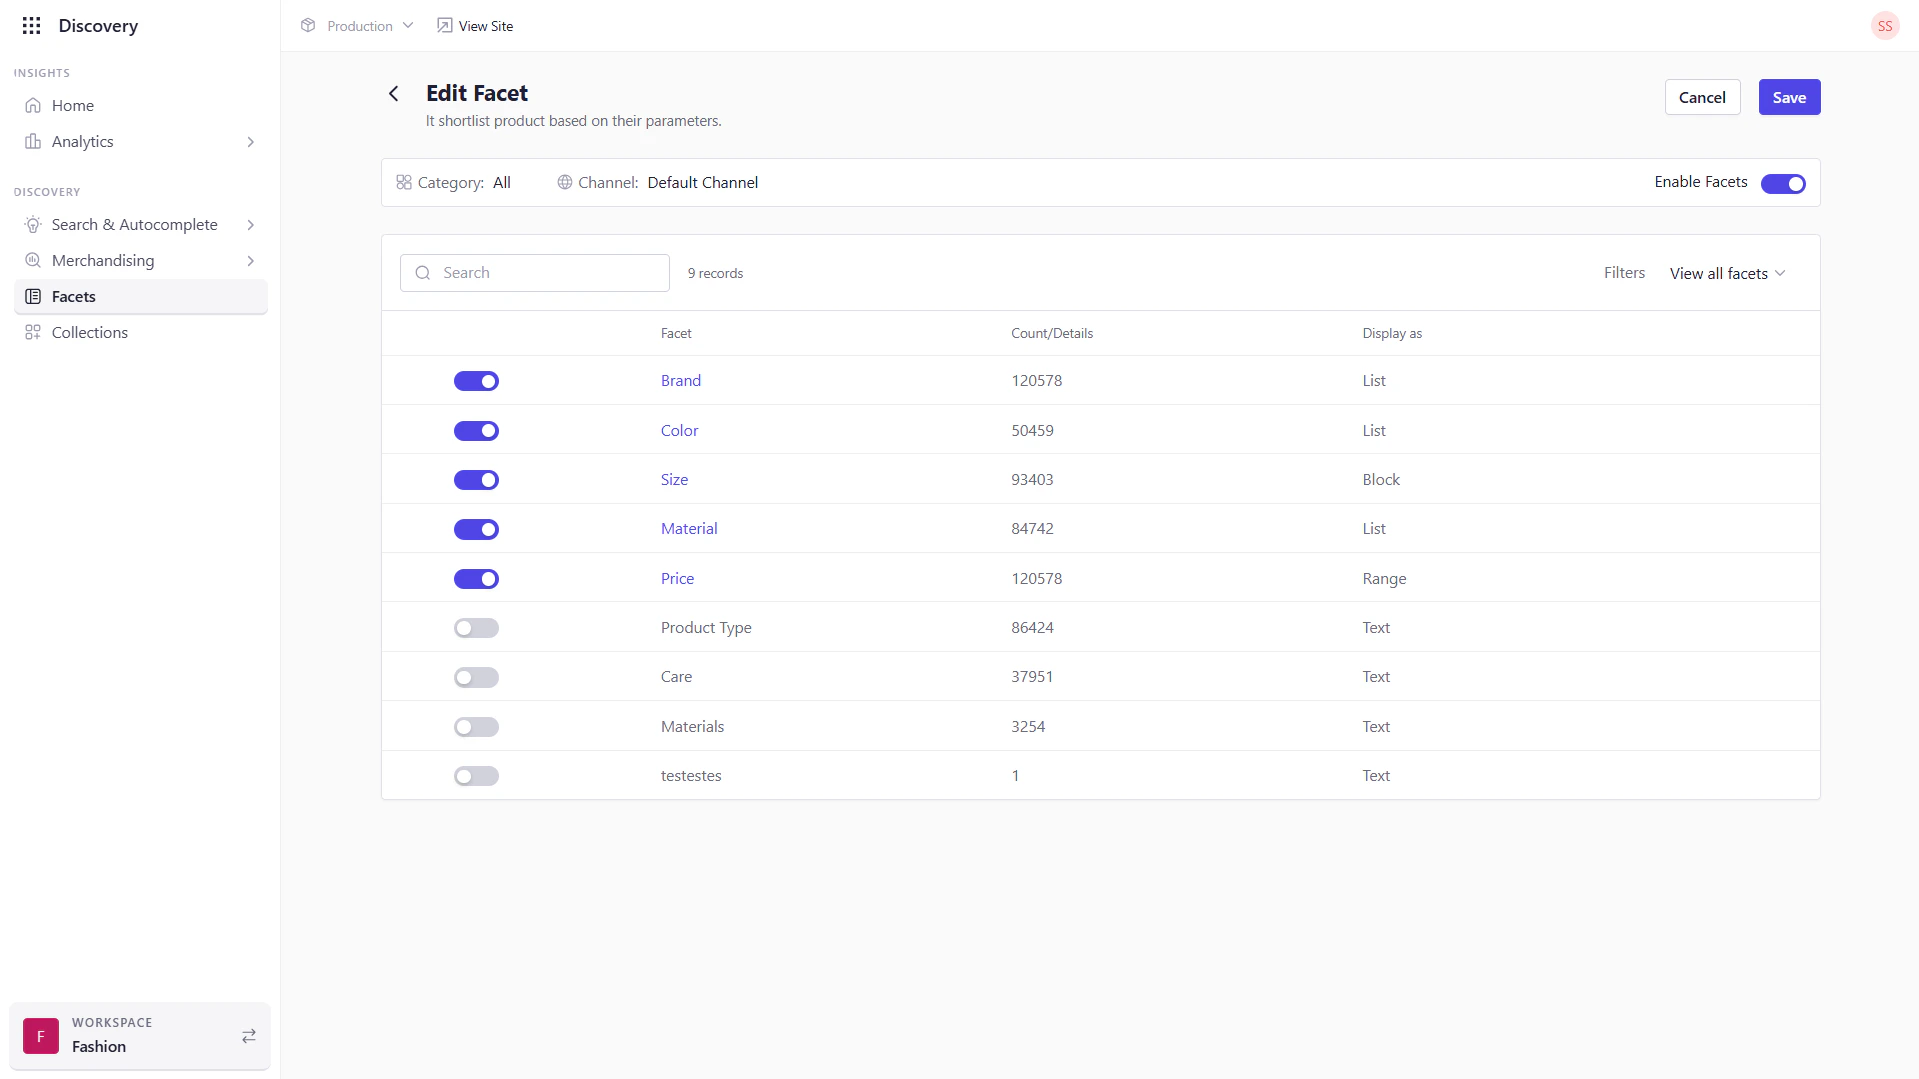
- Once a facet is created, click on the Edit option in the Actions column.
- Under the Filters dropdown, select View All Facets to see all available facets.
- Locate the facet you want to configure and use the toggle button to enable or disable it as required.
-
Click Save to apply your changes.
4
Customize Individual Facets
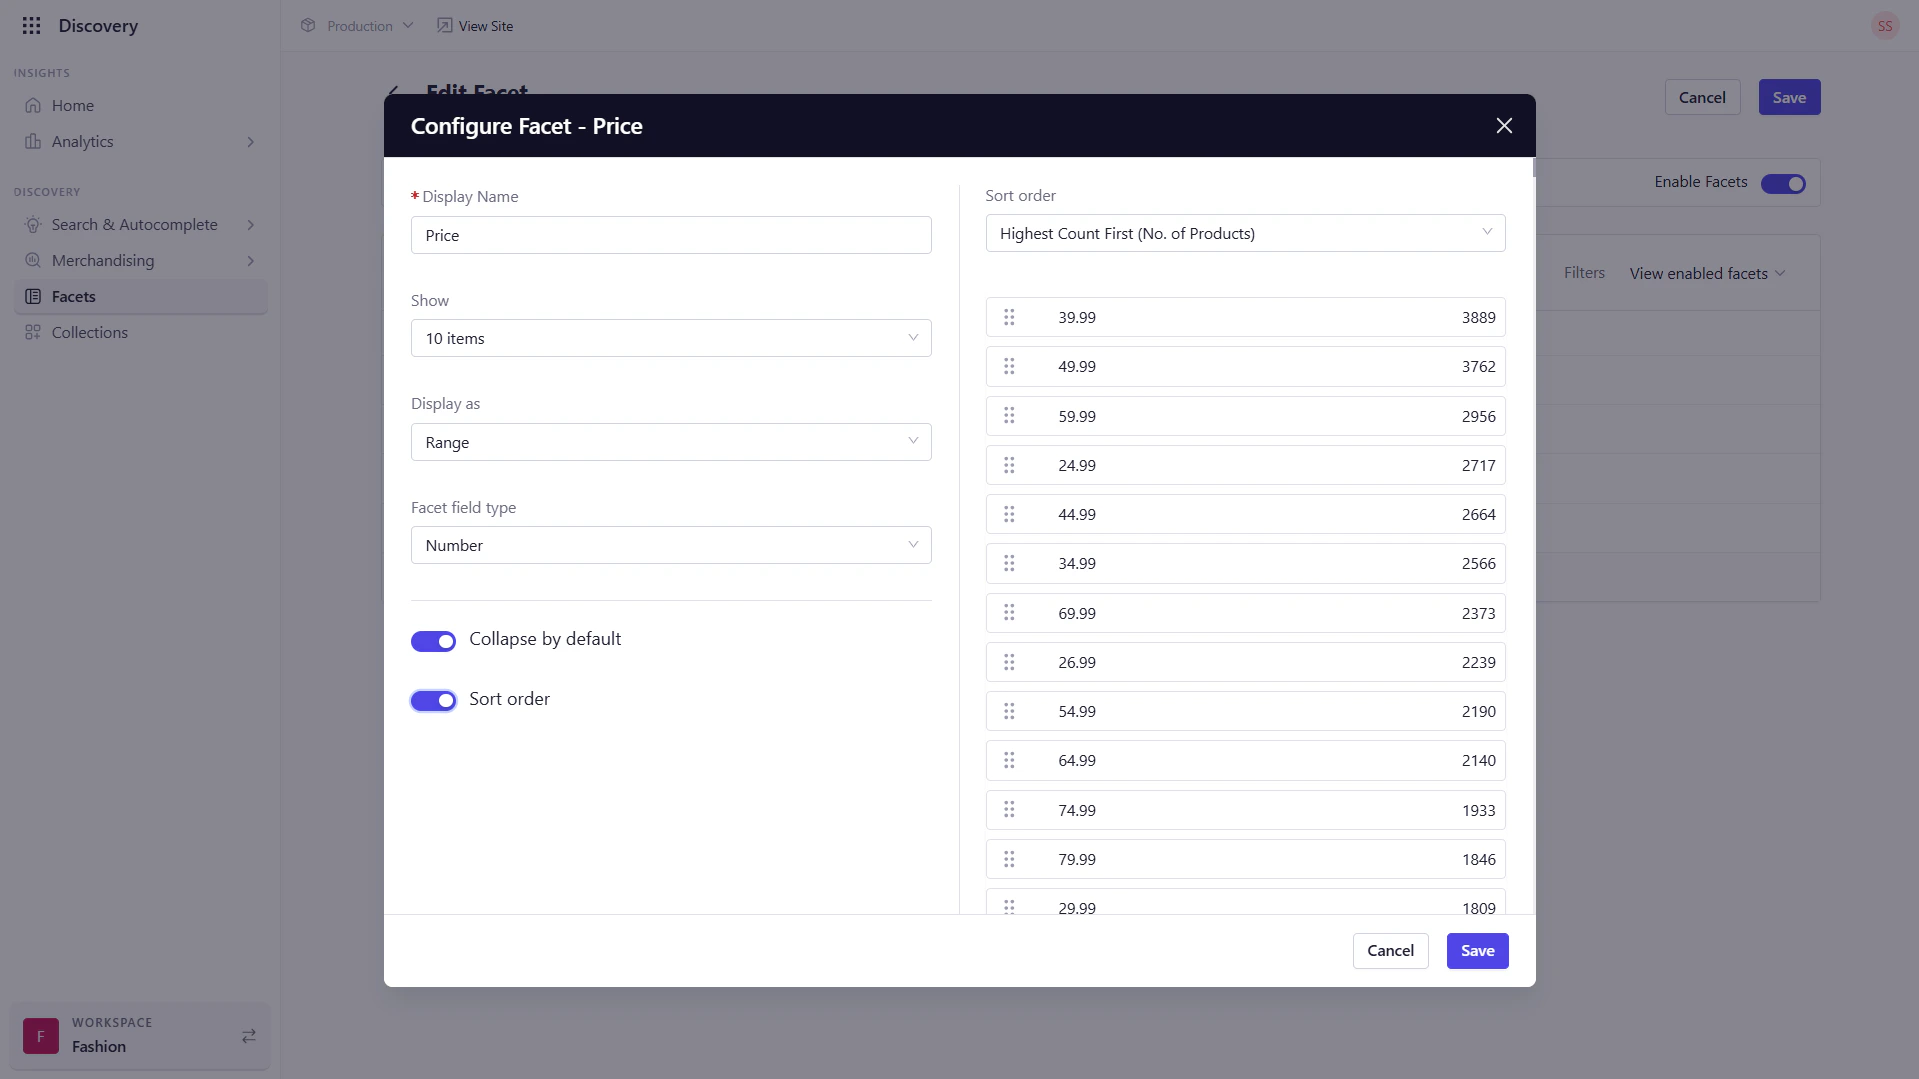
- Click on a specific facet (e.g., Price or Brand) to access advanced customization options.
- Each facet type exposes a unique set of configuration settings to better control the user experience.
Example: Price Facet
Example: Brand Facet
Facets play a critical role in helping users filter results meaningfully. By customizing them by type and context (e.g., price sliders for numerical fields or count toggles for brands), you can ensure a smoother, more personalized, and high-converting shopping experience.