Prerequisites
- Store Connection: You’ve already connected your BigCommerce store in Experro (see Store Integration for details).
- UI Customization Complete: All desired changes under UI Customization → Search Results, Layout, CSS & JS, etc., have been configured and saved in the Experro Admin Panel.
- Experro Default Theme: These steps apply when you’re using the Experro Default Theme on your store.
1
Modify Your BigCommerce Theme
-
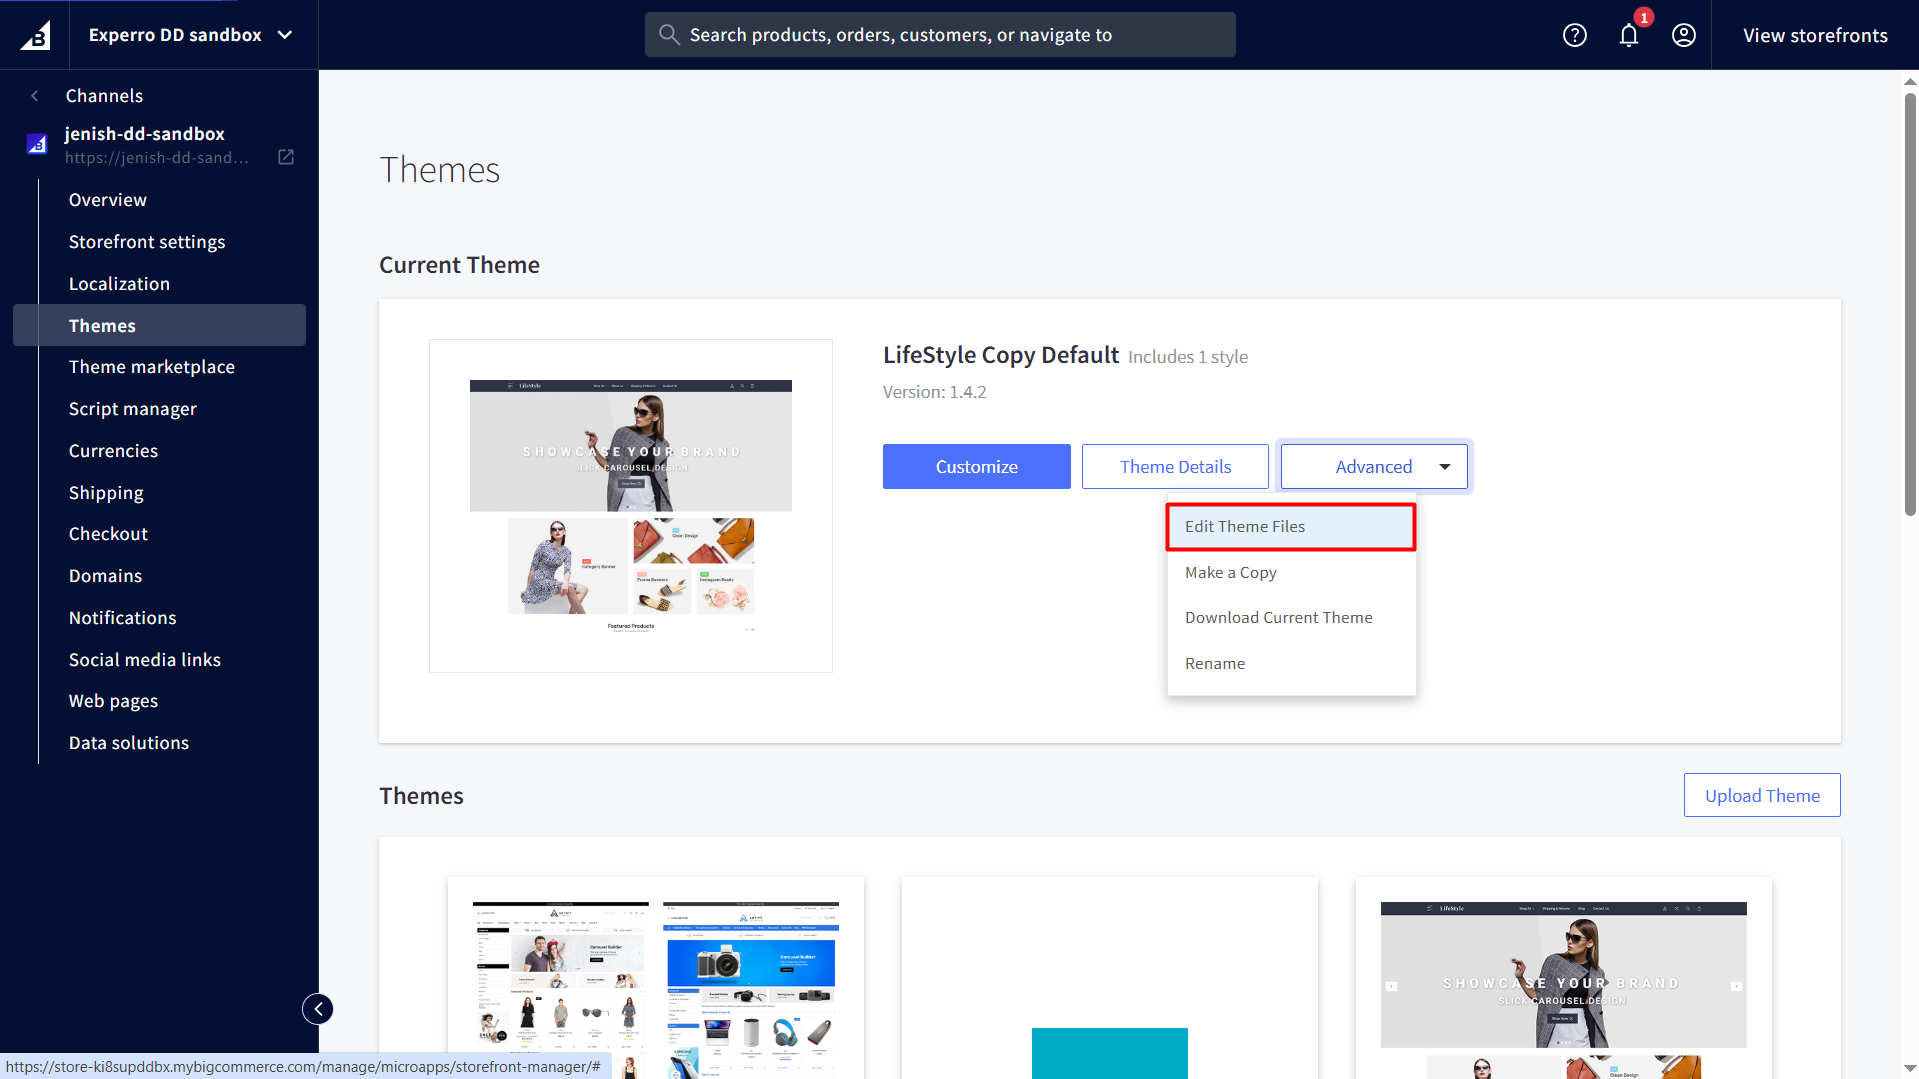
Open BigCommerce Admin
Log in to your BigCommerce control panel. -
Edit Theme Files
- In case of multiple storefronts, Navigate to Channels → Select your desired storefront.
- In case of single store, Navigate to Storefront → Themes.
- Select Edit Theme Files.\
-
Locate the Category Template
- In the file tree, open
templates/pages/category.html.\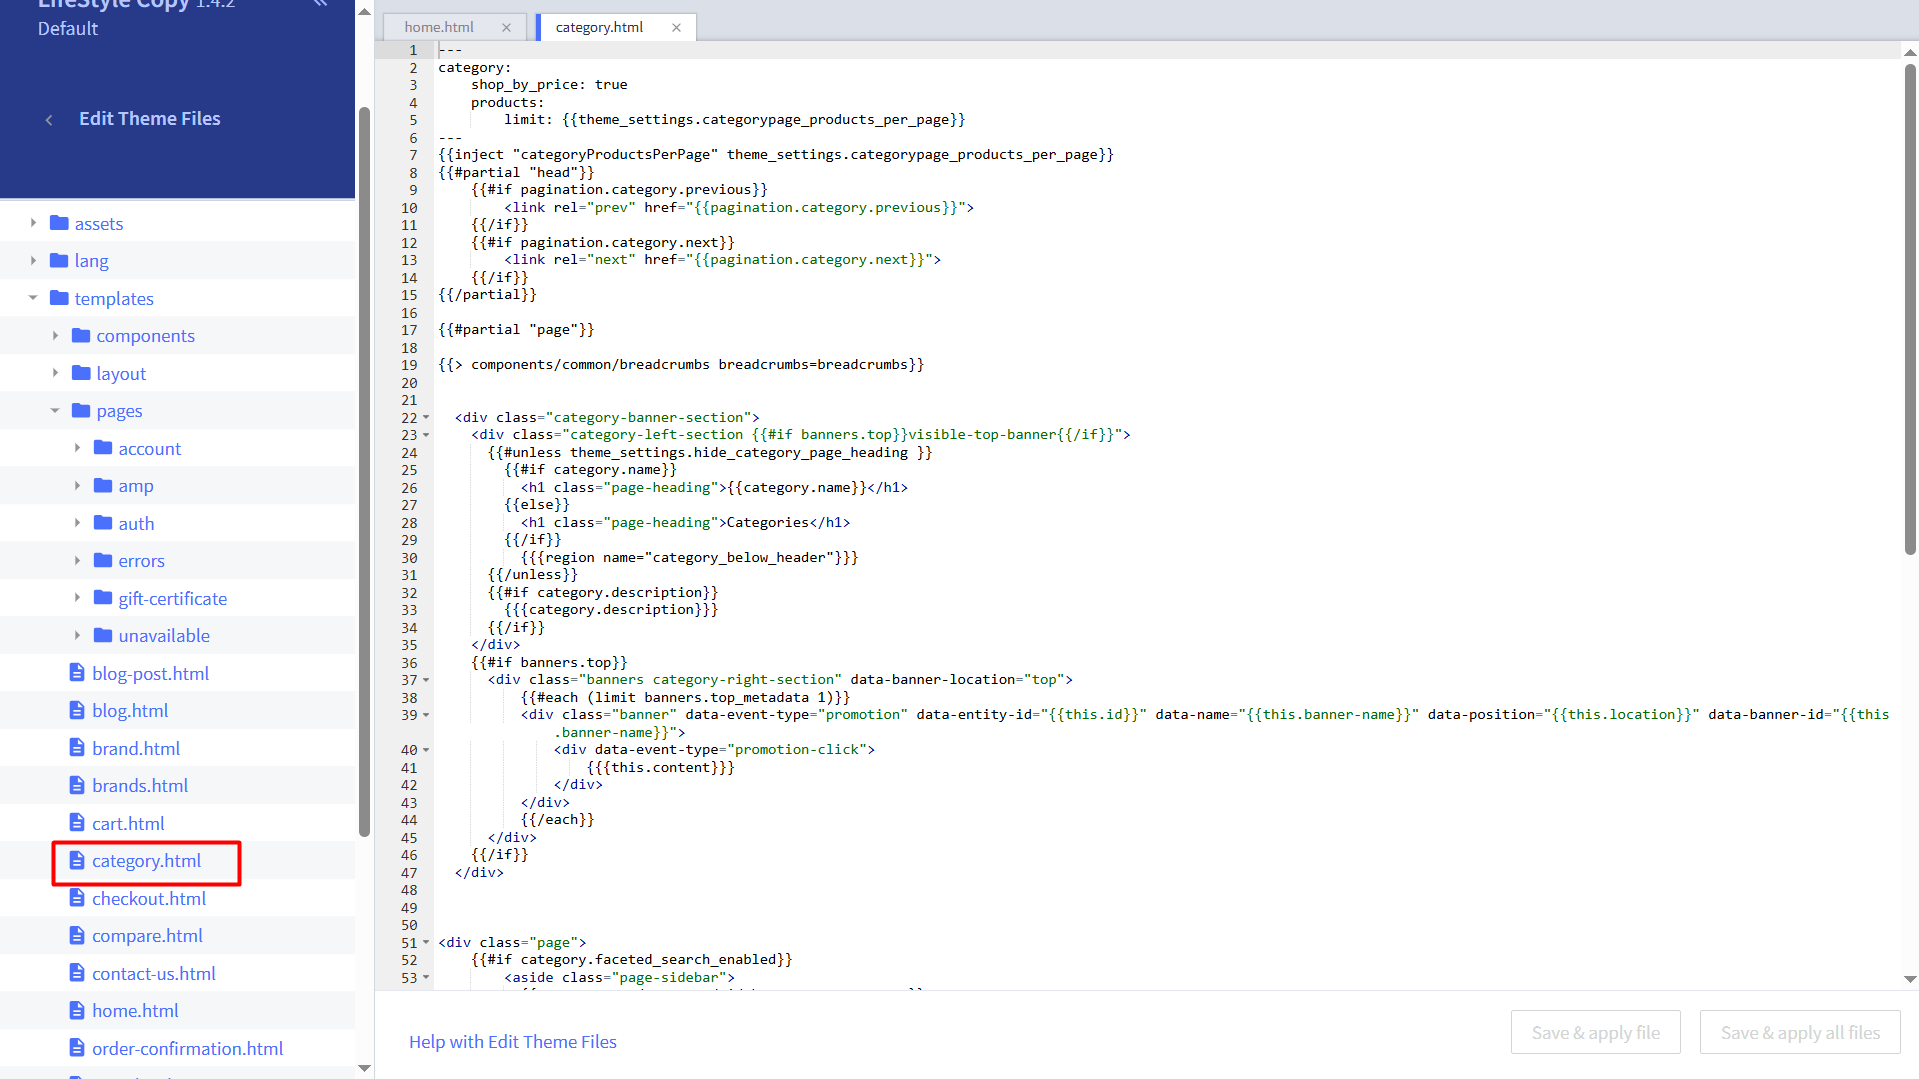
- In the file tree, open
-
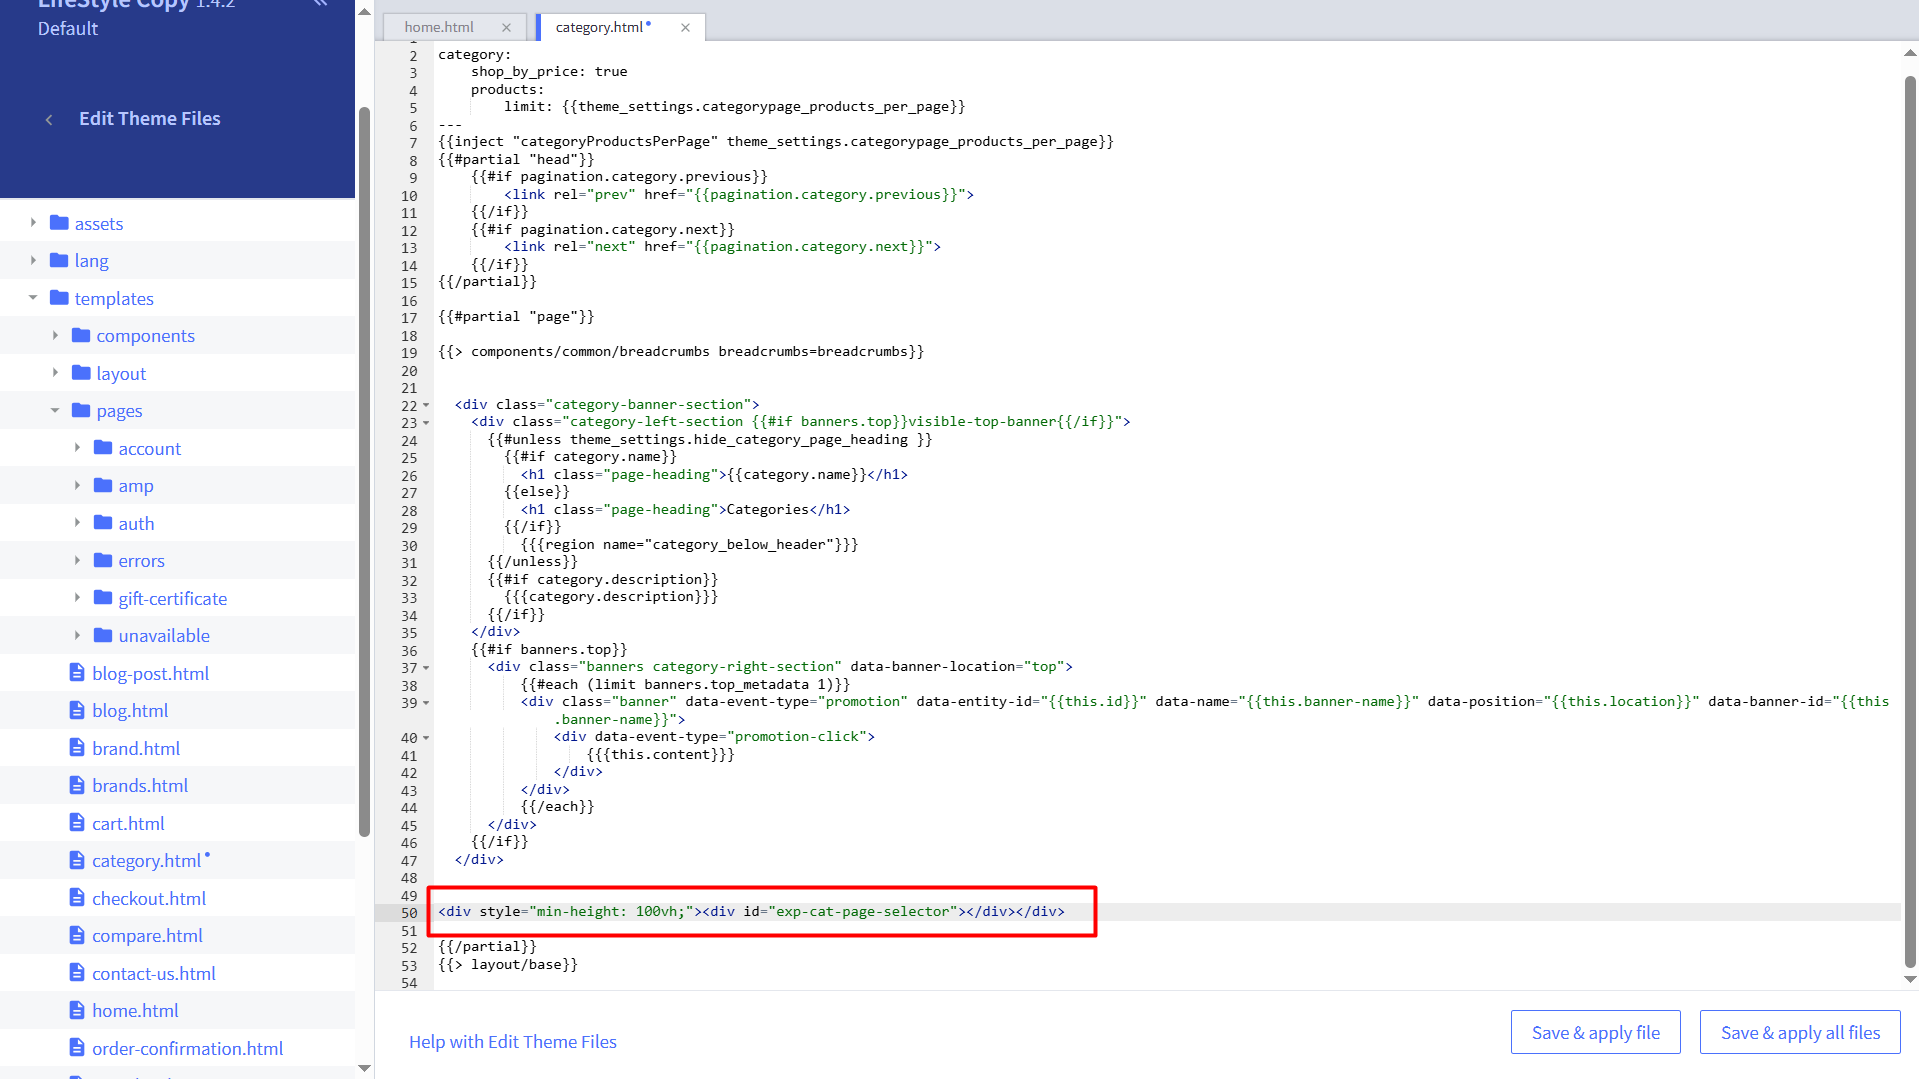
Insert the Experro Container
- Identify and comment out (or remove) the existing product‐grid wrapper where you want Experro to render.
- Replace it with:
-
Save & Apply
Click Save to commit your changes. BigCommerce will re‐apply the updated template immediately.
2
Inject the Experro Initialization Script
-
Open Experro Admin Panel
Go to Discovery → UI Customization → CSS & JS. -
Paste the Initialization Snippet
In the JavaScript (JS) Editor section, enter: -
Save Changes
Click Save in the CSS & JS tab.
3
Optional: Personal Branding for Experro Default Theme
- If you’re using Experro Default Theme, you can override its CSS variables to match your brand.
-
In the same CSS & JS tab (under the CSS editor), paste the following:
-
Adjust any of these
--exp-…variables to suit your fonts, colors, and layouts.
4
Inject the Experro is Live Script
- In the Experro Admin Panel, go to Discovery → UI Customization → CSS & JS.
-
In the JavaScript (JS) Editor section, enter:
5
Preview and Publish
-
Preview Locally
Use your storefront’s preview mode to verify that:- The Experro container is rendering your custom UI.
- Search and facet components behave as expected on both desktop and mobile.
-
Publish to Production
- When you’re satisfied, click Publish in the Experro Admin Panel.
- Your Experro Discovery UI and behavior changes will go live on your BigCommerce store.