Steps to Connect to the Store
1
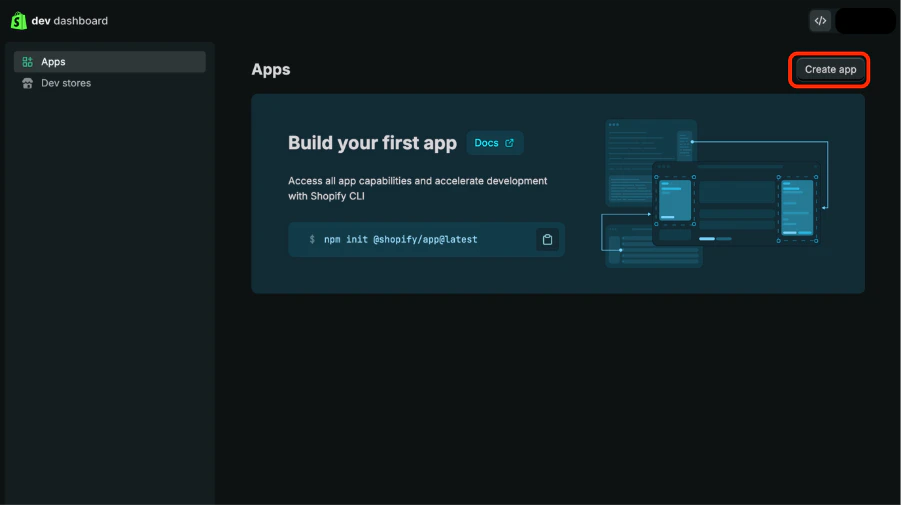
Create an App from Shopify Dev Dashboard
-
Go to the Shopify Dev Dashboard.

- Navigate to Apps.
-
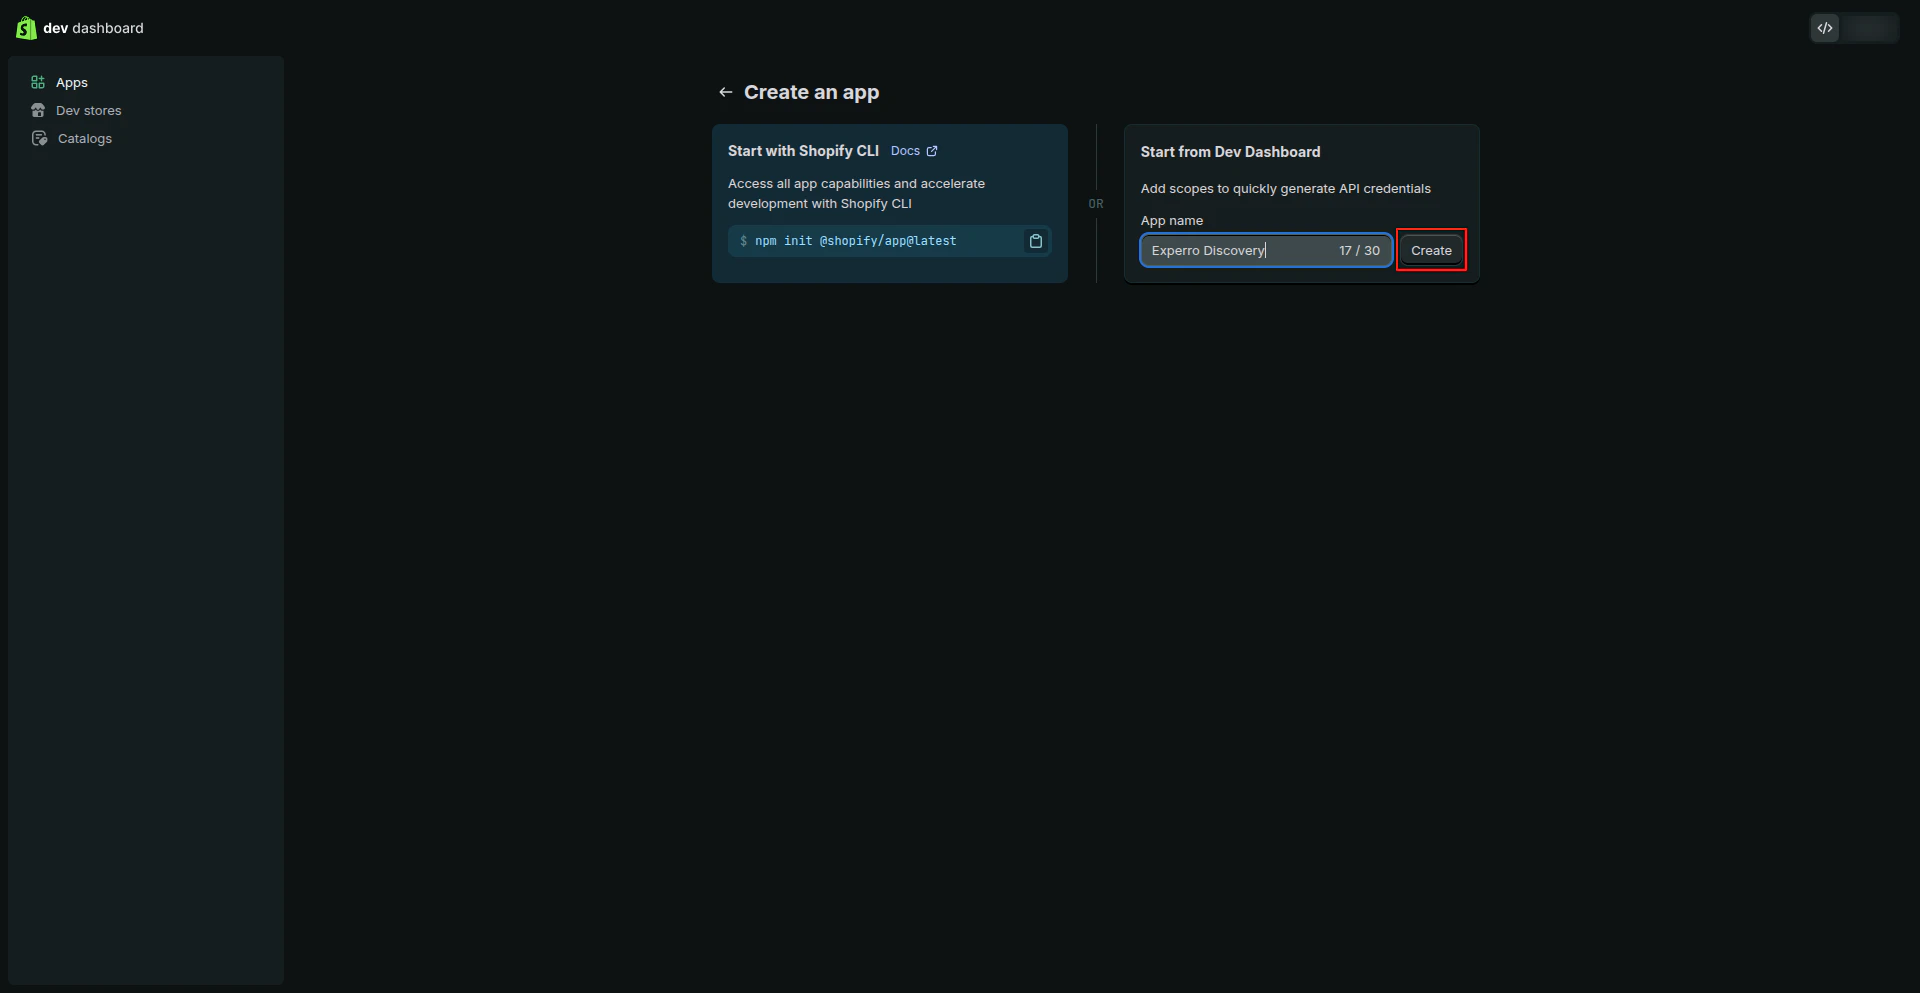
Click Create App.
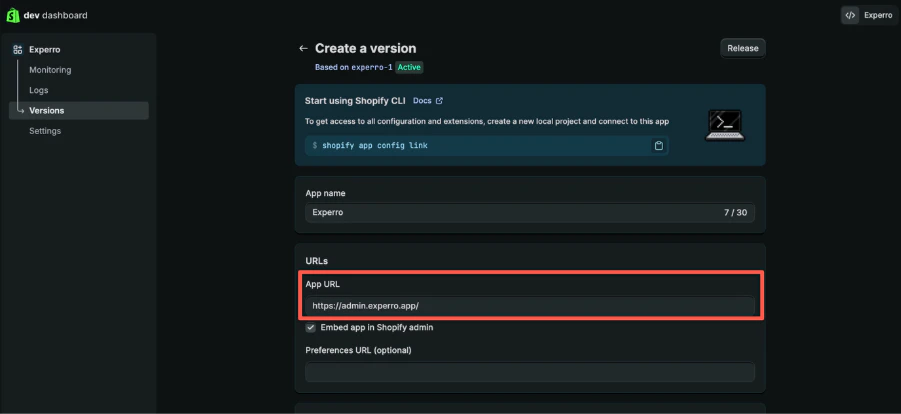
-
Add the App URL. (https://admin.experro.app/)
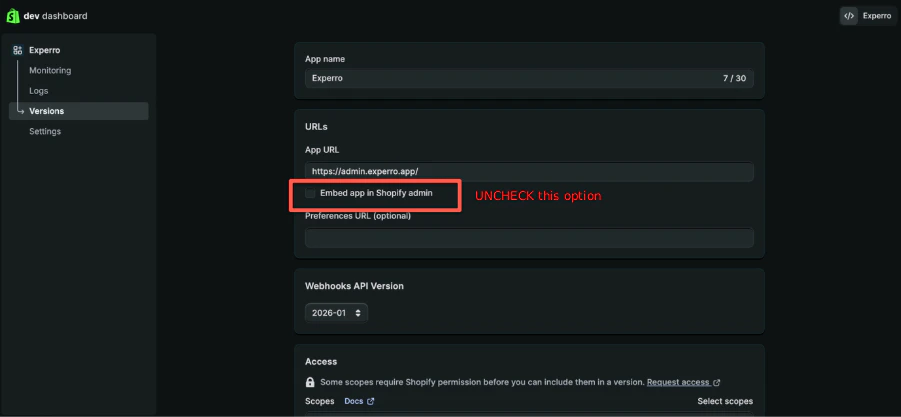
-
Disable Embed App in Shopify Admin.
-
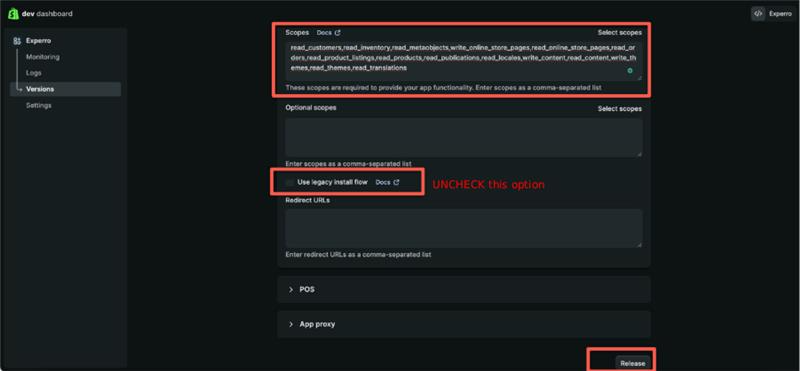
Select the required API scopes.
A list of required Admin API scopes ready to configure:
-
Disable Use Legacy Install Flow.
-
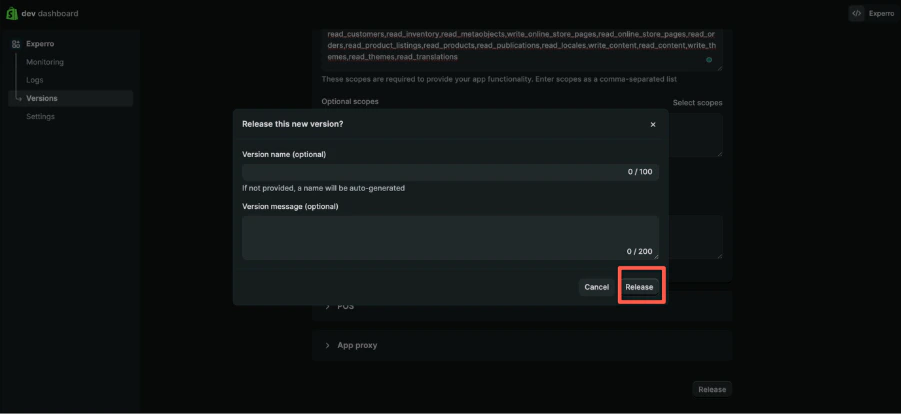
Click Release, enter the version name, and confirm the release.
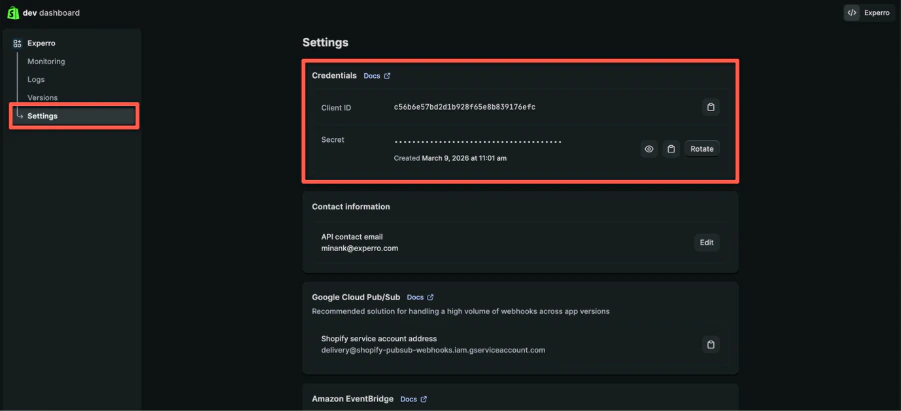
- After installation Under Settings, you will get:
-
a. Client ID and Client Secret under the API credentials, copy both tokens.
2
Install the App on Shopify Store
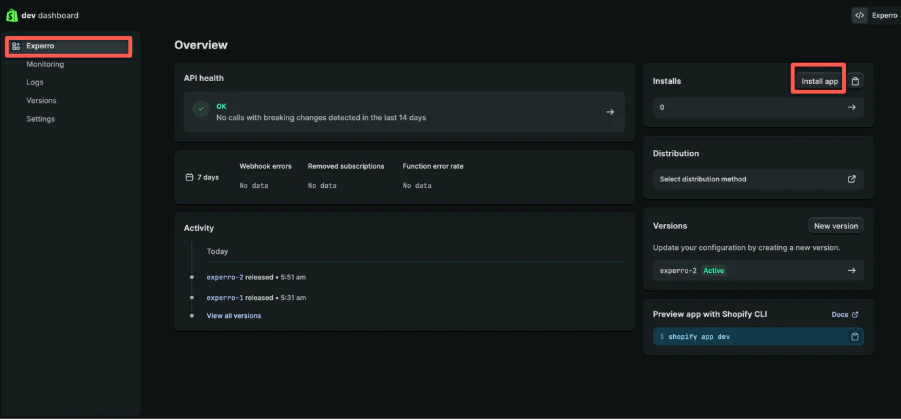
- Go to the Home section in the Developer Dashboard.
-
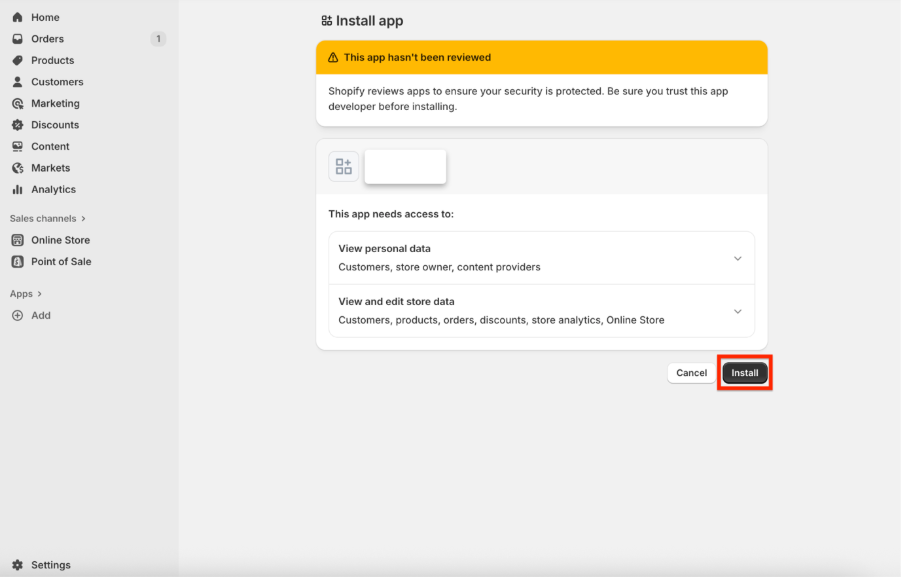
Click Install App.
-
Select your Shopify store.
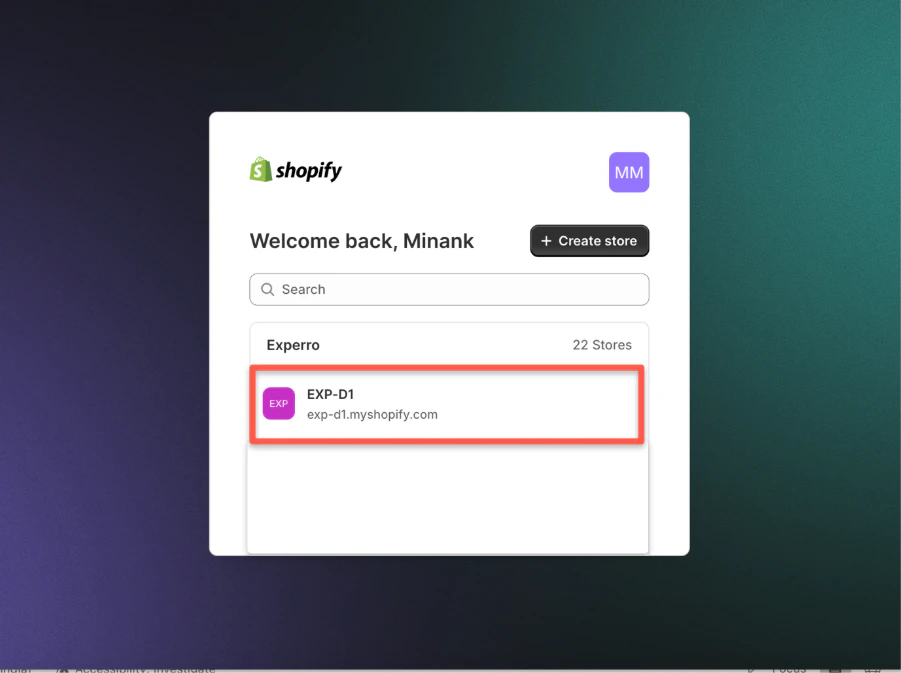
-
Click Install to complete the installation.
3
Open Experro Admin Panel
- Log in to admin.experro.com.
-
Click Connect Store from the dashboard.
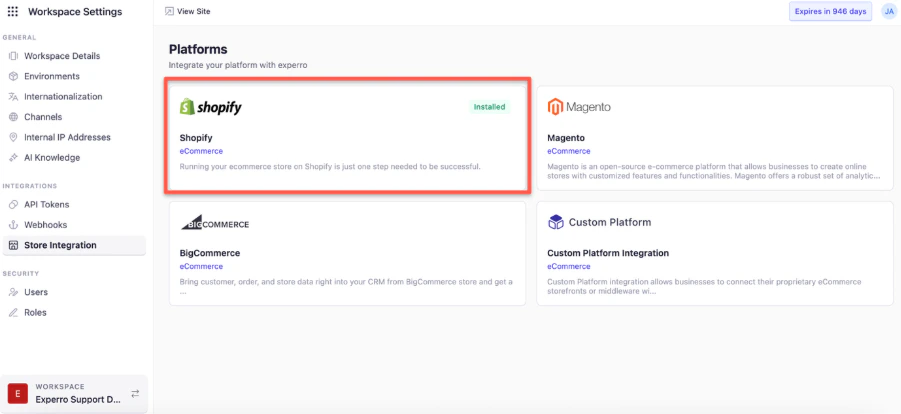
- Select Shopify as the platform.
- Click Add Platform.
-
Click Install to proceed.
-
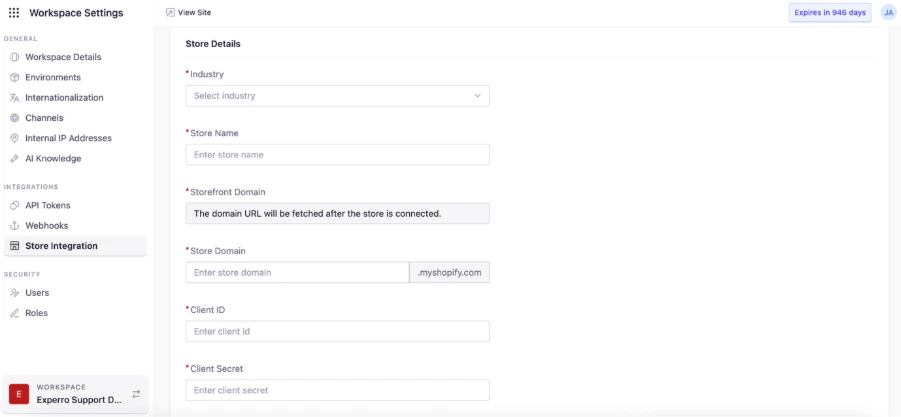
Click on Add Store Button
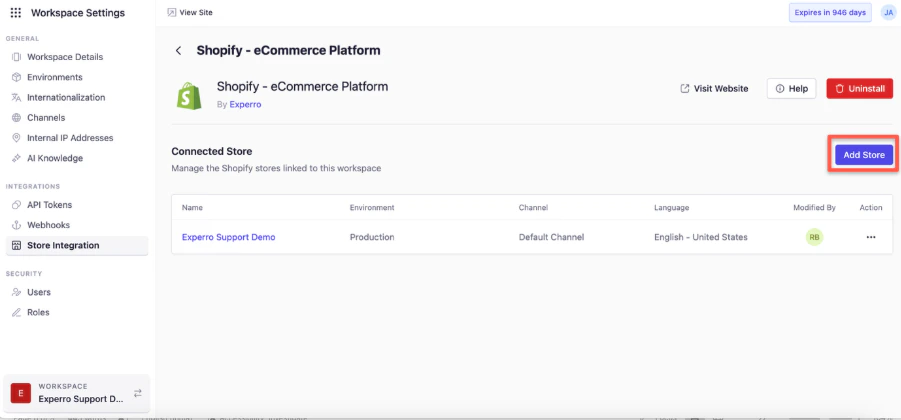
- Select the Industry.
- Enter the Store Name.
- Confirm the Store Domain.
- Add Client ID and Client Secret Code.
- Click on the Next Button.
- Select the Shopify Language.
-
Click Connect.
4
Confirm Store Connection
- Verify the store status appears as Connected in Experro.
- Initial data synchronization begins automatically.