What You Can Do on This Page
- Browse Existing Groups View all groups you’ve created, along with the number of users assigned to each.
- Inspect Group Membership Hover over the Users count to see which users belong to that group.
- Edit, Clone, or Delete Use the Actions menu to update a group’s name, description, roles, or membership; duplicate it to create a similar group; or remove it entirely (only if no users depend on it).
- Create New Groups Click Add Group to bundle roles and users into a new group for streamlined assignment.
Adding a New Group
- Click Add Group
-
Specify Group Details
- Group Name: Enter a clear, descriptive name.
- Description: Summarize what this group represents.
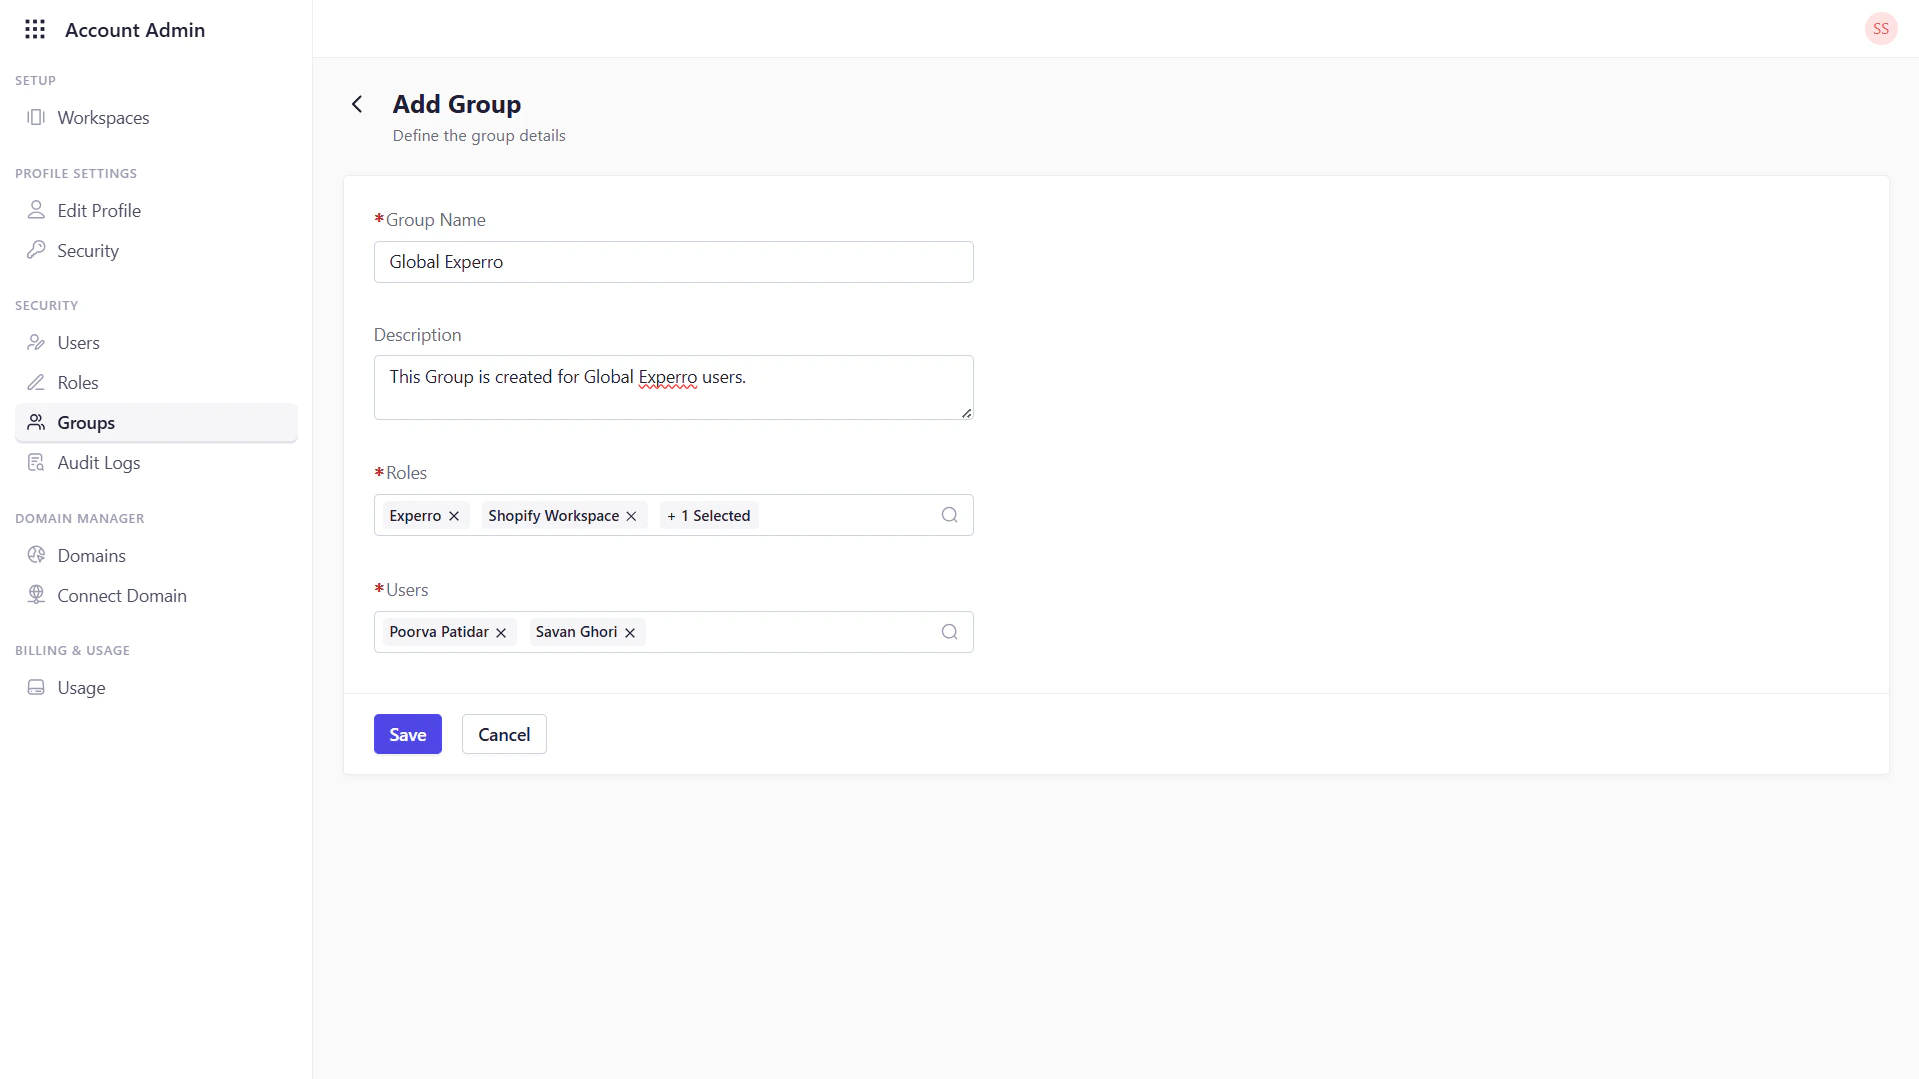
-
Assign Roles
- Select one or more roles from the list to bundle into this group.
-
Select Users
- Choose which existing global users should belong to this group. (You can always add or remove users later.)
-
Save
- Click Save to create the group. It will appear immediately in the group list.