

How It Differs From an A/B Test
An A/B test measures which version wins. Personalization assumes different visitors want different things and delivers accordingly.
Prerequisites
- Permission to manage experiments in the workspace.
- At least one channel and language configured.
- The audiences you want to target, defined in your workspace.
- The pages, components, algorithms, or merchandising rules you want to personalize, each with variants already created.
How the Configuration Screen Works
Configuration is a step-by-step flow. Each step is its own screen with its own address, and Previous and Next move between them. The Configurations rail on the left jumps straight to any step and marks completed steps with a green check. Personalization has five steps: Details, Metrics, Target Audience, Duration, and Experience. An A/B test has six. It adds a separate Variants step, which personalization does not have — variants are defined on Target Audience instead.Create the Experiment
1
Start the flow
On the Experiments list, click Create Experiment, then choose Personalization in the Select Experiment Type dialog.
2
Enter the details
Give the experiment a name, then select a Channel and a Language.Click Create & Continue. This saves the experiment as a draft.
3
Define your metrics
Add one primary metric, then any secondary metrics you want to track alongside it.
4
Set the audience and variants
Set Traffic Allocation and pick a Target Type. Add each variant and give it values for that type.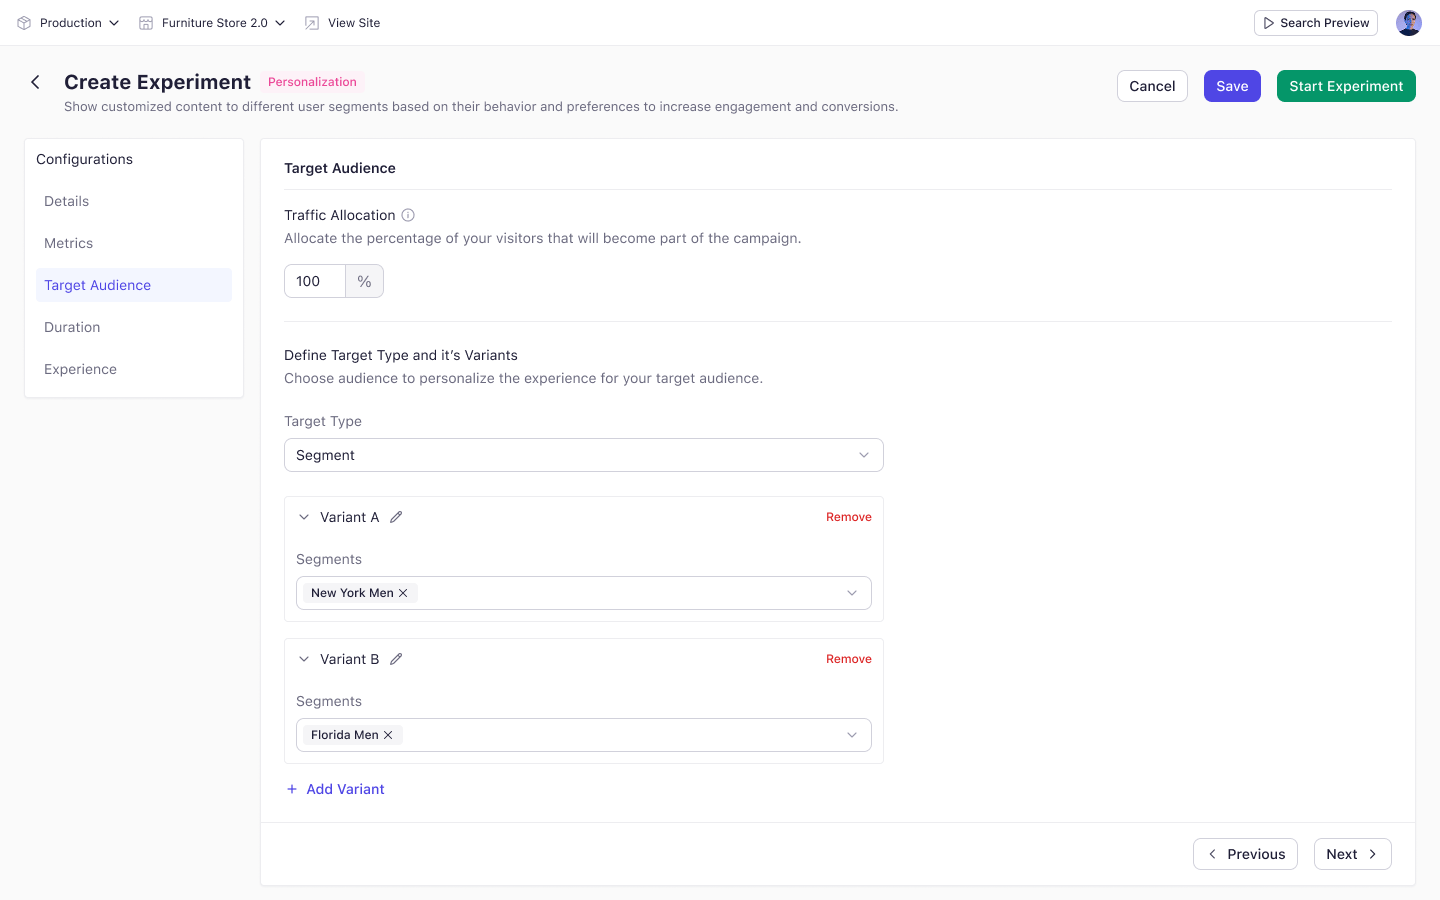
5
Set the duration
Pick a start date. Optionally add an end date and email recipients.
6
Map the experiences
Add the pages, components, algorithms, or rules you are personalizing. Choose which version of each record every variant receives.
7
Launch
Click Start Experiment, then confirm the prompt to publish the associated records.
Start Experiment stays disabled until you complete the Details step. Its tooltip reads “To start the experiment, first add the experiment details and create it.”
If Validation Fails
Experro checks every step when you start the experiment. If something is missing, a red icon appears beside the affected step in the Configurations rail. The message “Please enter all the required fields” appears at the top of the screen. Use the rail as a checklist. A green check means the step is complete.Key Considerations
- After you save the Details step, Channel and Language become read-only.
- Observation and Hypothesis do not appear on a personalization experiment. They are A/B test fields.
- Personalization has no control group and no per-variant traffic split. A visitor reaches a variant by matching its audience values.
- Once an experiment is published or paused its configuration is locked. Clone it to make changes.