Creating a Banner
1
Navigation
Select the grid icon at the top left of the application. Select Discovery from the dropdown menu. On the Discovery screen, navigate to Banners from the left panel under Discovery.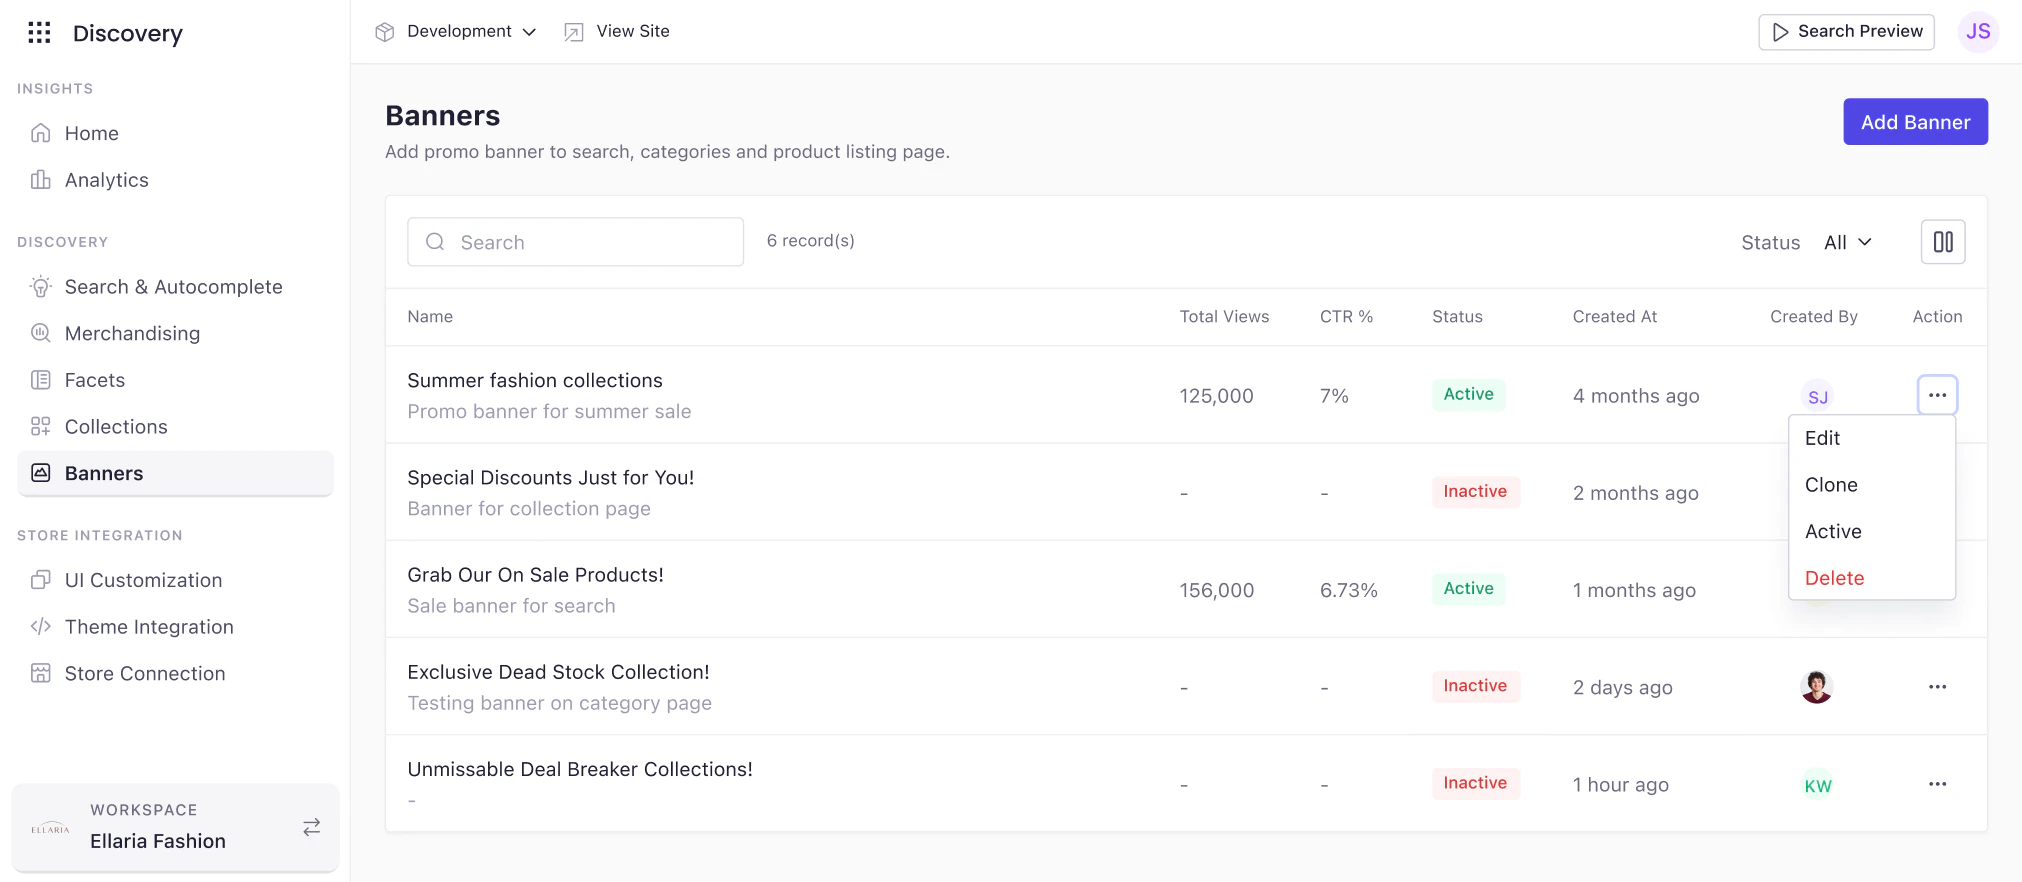
2
Banners List View
The Banners screen displays all configured banners with the following columns:
Search and FilterUse the Search bar to filter banners by name. Use the Status dropdown to filter by Active or Inactive.Actions MenuClick ··· on any row to access the following actions:
- Edit — modify the banner’s configuration
- Clone — duplicate the banner and all settings as a starting point for a new campaign
- Activate / Deactivate — toggle the banner’s active status without deleting it
- Delete — permanently remove the banner
3
Create a Banner
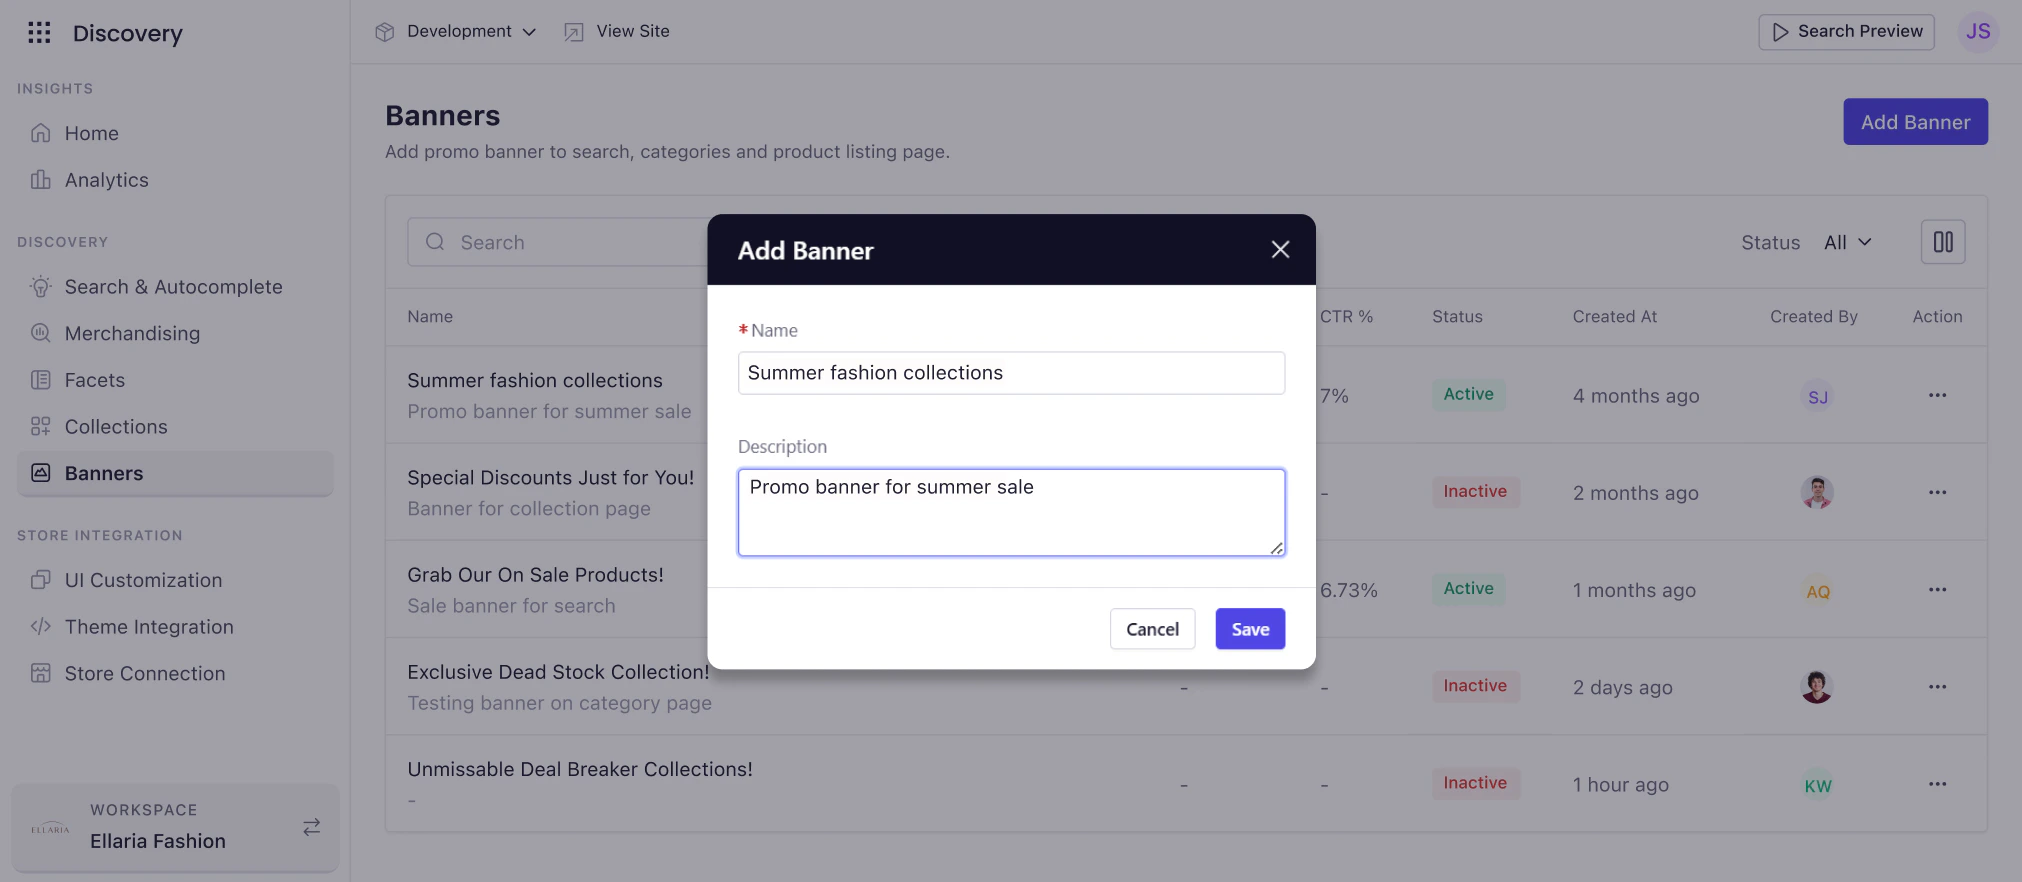
- Name (required) — an internal identifier for the banner. Use a naming convention that reflects the campaign and placement, for example: “Summer Sale — Dresses — Search.”
- Description (optional) — additional context for your team, such as campaign dates or the intended rule.
Configuring Banner
1
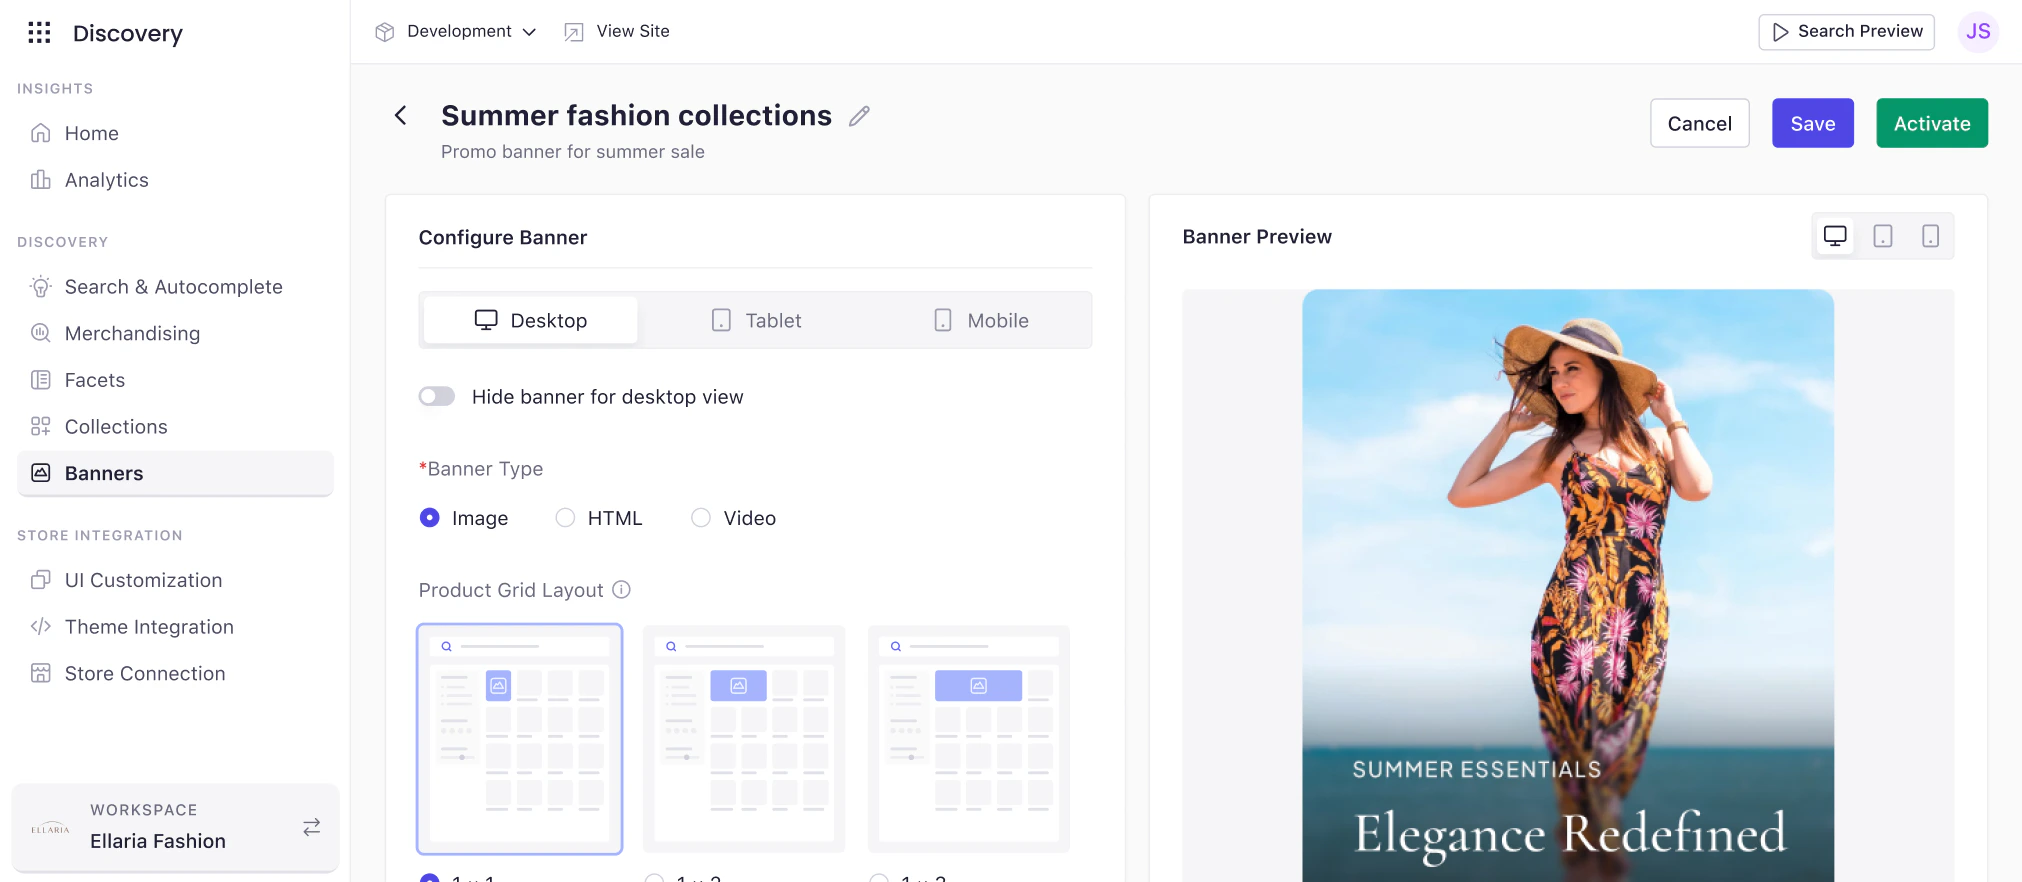
Device Configuration
Banners can be configured independently for Desktop, Tablet, and Mobile. Each device tab has its own layout, content, and visibility settings.
To suppress a banner on a specific device, check Hide banner for [device] view within that device tab.Configure devices separately when:
- Your banner creative is not responsive across screen widths
- You are using a different image crop or aspect ratio per device
- You want the banner to appear on desktop and tablet but not mobile, or vice versa
2
Banner Type
3
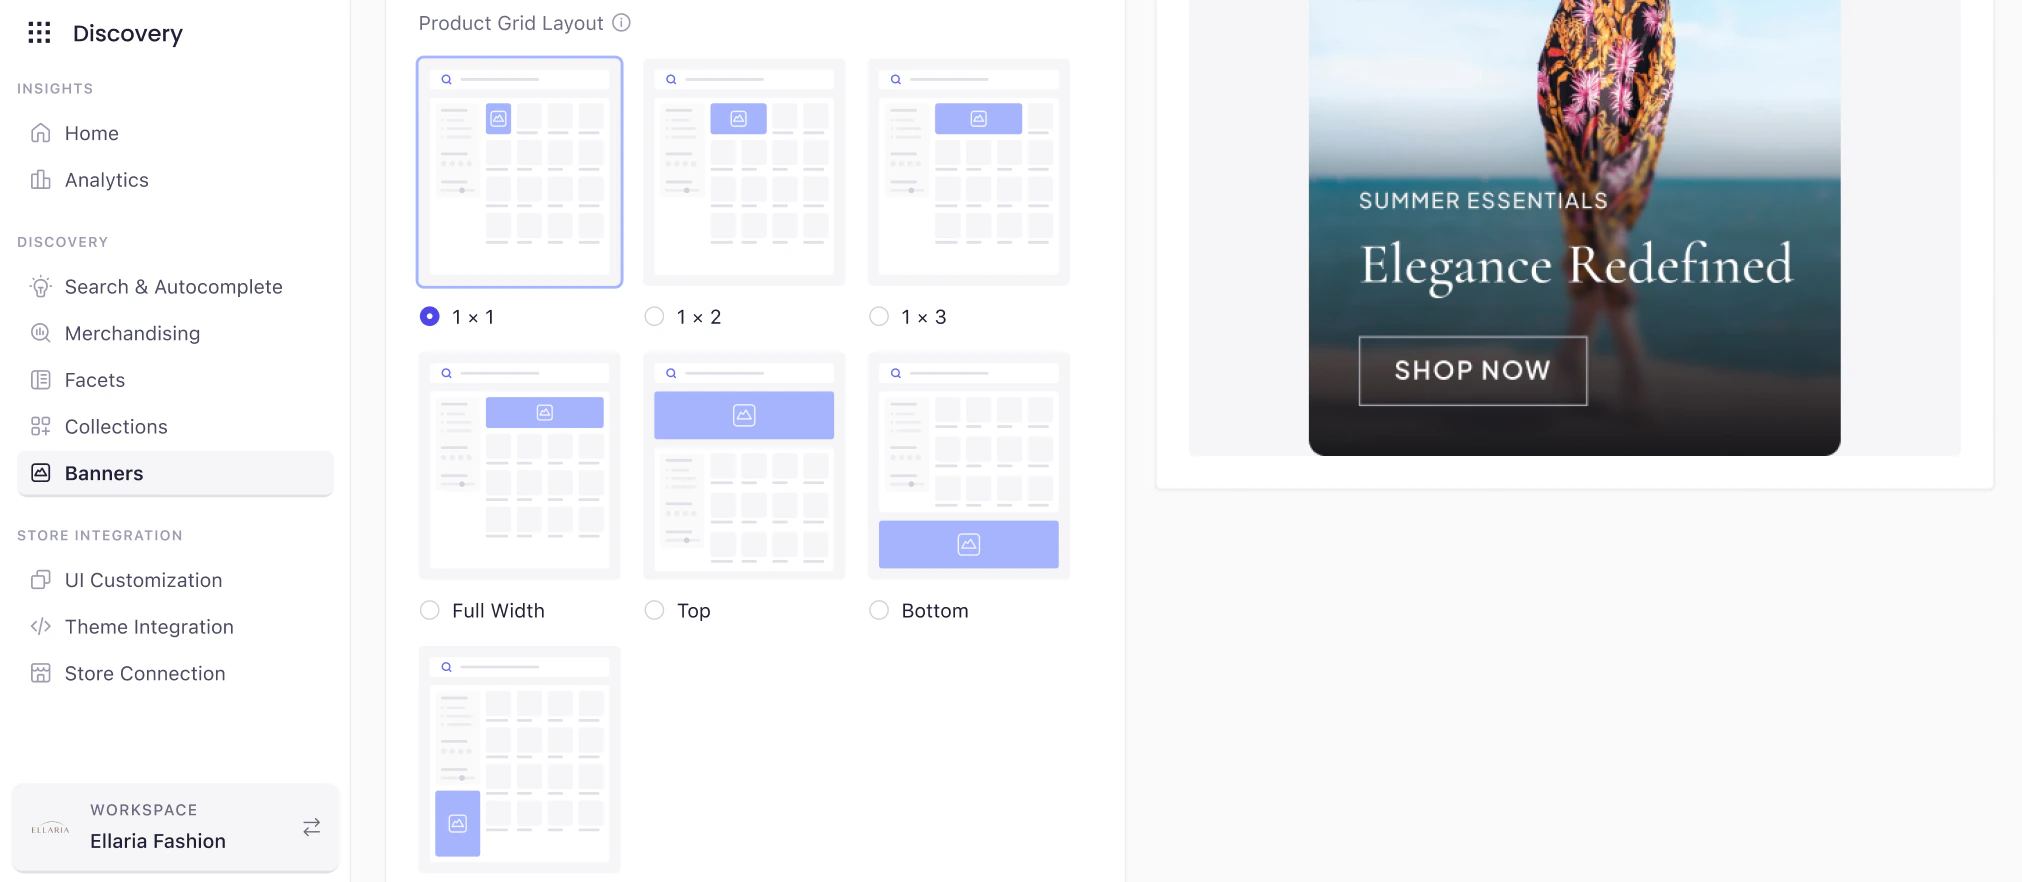
Product Grid Layout
4
Banner Content Settings
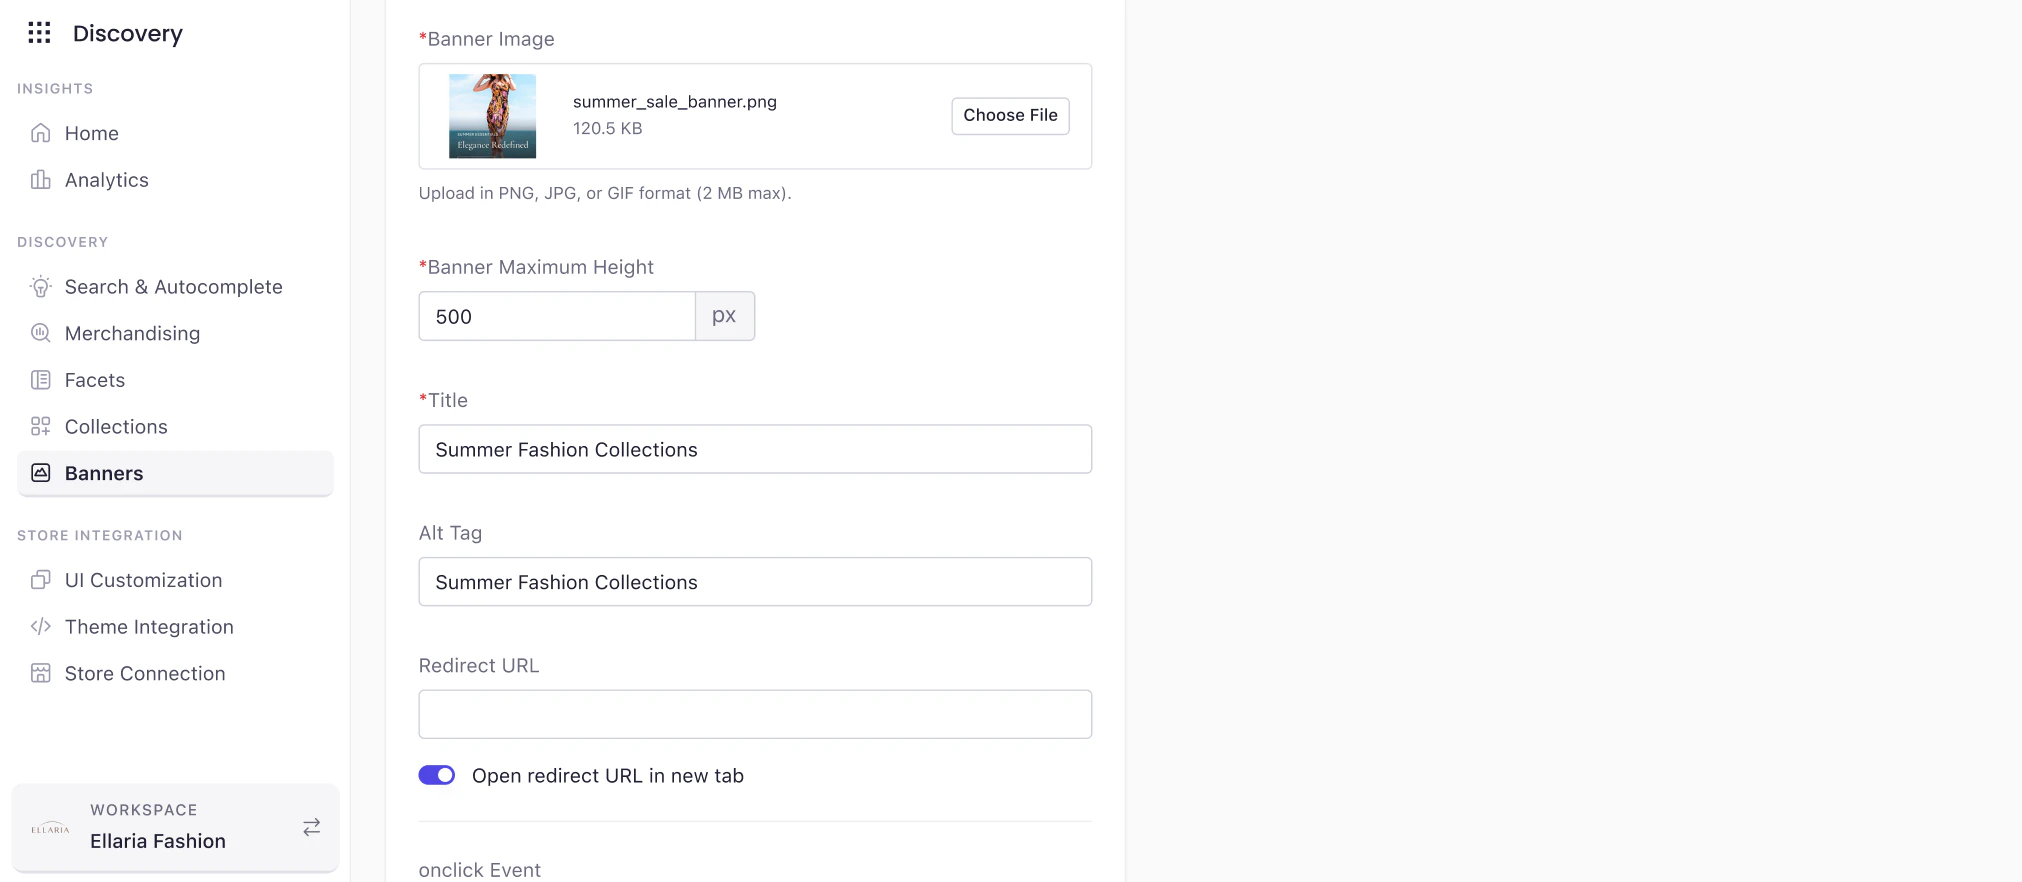
5
Event Tracking
Event tracking connects banner interactions to your analytics stack. Configure JavaScript events to fire when the banner loads or when a shopper clicks it.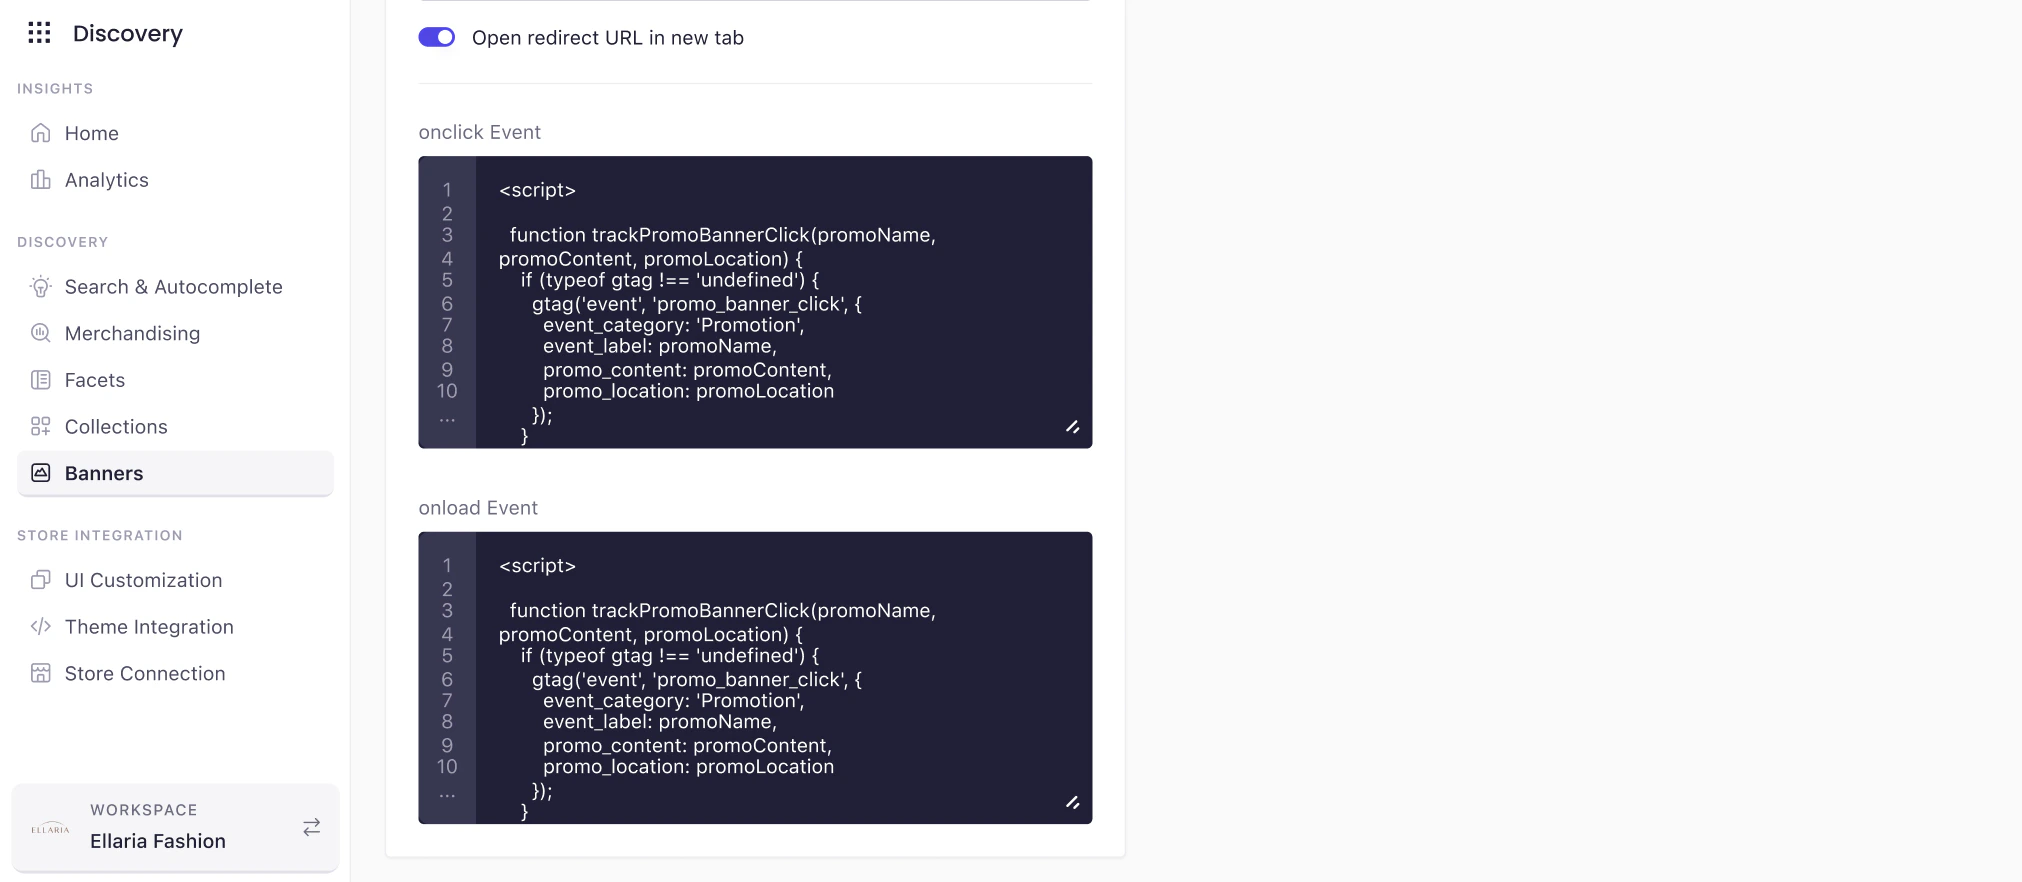
To configure, paste your JavaScript event code into the Onload Event or Onclick Event field. Events execute in the browser at the corresponding moment without requiring additional page-level changes.
6
Banner Preview
A real-time Banner Preview panel is available on the right side of the configure screen. The preview updates as you make changes to layout and content.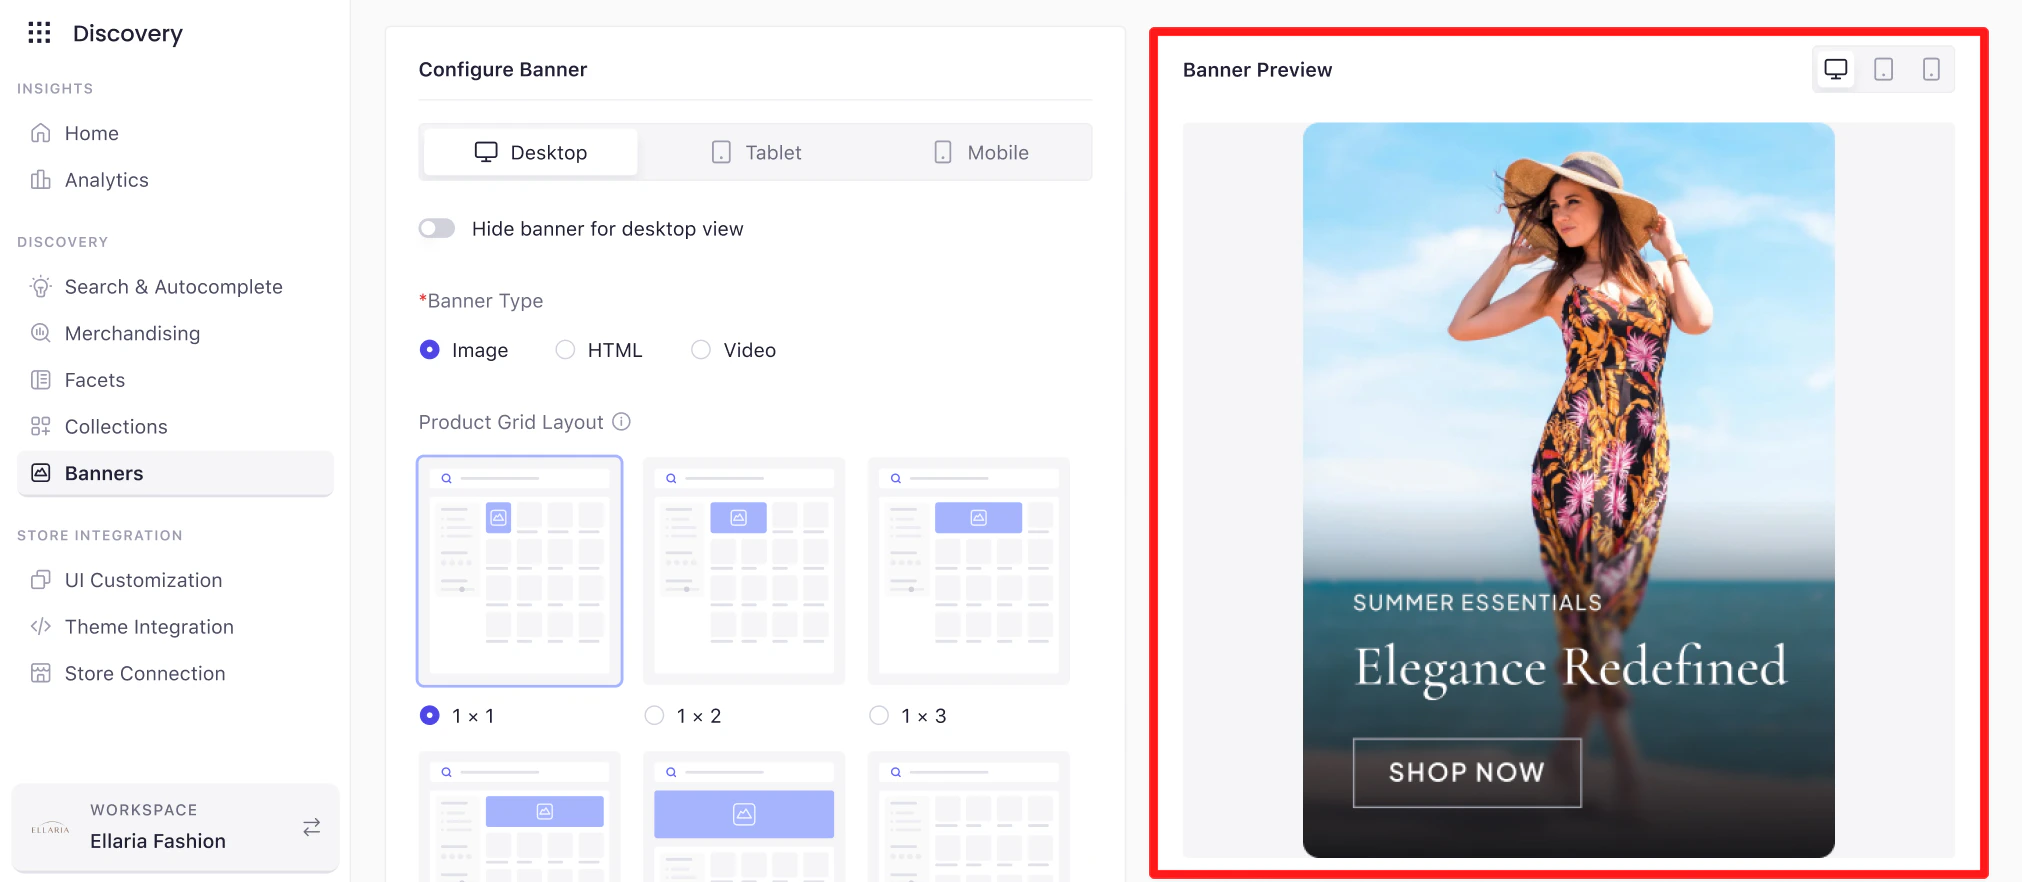
7
Save and Activate
Important
Activating a banner does not make it visible on your storefront. A banner only appears once it is attached to an active Merchandising Rule.
Activating a banner does not make it visible on your storefront. A banner only appears once it is attached to an active Merchandising Rule.