How Versioning Works
- Sequential Numbering Versions increment automatically: #1 → #2 → #3, and so on.
- Custom Labels Add meaningful names (e.g., “v3 – Updated CTA Text”) to identify key milestones at a glance.
Versioning safeguards your content i.e., if a change introduces an error or you need to revert to an earlier draft, you can restore any prior version instantly.
Viewing & Comparing Version History
- In Content Library, open the menu next to your Model’s listing and select Version History.
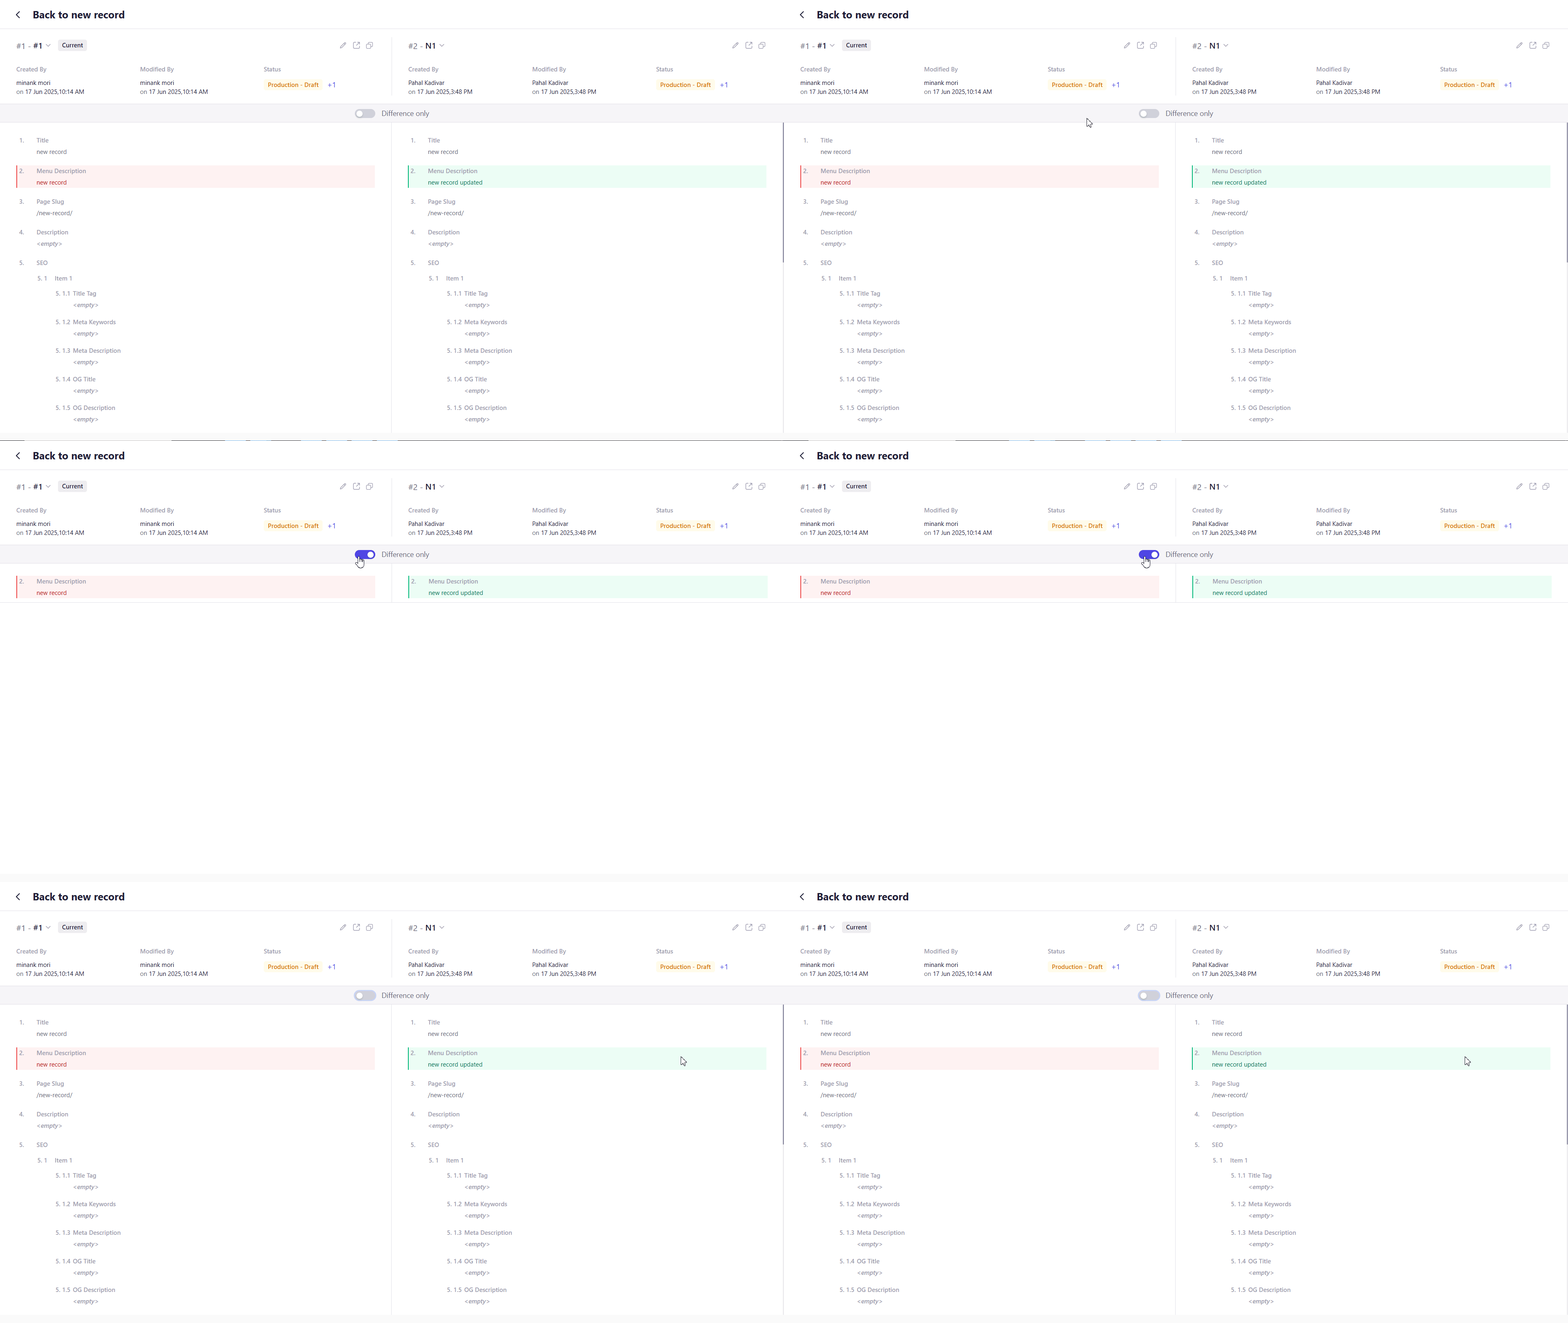
- In the history view, select two versions to compare side by side.
- Differences are highlighted:
- Red for content removed or changed in the newer version.
- Green for content added or restored from the older version.
- Use the “Show Differences Only” toggle to focus exclusively on changed fields.

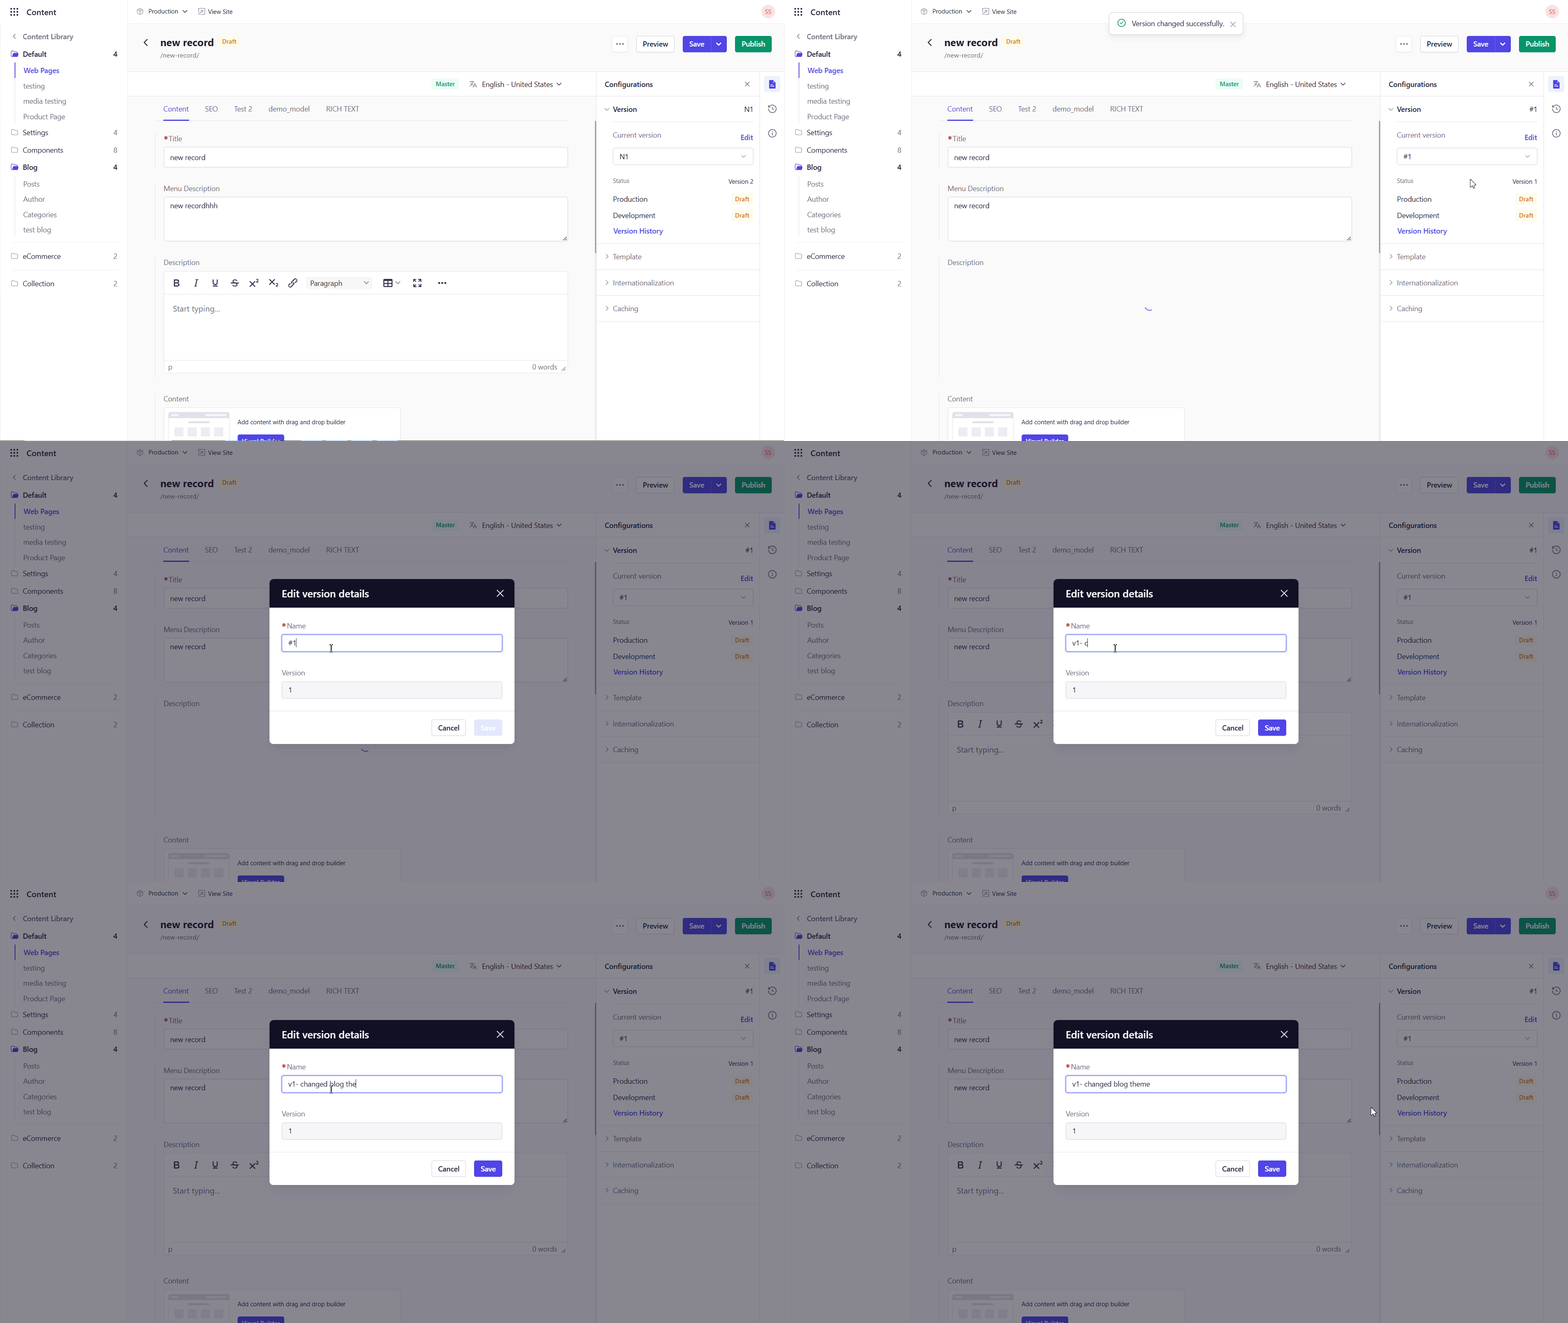
Renaming a Version
- Open the entry in Content Library.
- Click the Versions widget on the right-side of the screen.
- Select the version that you want to rename.
- Click Edit.
- Change the Name and click Save.

Deleting Versions
-
To remove an individual version (without deleting the entire entry):
- Hover over the version you want to delete from the Versions widget and select the delete option against the version.
- There is no limit to the number of versions you can maintain, but pruning unnecessary drafts can keep your history concise.