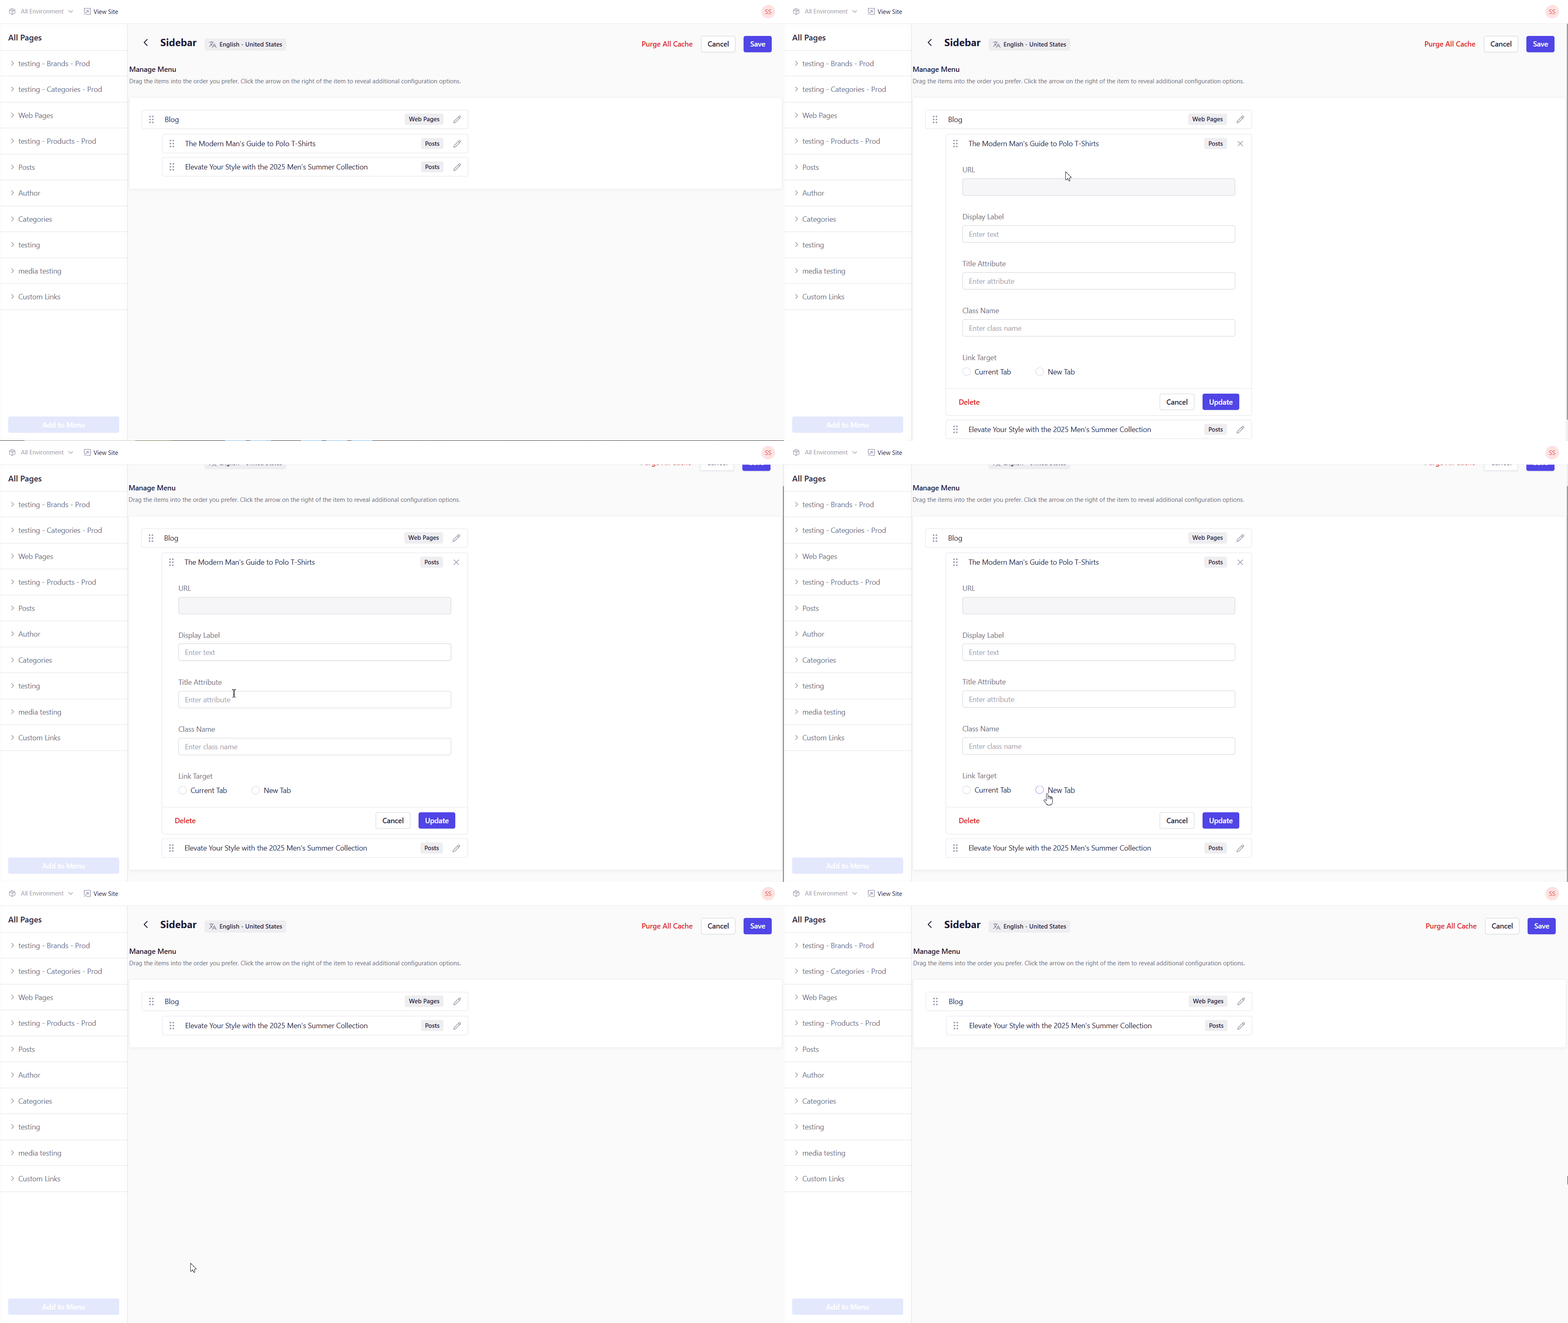
Deleting a Menu Item
- Navigate to the menu you wish to edit and select your menu.
- In the right panel, locate the menu item you wish to remove.
- Click the pencil (Edit) icon on that item.
- In the pop-over, click Delete.
- Click Save (top-right) to persist your changes.
Deleting a menu item does not delete the underlying page—it simply removes the link from your navigation.
Customizing a Menu Item
Click the pencil icon beside any item to open its settings:- Display Label: Override the default text (e.g., “About Our Company” → “About Us”).
- Title Attribute: Text shown on hover. Use for accessibility or extra context.
- Class Name: Add custom CSS classes for unique styling.
- Link Target: Choose opening behavior: “Same Tab” or “New Tab.”
Best Practices
- Clear Labels: Keep menu labels concise and user-focused.
- Consistent Behavior: Limit “New Tab” links to external destinations or documents.
- Styling Hooks: Use Class Name sparingly to apply unique styles only when necessary.