Creating a Folder
1
Open Media Manager
In the left sidebar, select Media Manager.
2
Launch Folder Creation
Click Create Folder in the top‑right corner.
3
Name Your Folder
Enter a unique folder name (max 30 characters; avoid
\ * : < > ? / |).4
Confirm
Click Create to add the folder to your current path.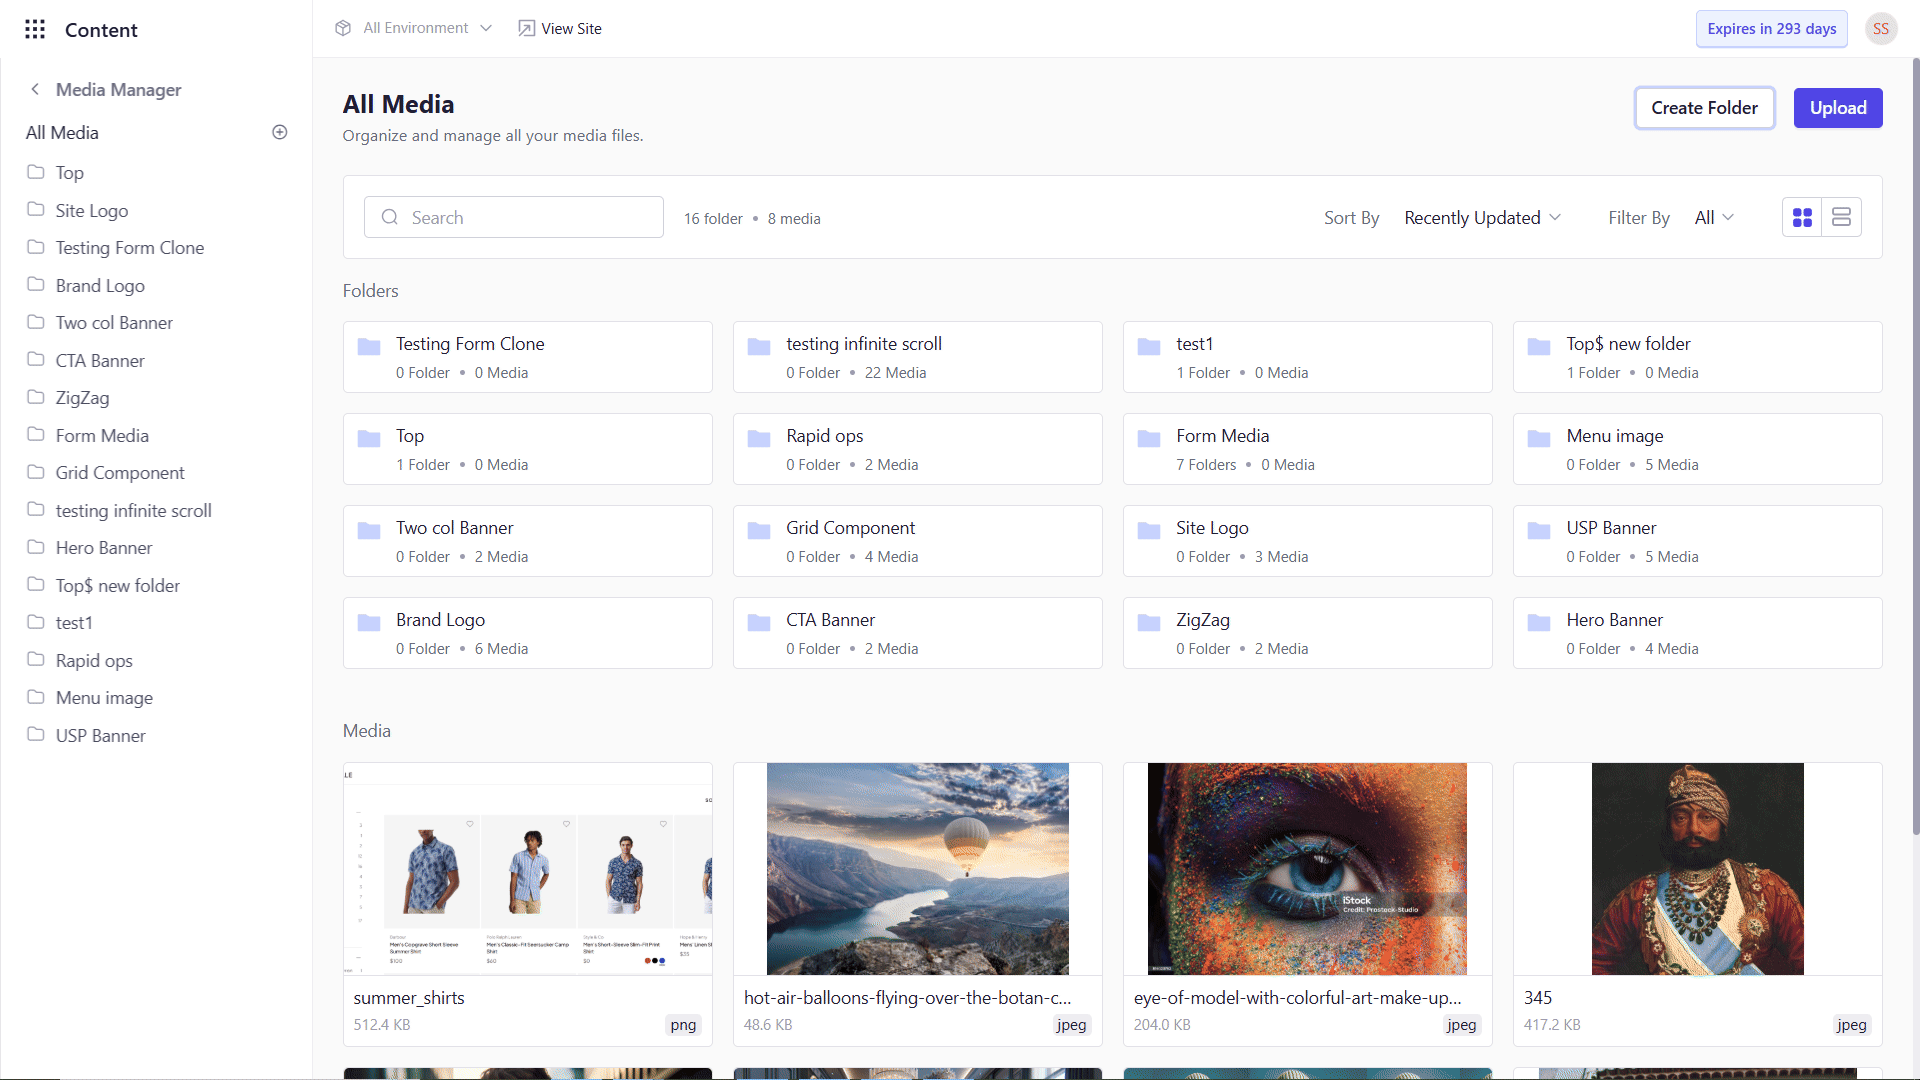
Nested Folders
You can organize folders up to 5 levels deep—ideal for large projects needing multiple subcategories (e.g., Year → Quarter → Campaign).Renaming a Folder
1
Locate the Folder
In the sidebar, hover over the folder you wish to rename.
2
Open Actions Menu
Click the … menu next to the folder name and select Rename.
3
Enter New Name
Update the folder name (observe the same character restrictions) and click Save.
Deleting a Folder
1
Select the Folder
Hover over the target folder in the sidebar.
2
Initiate Delete
Click the menu → Delete.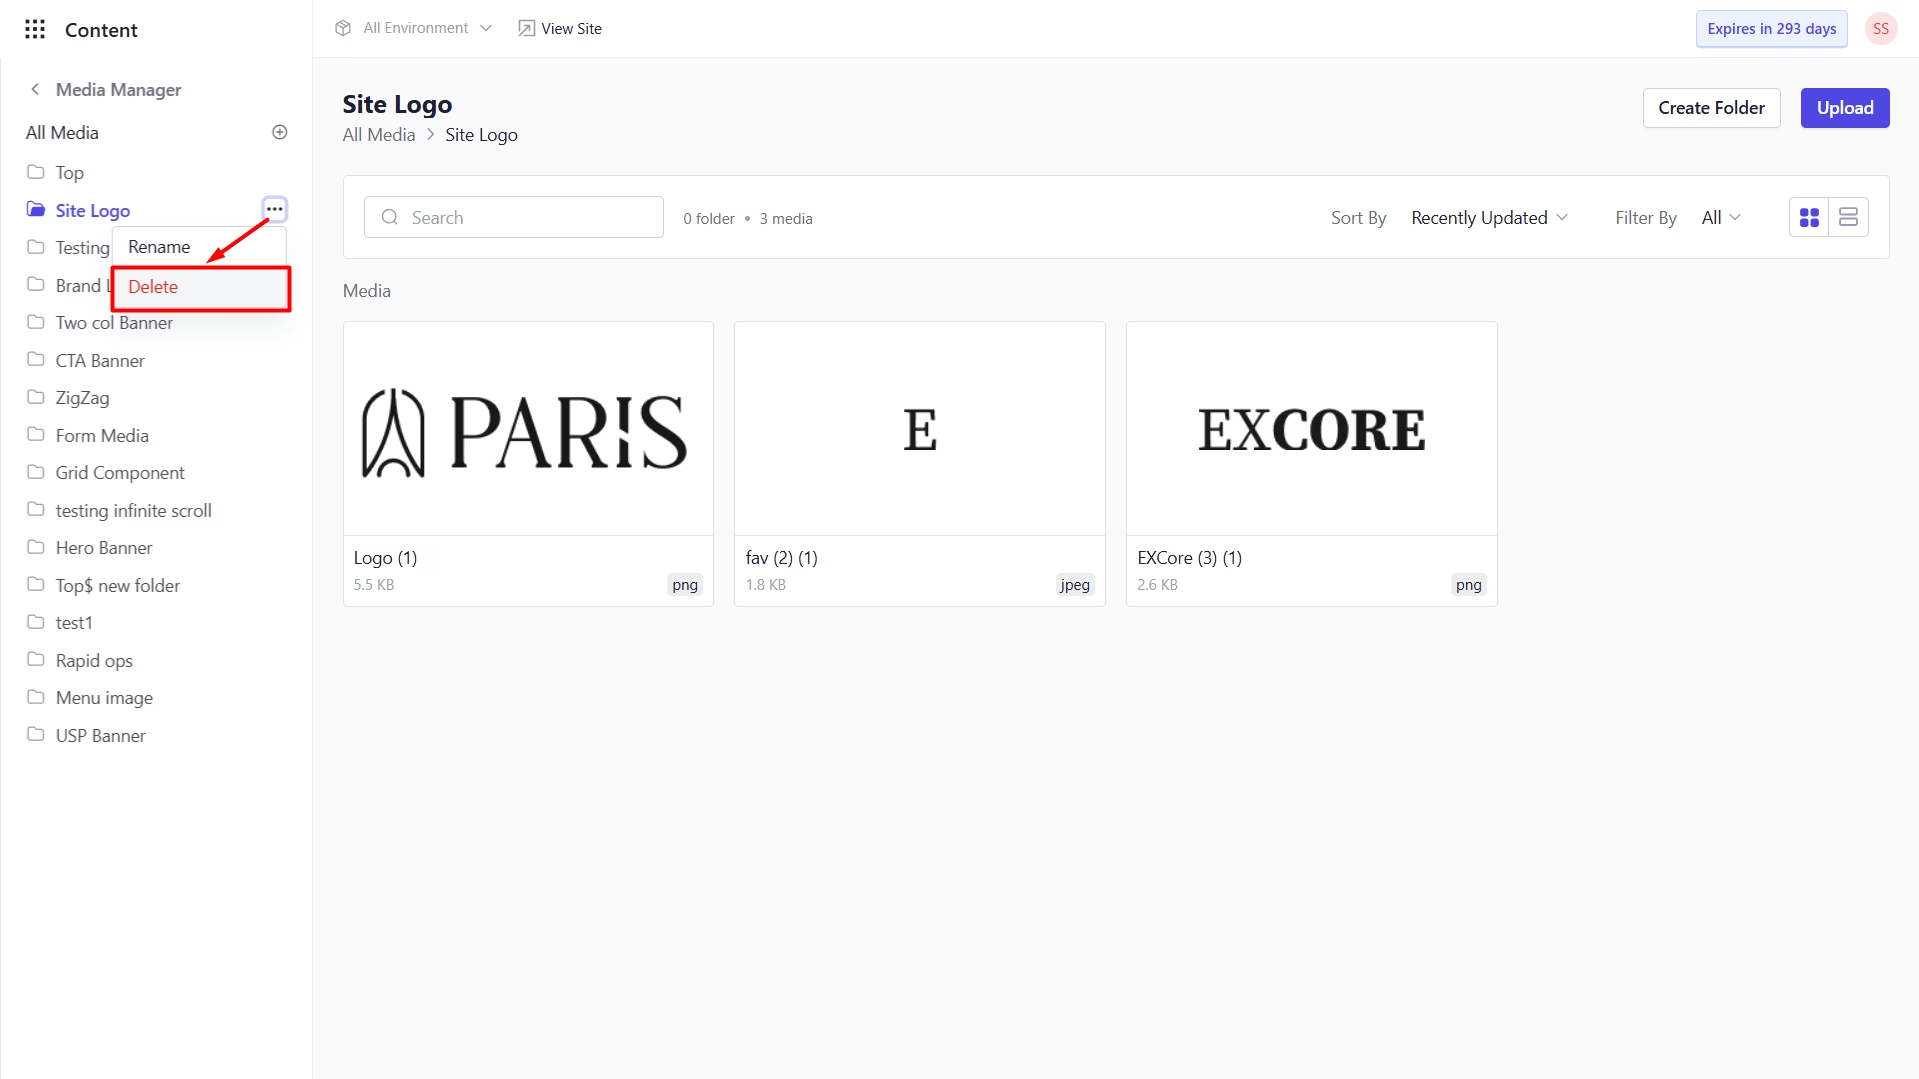
3
Confirm Deletion
In the confirmation dialog, click Delete.