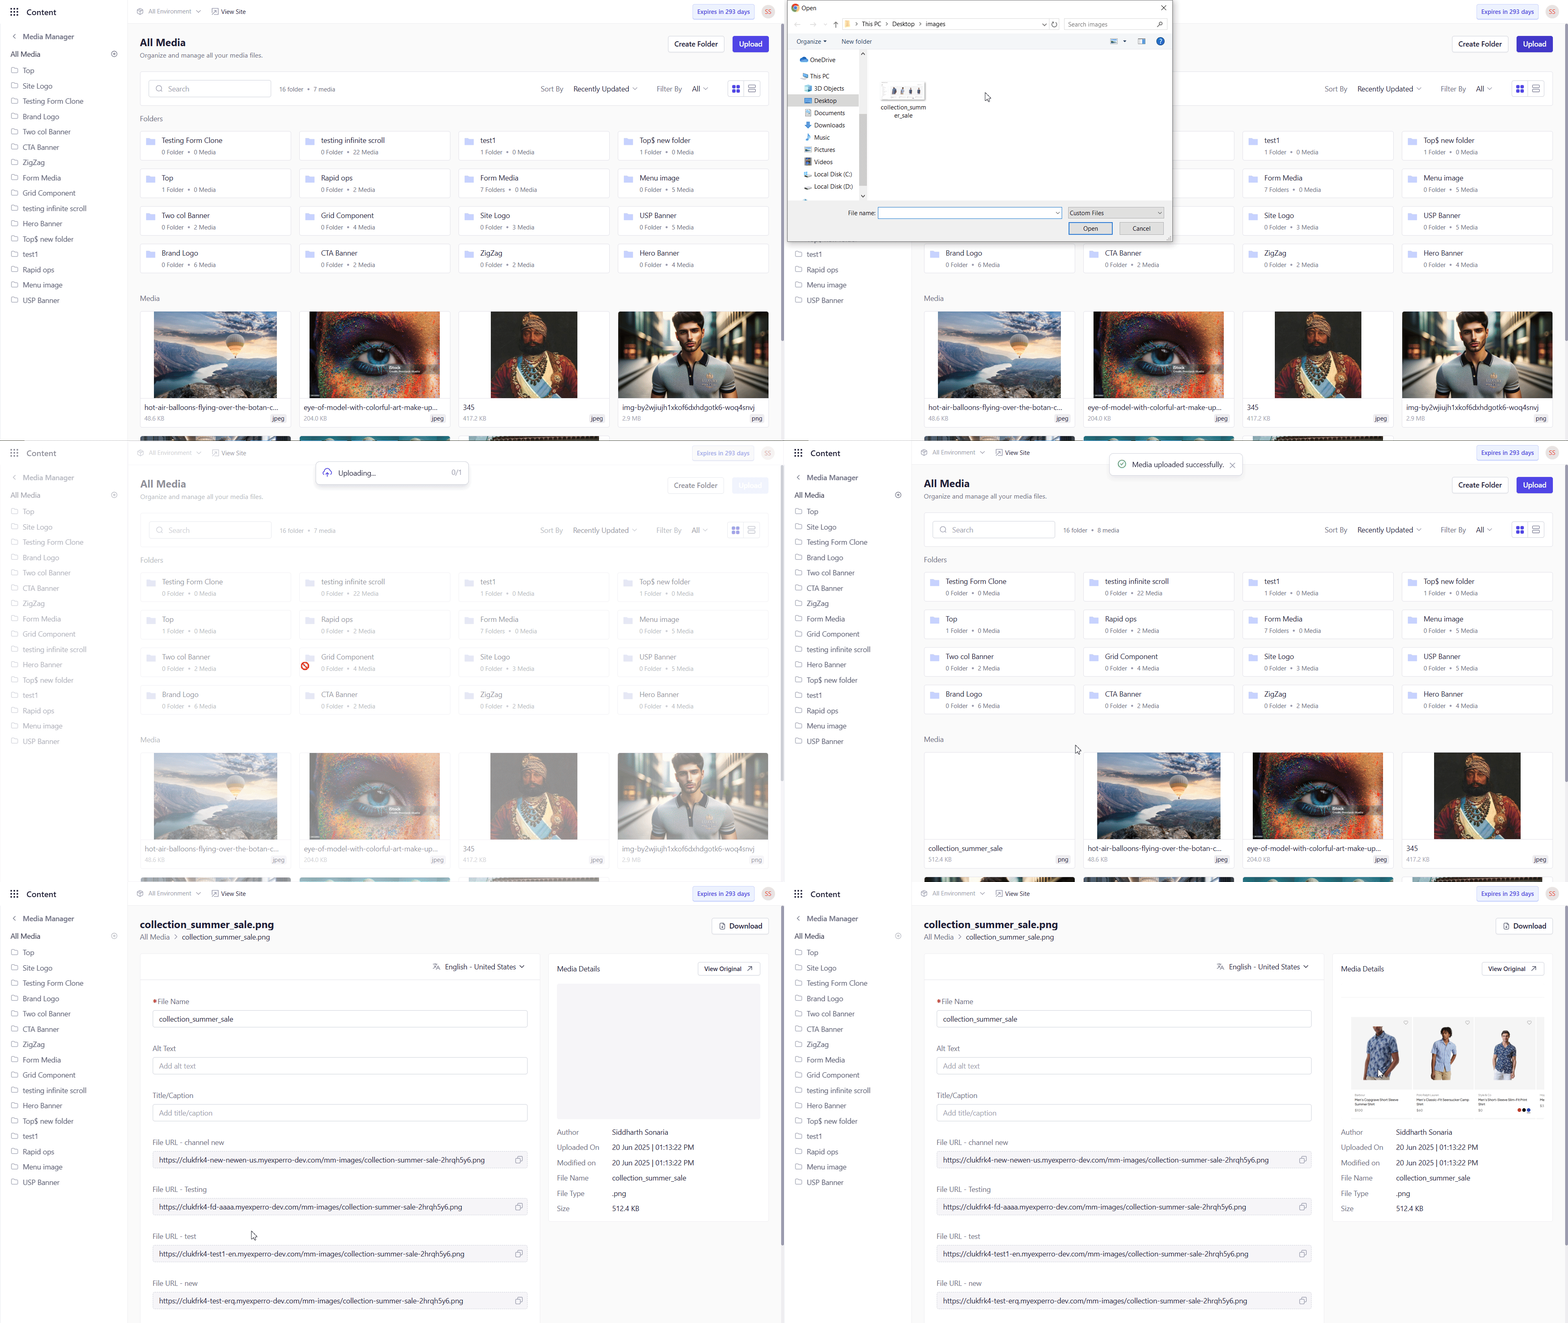
Click‑to‑Upload
1
Open Media Manager
From the left sidebar, select Media Manager.
2
Choose Your Folder
Navigate to the desired folder (by default you land in All Media).
3
Initiate Upload
Click the Upload button in the top‑right corner of the folder view.
4
Select Files
In the system file picker, select one or more files and click Open.
5
Watch the Progress
Each file displays an upload progress bar; wait until you receive the message for sucessfull upload.

Drag‑and‑Drop
1
Navigate to Media Manager
Open Media Manager and browse to the target folder.
2
Drag Files In
From your desktop or file explorer, drag one or more files onto the designated drop zone.
3
Release & Confirm
Drop the files to start the upload. Monitor the progress bars as each file uploads.
Post‑Upload Validation & Error Handling
- Unlimited Size & Quantity : Upload as many files of any size as you need as there are no hard limits on file count or total data volume.
- Retry on Failure : If an upload fails, you’ll see an “Upload failed. Retry” message. Simply click Retry to attempt that file again.
- Unsupported Formats : When you try to add a file with an unsupported extension, the system displays “File not supported.” Check the file type and try again with a compatible format.